Author:
Christy White
Date Of Creation:
11 May 2021
Update Date:
1 July 2024

Content
- To step
- Part 1 of 3: Gathering your materials
- Part 2 of 3: Sewing your blanket together
- Part 3 of 3: Finishing the blanket
- Tips
- Warnings
- Necessities
On a cool winter day it is wonderful to curl up on the couch under a nice warm blanket. Many people will buy a blanket in the store without giving it a second thought. However, it's much easier than you think to make one, and the added mystique that hangs around something you've made yourself is fun to show off. All you need is some fabric, a sewing machine, and some patience, and you'll be well on your way to making a great blanket for the winter months.
To step
Part 1 of 3: Gathering your materials
 Choose the filling for your blanket. Cotton wool are fillings that fill your blanket. You can purchase prepackaged fill (insulation) in Twin, Queen and Kingsize sizes at your local fabric or craft store. You can also buy a custom refill straight from the roll in the store. If you are going for a custom size, make sure the batting is rectangular in shape (batting in a double, or 'twin' size, for example, is 182 x 228 cm) so that it covers your entire body lengthwise .
 - The size of the cotton wool you buy depends on how big you want to make your blanket. Prepackaged batting usually comes in standard widths from 114cm to 152cm. However, if you buy the filling cut to size, you can get it in any size you want.
- You can choose between cotton or polyester batting. Cotton feels softer, while polyester is stiffer. Often times, cotton is also pre-shrunk, which is a bonus.
- You will also have to choose whether you want a high or low pile quality. High-loft quality is thicker. Low-loft quality is a thinner quality that helps to lay your blanket flat.
- Try to find a filling in sheets and not loose. Cotton sheets are much easier to handle, cut and sew.
 Choose the flannel you want for your blanket. There are many different designs on the market, including floral, animal prints and stripes. You can also find a solid color that you like, such as dark green or hot pink. The choices are almost endless. Note that the color of the flannel shows up when you use or fold your blanket, so you may want it to match its surroundings, such as the pillows in your living room.
 - Because flannel comes in so many different colors, you can generally only buy it prepackaged. If you want to tailor a blanket, buy a prepackaged flannel that is slightly larger than the size of your blanket. You can then cut it to the right size later.
- The labels on the prepackaged flannel also indicate the thickness, which varies depending on the brand.
 Buy some plush fabric. There should be a section in your local arts and crafts store that sells "soft and comfortable" fabric. Plush fabric is made from 100% polyester fiber and comes in a variety of styles such as furry, with stripes, dots, and fluffy. Choose a plush fabric that matches your flannel design and color. Usually people choose white as plush fabric, which goes with any color, but you can choose any color or design you like.
 - If you buy plush fabric from the roll, make sure you have the same measurements as the flannel and batting.
- If you buy it prepackaged, make sure it is slightly larger than the flannel and padding so you can cut it to the right size later.
- Since this is the fabric that will touch your skin when you lie underneath, check to see if the material is bothering your skin. You should also check the added dyes in the fabric and whether or not you are allergic to them.
 Buy the right yarn. If you are working with a sewing machine, you will need to buy standard single thread sewing thread. If you want to hand sew the blanket, use six-ply embroidery floss. Even if you decide to use a sewing machine, you will still need six-ply embroidery floss to finish the edges of the blanket.
 - Try to find a color that matches the flannel and plush fabric. If you want to see the stitch design, make sure to buy a contrasting color of thread and embroidery floss.
- You will also need to buy a needle with a large eye so that the six-thread embroidery floss can slide through easily.
 Wash your fabric. Do this before you start sewing. This prevents the blanket from shrinking to a strange, uneven shape when you wash it. If the flannel and plush fabric are both prepackaged, you can wash them normally with cool water and safe fabric detergent.
 - If they have been cut directly from the roll, i.e. cut, put them in separate mesh laundry bags. You can then wash them with cold water and a safe fabric detergent.
- You don't have to wash the filling if it's already pre-shrunk. If it has not been pre-shrunk, wash it gently by hand with cold water, a soft washcloth and a little detergent. Rinse it under cold, running water when you're done to get the detergent out.
- The flannel and plush can be dried in your dryer at a low temperature. Washed stuff should be dried hanging.
Part 2 of 3: Sewing your blanket together
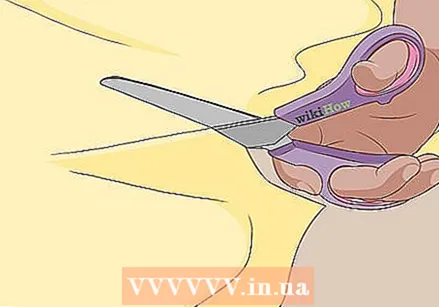 Trim any excess edges. This step is only for people starting with different sizes of fabrics. You must have them all the same size before you start sewing. Place all three fabrics (flannel, cotton wool and plush) on top of each other. Place all three on top of each other at one corner so that the sides coming out of that corner are flush with each other.
 - Pin the pieces of fabric together so that they don't move when you cut them out.
- You can cut them with scissors or with a gear wheel. If you are using a gear wheel, make sure you cut on a safe surface.
- Cut the fabric into parts. You can use a ruler as you work your way down to make sure the dimensions of your fabric stay the same. Use a small, light pencil to mark where you want to cut.
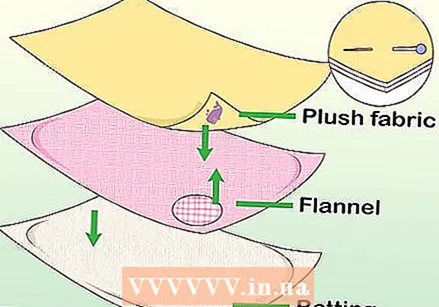 Put your fabrics in the correct order. After you have cut the fabrics and they are all the same size, place the filling on a smooth table top. Place the flannel right side up on top of the filling. On top of the flannel you place the plush with the right side down. This means that the right sides of the flannel and plush are facing each other.
 - Once you've put them on top of each other in the correct order, straighten them neatly. Insert pins through the inner part of all three layers so that they stay straight when you start to sew.
 Stick tape on the fabric. This means putting masking tape around the back of your plush. For example, if you want a 1cm seam on the inside, apply the masking tape around your rectangle 1cm from the edge of the fabric. The edge of your masking tape will be 1 cm from the edge.
 - Use a ruler or straight edge to keep the masking tape straight. Leave the tape on until you are done sewing.
- You can also replace the tape with a simple light pencil line, although this can be difficult to see as you sew.
 Work with a sewing machine. Place the fabric under the needle of your sewing machine. Go slow, and pull consistently as you move your fabric down. Make sure the seam of your thread is on the outer edge of the masking tape (1 cm away from the edge of the fabric for an inner seam of 1 cm).
 - You can make curved stitch marks on the corners, or stop your sewing machine and move your material 90 degrees so you are sewing a sharp corner.
- When you are almost done, leave a gap of about 6-8 inches (15-20 cm) from where you stopped to where you started sewing.
 Sew your blanket by hand. If you don't have a sewing machine or prefer a more handmade look, choose this step instead of the previous one. First, you need to thread your needle with six-ply embroidery floss. Tie a knot at the long, hanging end of your yarn. Start at the corner of your blanket and work your way down the sides. Insert your needle into the bottom of the corner, off the plush fabric only. Pull the needle all the way through until the knot catches. Pull your needle around the edge of the three fabrics. For more information about the blanket stitch, read: Making the blanket stitch.
 - Insert your needle under the batting and through the top, already threaded hole in the plush fabric. Pull the thread through, keeping a finger near the edge of the fabric so that the thread is not pulled all the way through.
- Pass your needle through the loop you made with your finger. Pull the needle all the way through until the stitch is tight.
- Insert the needle down under the batting about half an inch from the previous stitch. Slide the needle through all three fabrics, keeping your finger close to the edge, to create a loop. Insert the needle through the loop and pull it tight.
- Repeat the previous step over and over until you have made the blanket all the way around. If you need to add another piece of yarn, just tie a knot and start over where you left off. Do not forget to leave a gap of 15-20 cm between where you will end up and where you started sewing.
Part 3 of 3: Finishing the blanket
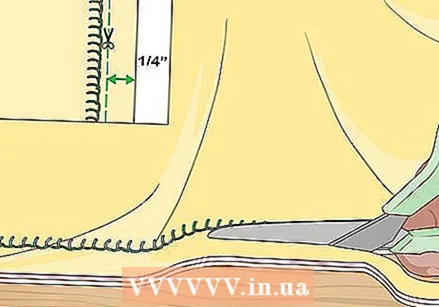 Trim off the excess fabric. You don't want a bulky border for your blanket. Use scissors or a gear wheel to cut around the edge of your blanket about 7mm from the inside seam. If you are using a gear wheel, make sure you are working on a safe surface.
 - After you've trimmed the excess fabric, you can remove the masking tape and pull the pins from your blanket that were attached to hold everything in place.
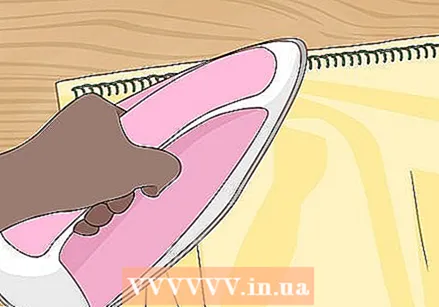 Iron what's left of the edges. Pull up the edge of the top plush fabric. Set your iron on a low setting and gently press down on the edge of the fabric. When lifting the iron, make sure that the edge of the fabric remains flat. Work around the edge of the blanket in this way.
 - When you are done with the top edge, turn your blanket over. Return your iron to the low setting and iron the edge of the flannel flat. Do this around the edge of the blanket.
 Turn your blanket inside out. Until now, the padding has remained on the outside, and the plush fabric with the right side in. Put your hand in the gap between the flannel and the plush fabric (not between the flannel and the filling). Push your hand in until you feel the seam on the other side and pull gently.
 - It's important to do this slowly so you don't accidentally pull out some of the stitching.
- When you've turned most of it inside out, put your hand back in the hole and poke your finger in the corners. You can also pull from the outside to straighten them and not curl them inward.
 Sew the hole closed. Turn your blanket over so that the plush fabric is on top. As before, the intention is to sew a blanket stitch. Slide the six-strand embroidery floss through the eye of your needle. Tie a knot at the long, loose end. Slide it under the plush fabric, out at the top, until the knot catches. Note: you only slide the thread through the plush fabric, not through the flannel or filling. For more information about the blanket stitch, read: Making the blanket stitch.
 - Get your needle around the edge and slide it into the flannel underneath. Pass your needle through the three fabrics and up through the hole you have already sewn through. As you pull the thread through, put your finger on the edge of the fabric so the thread doesn't go all the way through.
- Take your needle and slide it through the loop you made with your finger. Pull the thread tight. Slide your needle under the flannel, about half an inch lower than the previous stitch. Slide your needle through all three fabrics while keeping your finger on the edge of the blanket to catch the thread.
- Insert the needle through the loop you made with your finger and pull the thread taut. Repeat the previous steps over and over until you have sewn the hole together. Tie a knot in the thread when you are done.
Tips
- To avoid shifting, sew a few straight seams in the center of the blanket.
- Take your time and don't rush. You want to make sure your stitches are tight and evenly spaced.
- Use old fabrics you have around the house. All you have to do is cut them the same size. If you have small pieces of fabric, consider making it into a baby blanket, or one for just your hands or feet.
- When you are done with the seam, sew back a little before tying the knot. This will keep the stitching from fraying if the button happens to come loose.
- If you are using a quilt-style material, make squares before sewing.
Warnings
- Always use a gear wheel on a safe surface so that the knife does not cut through your wooden table top.
Necessities
- Stuffing
- Plush
- Flannel
- A sewing machine
- Needle
- Six-ply embroidery floss
- Scissors or a gear wheel
- Wide masking tape


