Author:
Tamara Smith
Date Of Creation:
20 January 2021
Update Date:
1 July 2024

Content
- To step
- Method 1 of 3: Create a simple balloon arch
- Method 2 of 3: Create a floating balloon arch
- Method 3 of 3: Make a balloon arch to hang on the wall
- Tips
- Warnings
- Necessities
- Making a simple balloon arch
- Create a floating balloon arch
- Making a balloon arch to hang on the wall
A balloon arch is a great addition to almost any party or event. Such a bow looks imposing and complicated, but is actually quite easy to make. You can make a simple balloon arch with regular balloons, or a floating arch with helium balloons. You can even make a chicken wire arch that you can hang on the wall. Whichever arch you choose, you are sure to impress your guests.
To step
Method 1 of 3: Create a simple balloon arch
 Find or make a frame from iron wire. Use wire cutters to cut a long piece of sturdy iron wire to the correct length, depending on how high you want to make the bow. You can also purchase a balloon arch kit from the store and use the iron wire frame from the kit.
 - The longer the piece of wire that you cut, the weaker and weaker it becomes. This method is best used for smaller arches.
 Anchor the arch. Stick the ends of the arch into buckets filled with gravel, pebbles, or sand. A commercially available bow may already have a flat base or base. In this case, put something heavy on the base or foot to weigh it down. You can use bricks or concrete blocks.
 - Put a thin layer of colored sand or pebbles in the buckets to hide the regular sand or pebbles.
- Wrap the bricks or concrete blocks in paper that matches your balloons. You can also paint them the same color as the base of the balloon arch.
 Blow up four balloons with a balloon pump. You can use balloons in different colors or choose balloons in the same color. Make a knot in the end of each balloon immediately after you inflate it. Try to make all balloons the same size.
 - Use a regular pump for this and not a tank of helium.
- You need not to use a balloon pump for this, but your lungs can get tired after a while.
 Tie two balloons together at the ends so that you get a double knot. If this is difficult for you, you can also tie the balloons together with a string. Repeat this step with the other two balloons. You should now have two balloon pairs.
  Turn the balloon pairs around to form a clover shape. Place the first balloon pair on top of the second balloon pair so that you get a cross shape. Pull up the bottom two balloons. Pull the balloon on the left to the right and the balloon on the right to the left. You now have something that looks like a four-leaf clover.
 - You can also tie the balloons together with a string so that you get a cross shape.
 Tie or twist the balloons to the iron wire. Pull the balloons against the wire. Make sure the wire rests against the knot in the center of the four balloons. Twist the two nearest balloons around each other so that they hang in front of the wire.
 - You can also attach the balloons to the iron wire with string or colored ribbon.
 Repeat the process to make more rows. Blow up four balloons at a time. Twist and tie two balloons together and tie the balloon pairs together to make a clover. Slide the clover onto the wire just below the bottom row of balloons and secure it. Keep doing this until the wire is full.
 - You can use balloons in the same color or alternate different colors.
- Slide the balloons together. Rest the balloons in the second row in the cracks between the balloons in the first row.
Method 2 of 3: Create a floating balloon arch
 Tie a long length of fishing line to a balloon weight. Choose a balloon weight that matches your color scheme. Wrap the end of the fishing line around the handle a few times and then tie it in a tight knot. Do not tie the other end yet.
 - If you can't find fishing line, use white rope. You can also use balloon ribbon that matches your color scheme
- If you're making a large balloon arch, tie the rope to the handle of a bucket. Fill the bucket with sand, gravel or pebbles.
- You can also tie the rope to a concrete block if you are making a large balloon arch.
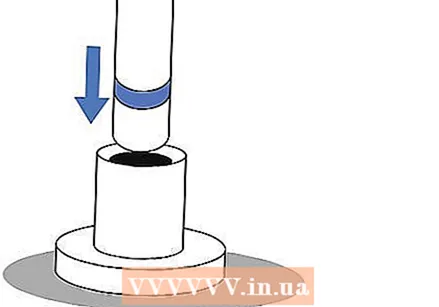
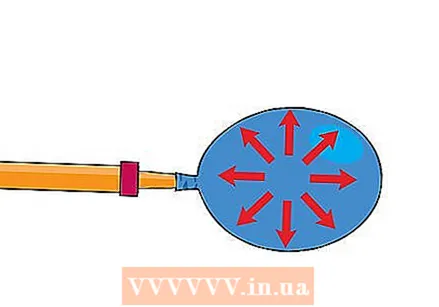
 Blow up a balloon using a helium tank. Unlike other arches, this arch derives its structure from floating balloons. Inflate the first balloon with the helium tank and tie the end.
 - You can purchase a tank of helium at party supply and craft stores. You can also rent them at some stores.
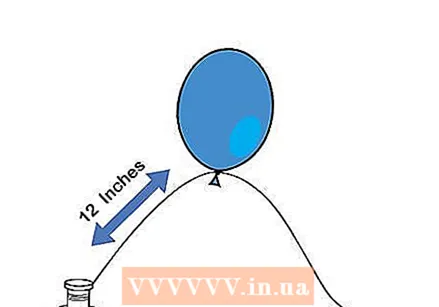 Tie the fishing line to the balloon. Measure a distance of approximately 12 inches above the balloon weight. Wrap the fishing line around the end of the balloon just above the knot and then tie it in a tight double knot.
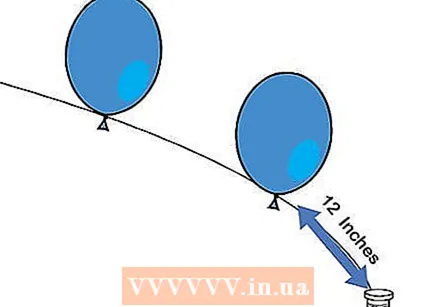
  Continue to inflate balloons and tie them to the fishing line. Tie the balloons together close enough so that they collide at the sides. Work from one side of the fishing line to the other. Leave about 12 to 12 inches at the end of the fishing line.
 - If you used a concrete block as an anchor, you will need to be left with enough fishing line to pass through the holes in the block and tie in place.
 Anchor the other end of the fishing line. Measure a distance of about 12 inches from the last balloon. Wrap the fishing line around the handle of your balloon weight a few times and then tie it in a tight knot.
  If desired, tie a ribbon around the bottom of each balloon. This is a nice addition to make the balloons seem to float neatly in a row. Cut a piece of balloon ribbon in a contrasting color and tie it at the bottom of each balloon. You can beautify the ribbon by curling the ends with scissors.
 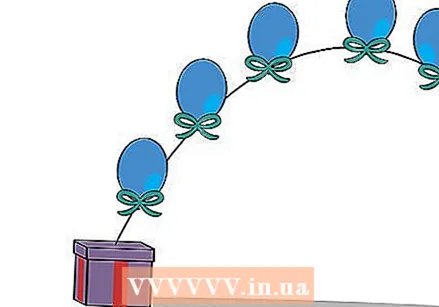 Decorate heavier balloon weights, if you wish. Small balloon weights often look like little gift boxes and are beautiful enough on their own. However, if you used buckets or concrete blocks to anchor a large arch, it might be a good idea to decorate them. Here are some ideas:
 - Cover concrete blocks with gift wrap.
- Paint the buckets with spray paint or acrylic paint.
- Fill the top part of your buckets with colored sand or gravel.
- Stick flowers in the buckets or concrete blocks.
Method 3 of 3: Make a balloon arch to hang on the wall
 Use wire cutters to cut chicken wire for your bow. The length of the piece of chicken wire depends on how wide and how high you want to make the arch. If the chicken wire is very wide, it is a good idea to make it narrower. This makes it easier to bend it and make it into an arc shape.
 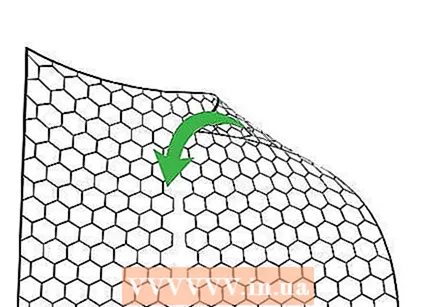 Bend the chicken wire into the shape of your choice. You can make a perfect arc or a curved arc. If necessary, crumple the chicken wire a little or fold the piece of chicken wire in half lengthwise to make it thinner.
  Attach the arch to the wall. You can do this with nails or thumbtacks. Start at one end of the piece of chicken wire, work your way up to the top, then move to the other end.
 - The arc does not have to be exactly symmetrical. Try making a warped bow to make your bow look more natural.
 Blow up the balloons with a balloon pump. To make your arch even more interesting, blow up balloons in different colors and sizes. Try using water balloons, regular balloons, and jumbo balloons. You can also blow up regular balloons in different sizes.
 - Do not use a helium tank for this.
- You can inflate the balloons with your mouth, but your lungs can get tired.
 Secure the first balloon at the bottom of the arch. Place a bead of glue on the end of the balloon, just below the knot. Tuck the end behind the chicken wire, then press it against the knot. Hold the end and knot together for about 10 seconds and then release. This way you stick them together tightly.
 - You can find glue rounds at a hobby store with scrapbook supplies. They are adhesive circles that are glued to a strip. Subtract one at a time.
 Secure the next balloon in the same way. Make sure to strap it close enough to the first balloon so that both balloons touch. Find the place where both balloons touch and stick another glue circle in between.
  Fill the entire arch with balloons. Make clusters of balloons. Start with the larger balloons and then attach the smaller balloons. You can even stick smaller balloons onto larger balloons using glue dots.
  Consider using filler material. Dried flowers or fresh flowers are particularly suitable for this, but you can also use artificial flowers. You can also put some colored ribbons between the balloons. This is a great way to hide gaps and make your balloon arch look more natural.
 - Attach the flowers to the chicken wire with glue or string.
- Make sure the flowers do not have thorns. Cut the thorns off with a hobby knife.
Tips
- Fill transparent balloons with confetti for a glittering effect.
- Match the colors of your bow with the colors of your party.
- If you only want to use one color, consider using different shades of that color. For example, you can use light pink and dark pink.
- You can purchase helium tanks at party supply and craft stores.
- You can attach balloons of different colors to the arch in any way or choose a specific pattern.
- Fill a balloon arch with confetti and puncture the balloons so that the confetti rains.
- You can make the arch higher or lower by moving the ends closer together or further apart.
- Use a color scheme. Create a rainbow or opt for an ombré effect.
Warnings
- Helium balloons will not float as well after 8 to 15 hours, so make the helium balloon arch no earlier than a few hours before the party starts.
- Helium balloons can deflate if it gets too cold.
Necessities
Making a simple balloon arch
- Balloons
- Balloon pump
- Solid iron wire
- Wire cutters
- Buckets of gravel or concrete blocks
Create a floating balloon arch
- Balloons
- Tank with helium
- Fishing line
- Scissors
- Balloon weights
Making a balloon arch to hang on the wall
- Balloons in different colors and sizes
- Balloon pump
- Chicken wire
- Wire cutters
- Nails or thumbtacks
- Glue circles
- Ribbon or flowers (optional)


