Author:
Eugene Taylor
Date Of Creation:
16 August 2021
Update Date:
1 July 2024
Content
- To step
- Method 1 of 2: Make a big toy car from a box
- Method 2 of 2: Make a simple cardboard model car
- Necessities
- Making a big toy car from a box
- Making a simple cardboard model car
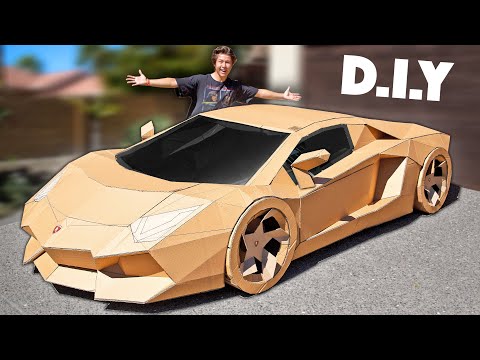
Making a cardboard car is fun to do. With a large cardboard car made from a moving box, your toddler or small child can play for hours on end. A small model car is just as much fun. To make a large or small car out of cardboard you will need a pencil, a utility knife and some glue.
To step
Method 1 of 2: Make a big toy car from a box
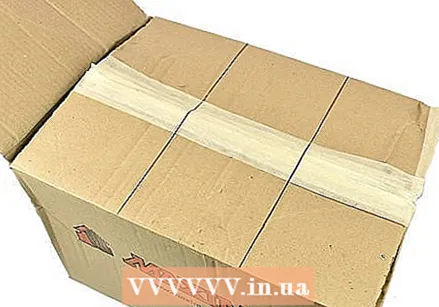
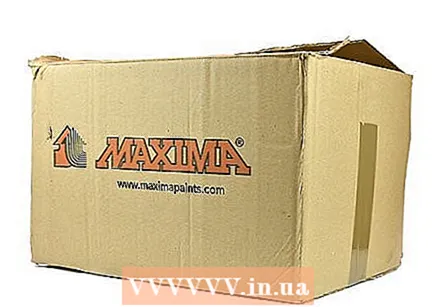 Find a large rectangular cardboard box that you or your child can sit in. Before you choose a box to use, make sure the one you are making the car for fits in the box. If you're making a car for a toddler or a small child, most large moving boxes are big enough.
 - You can buy large cardboard boxes at most hardware stores.
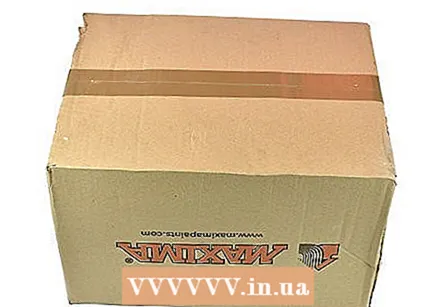 Tape the bottom of the cardboard box closed. It is best to use clear packing tape for this, but masking tape is also suitable. Use enough tape to tape the bottom of the box two or three times lengthwise.
 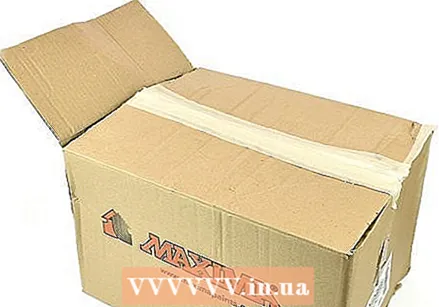 Close the top of the box, but leave one of the short flaps up. Fold one of the short flaps in the box and leave the other short flap up. Then tape the two long flaps together to seal the box at the top.
 - The short flap that you leave out of the box acts as the back of the car.
 Measure the long sides of the box and divide them into three pieces. Use a folding rule to measure the long sides of the box and divide the length by three. Then, using a pencil, draw three equally sized boxes on the long flaps of the box.
 - The doors of the car will be in the middle compartment.
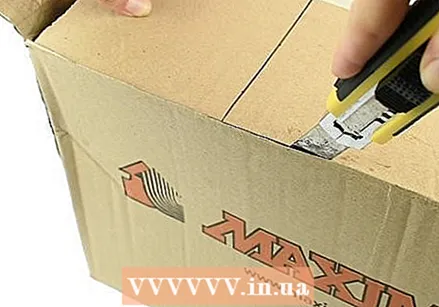 Use a utility knife to cut the box on the long sides to make a flap. Start at the back of the box and cut the top of the box on one side so that it separates from the side of the box. Stop cutting when you get to the front box on the box. Cut the box in the same way on the other side.
 - When you are done with this step, the two back pockets on the box should be cut from the sides of the box.
- Have an adult help you cut the box with a utility knife.
 Fold the top flap in half and tape the pieces together. Measure the height of the flap and mark the center with a horizontal line so that you can fold the flap neatly in half. Fold the top flap inward so that the inner crease is facing the inside of the box. Tape the two halves of the top flap together horizontally with packing tape.
 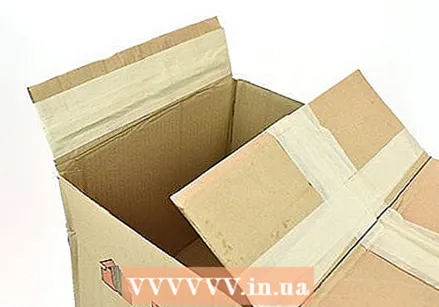 Do the same for the back flap. Fold the back flap in half just as you did the top flap. Secure the two halves together horizontally by wrapping packing tape.
  If desired, paint the outside of the box. You can paint the car red, blue, black, or another color, or leave the exterior as it is. Use acrylic paint and a paintbrush or a spray can of paint. Cover the entire outside of the box with an even coat of paint. Let the paint dry and apply another coat to give the car a darker color.
 - Place the cardboard box on sheets of newspaper or a large piece of cardboard so that you don't accidentally spill paint on the floor.
- Let the paint dry for about an hour before starting the next step.
 Cut or draw doors on the sides of the box. If you want to make a door that you can open and close, cut along the vertical line closest to the back of the car and the bottom of the box. You have drawn this line before. If you want to make a patio door, don't cut along the vertical line closest to the front of the car.
  Make a windshield, rear window and windows for your car. You can make a windshield, rear window, and windows by cutting out pieces of cardboard or drawing the windows on the car. To make a windshield and back window, measure a distance of three to eight inches from the edges of the front and back flaps, then draw a rectangle. Make the other windows by drawing squares on the two doors.
 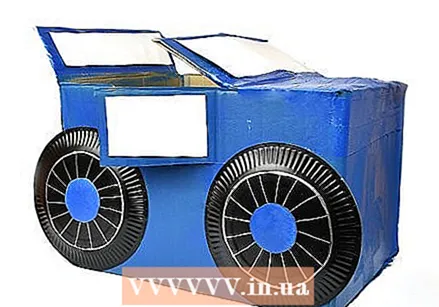 Attach wheels to your car with glue or Velcro. You can make your car's wheels out of paper or plastic plates, or cut circles out of another piece of cardboard. You can paint the wheels black before sticking them on the car, or you can leave them as is. Stick the wheels on your car at a distance of 15 centimeters from the front and back.
 - To make rims, you can stick duct tape to strips of cardboard and then stick the strips to the wheels.
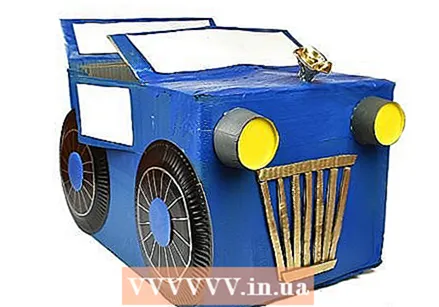 Finish your car by giving it lights, a number plate and a grille. You can make your car as detailed or as simple as you want. Use paint, pieces of cardboard and other craft supplies to decorate your car as desired.
 - For example, to make headlights, you can cut small circles out of another piece of cardboard, paint them yellow, and then glue them to the front of the car. You can also use the bottoms of paper cups.
- To make a grille, you can cover small rectangular cardboard strips with duct tape or paint popsicle sticks with silver spray paint.
- Another option is to use markers in different colors to add lamps and other details.
Method 2 of 2: Make a simple cardboard model car
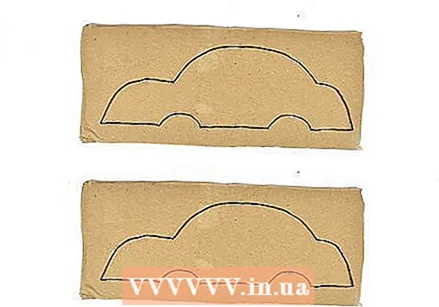 Draw the outline of a car on two different pieces of cardboard. Choose the car model you want to make and draw the side of the car on the cardboard. You can make your car as small or as big as you want. If you don't care how big the car gets, make a six-inch long car.
 - A good guideline is to make the car three times as long as it is tall.
- Make sure you draw two semicircles where the wheels should be.
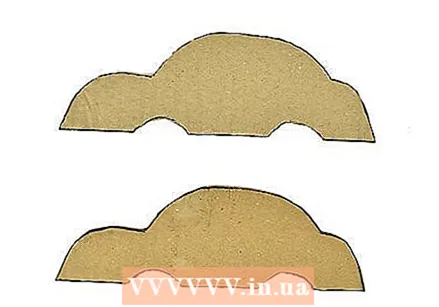 Cut out the two drawings with a Stanley knife. Place the cardboard on a cutting mat or other hard surface. Then carefully cut out the two cars.
 - If you don't have a Stanley knife, you can also use a sharp pair of scissors.
 Use a hot glue gun to glue the two sides to a bottom. First, measure out a rectangular piece of cardboard that is the same length as the cut out sides and about as wide as the height of the car. Cut out the bottom. Then apply glue along the bottom edge of the two sides. Carefully set the two sides on top of the rectangular piece of cardboard and hold them until the glue dries.
 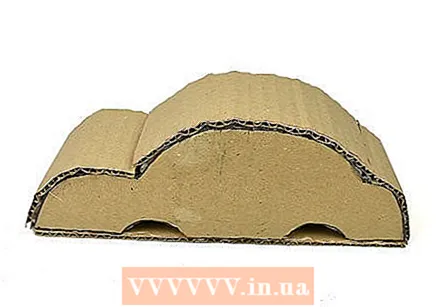 Make a roof for your car from another piece of cardboard. Start by measuring the top of the car. Then, using these dimensions, cut out another piece of cardboard that is large enough for the roof. Apply glue along the top edge of the two sides, gently push the top on and hold it in place.
 - To accurately measure the rounded edges, use a piece of string and then measure the length of the string with a ruler.
- If the roof of your car is curved, you may need to use your fingers to bend the piece of cardboard into shape.
 Make room for the wheels by cutting or snipping small rectangles from the bottom of the car. When you have glued the frame of the car, turn it over. Then cut or cut small rectangular pieces from the cardboard where the bottom of the car meets the wheel arches.
  Slip on a bottle cap to make wheels. Place a bottle cap on a piece of cardboard and trace it around to draw a circle. Cut or cut out the circle. Repeat this seven times to make eight circles. Stick two circles together to make a single wheel.
  Pass a skewer through two wheels. Make a small hole in one of the wheels with your Stanley knife. When you have made the hole, fill it with glue and insert the skewer. Repeat this step for another wheel.
 - Cut or trim the tip of the skewer before inserting it into the wheel.
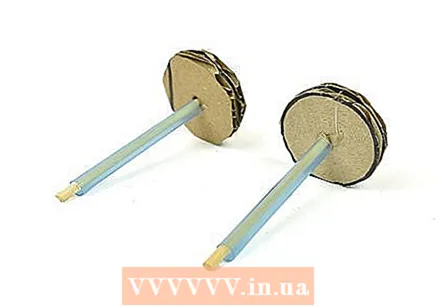 Slide a plastic straw over both skewers. Cut a piece of plastic straw that is the same length as the area between the wheel arches of your car.Then slide the straw around one of the skewers that you have pinned into a wheel. Do the same with the other straw.
 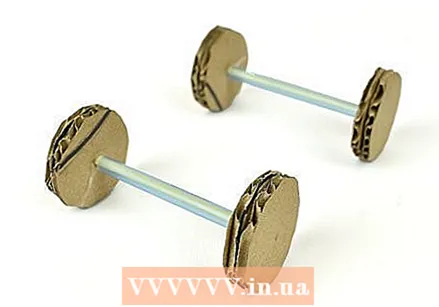 Slide the two other wheels onto the ends of the skewers to finish the axles. Use your utility knife to poke a hole in the two loose wheels you have left. Then fill the holes with glue and slide the wheels onto the skewers. If the skewers are sticking out of the wheels on the outside, cut or snip them.
 - Leave one to two inches between this wheel and the plastic straw so that the wheels can spin.
 Stick a rectangular piece of cardboard on the space between the wheel arches. Measure how wide the wheel arches are and how much space is between them. Then use these dimensions to draw two equal rectangles on a piece of cardboard and cut them out. Use the glue gun to glue one piece between the front wheel arches and the other piece between the rear wheel arches.
 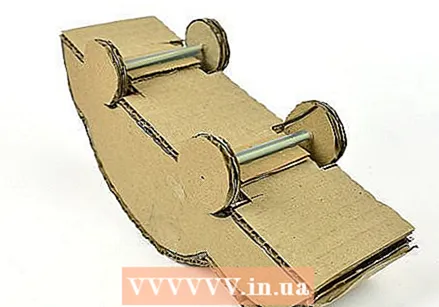 Stick the axes with glue on these rectangular pieces. Apply glue to the center of the rectangular pieces of cardboard. Then push the axles into place and hold them until the glue dries.
 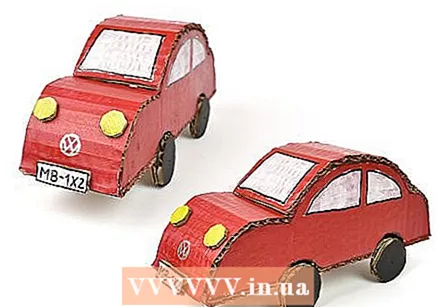 Add as much detail as you want. You can paint your car and draw on it. Add headlights, license plate, windows, and front and rear windows to make your car look more realistic.
Necessities
Making a big toy car from a box
- Large cardboard box
- Packing tape
- Folding rule
- Pencil
- Creasing knife
- Acrylic paint (optional)
- Paintbrush (optional)
Making a simple cardboard model car
- Pieces of cardboard
- Creasing knife
- Hot glue gun
- Bottle cap
- 2 wooden skewers
- 2 plastic straws


