Author:
Tamara Smith
Date Of Creation:
22 January 2021
Update Date:
29 June 2024
Content
- To step
- Method 1 of 2: Create a simple Animated GIF using online tools
- Method 2 of 2: Creating an Animated GIF in GIMP
- Tips
- Warnings
Animated GIFs are simple animations. If you have a series of images or a short video, you can create it in a minute or two using online tools. If you want to be able to do more, like edit images and set the speed of the animation, download GIMP for free and use the built-in ability to create GIF animations.
To step
Method 1 of 2: Create a simple Animated GIF using online tools
 Select a range of images or a video. Create a folder on your computer and place the material you want to animate there. Each image is a separate frame in the animation. Alternatively, you can also convert a short video to an animated GIF.
  Use an online GIF generator. There are many free GIF generators available online, including imgflip, makeagif, and gifmaker. These don't have as many capabilities as GIMP or other image editing software, but they are quick and easy to use and you don't need to download or register anything.
  Cut a small portion of a video segment (optional). If you're making a GIF from a video file, you probably want to use only part of the video. You can easily do this with the free program VLC Mediaplayer. Follow the instructions below:
 - Open VLC and click File → Open File ... to open the video file.
- Find the beginning of the segment you want to turn into a GIF.
- Select Playback → Record from the main menu.
- Play the video until the segment you want to turn into a GIF is finished. Press Record again to stop recording. The new, smaller file is saved in the same location as the original video.
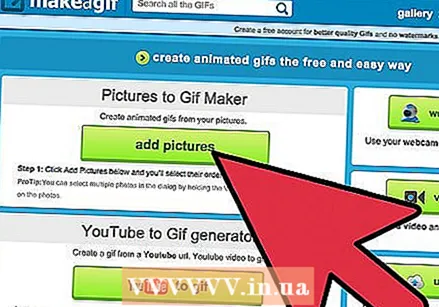 Upload the images for the GIF. Look for an Upload Images link. If you want to convert a video, look for an Upload Video link.
 - It can take a long time to upload a video, depending on your internet connection and the size of the file. It is recommended that you upload no more than a few seconds of video.
 Edit the GIF. The online tools usually offer the option to change the order of the images for the GIF, in case you sent them in the wrong order. In some cases you can also add text, change the size of the images and set the speed of the animations.
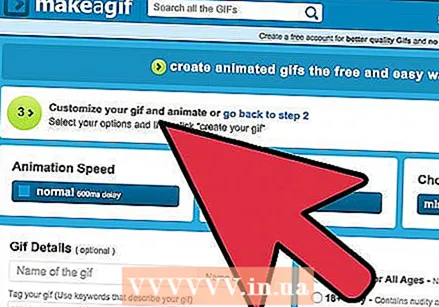
  Create your GIF. Now look for a button or link that will allow you to create / generate the GIF. THE images will now be converted to a GIF animation. You will usually also see a list of options now, including links to post the GIF on forums, download the animation, or embed it in an HTML page.
Method 2 of 2: Creating an Animated GIF in GIMP
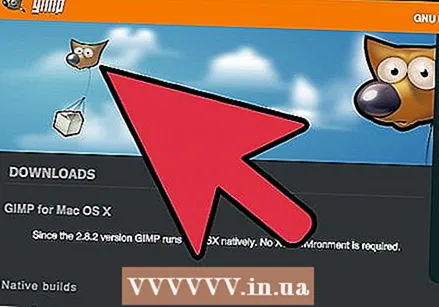 Download GIMP. GIMP stands for GNU Image Manipulation Program, an open-source image editing program. Download it for free from gimp.org/downloads. Using GIMP you can edit every frame of your GIF, adjust the speed of the animation and save it in an optimized format, which will make it load faster.
  Open the image you want to animate. Go to File → Open in the main menu and select an image from your computer. If you want to design your own GIF from scratch, select File → New.
 - If you are using an existing GIMP file with multiple layers, use Image → Flatten Image to merge them all into one layer. This layer is 1 frame of the animation.
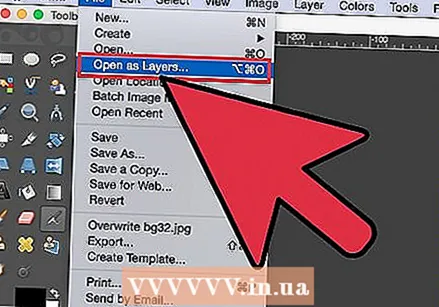 Add additional images to it. If you already have several images that you want to turn into a GIF (such as a series of screenshots), open them via File → Open as Layers. If you only have 1 image and want to edit it, use the Duplicate Layers function in the "Layers" window on the right side of the screen. You can do this by right-clicking the image's icon and selecting Duplicate Layer, or by selecting the icon and then clicking the icon that looks like two photos stacked on top of each other.
 - Each layer is a frame of the GIF. The image at the bottom of the list will appear first, followed by the rest of the images. Drag the layers to change the order.
- Each image must be the same size or the larger images will be cropped once the GIF is saved.
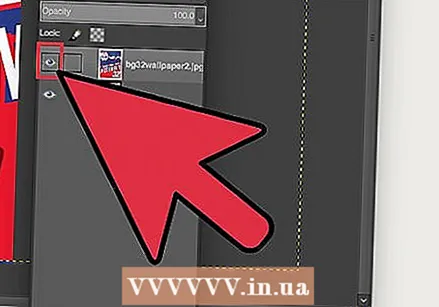 Hide layers so you can edit the layers below (optional). If you plan to edit the images or add text to them, you will have to hide all layers above them or you will not be able to see what you are doing. You can do this in two ways, both can be found in the "Layers" window:
 - Click the eye icon next to a layer to hide it. Click it again to make the layer visible again.
- Or select a layer and adjust the Opacity (transparency) at the top of the layers window. A low Opacity makes the layers more transparent. This is useful if you want to add text or make other changes to multiple frames so that you can align them properly.
 Edit the images (optional). GIMP is an extensive program with many possibilities. Select the image you want to edit from the layers menu on the right, and use the following tools to adjust the animation:
 - Select the "Scale Tool" (a small square with an arrow pointing to a larger square) from the Tools panel (Toolbar) to resize the image. Make all your layers the same size.
- Select the tool "A" and click on the image to add text. Type the text and use the context menus to adjust the size, font and color. Select Layer → Merge Down to merge the text with the layer below.
 Watch the animation. When you are done with all the edits, select Filters → Animation → Playback ... from the main menu. Click the Play icon in the window that appears to view the animation.
 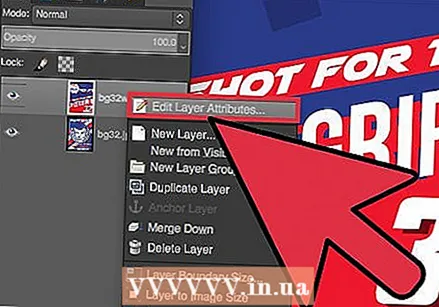 Adjust the timing. Go to the layers panel "Layers", and right click (or Ctrl-click on some Macs) on a layer. Select Edit Layer Attributes. Type after the name (XXXXms), where you replace the X's with the number of milliseconds you want the layer to show. Do this with every layer. Open Playback again to view the modified animation and continue adjusting until you are satisfied.
 - Most GIFs have a frame rate of 10 frames per second (100ms per frame).
- You can skip this step and select a default speed later when you export the file.
 Optimize the animation to load it faster. Select Filter → Animation → Optimize (for a GIF). This will create a copy that is much smaller in file size. For the remaining steps, continue with this copy.
 - Each frame is fully loaded for optimization. After the optimization, only those parts of the animation are loaded that actually changed.
- You can skip this step and optimize during the export as well, as shown below.
 Export the file as a GIF. Click File → Export As .... Then click Select File Type at the bottom of the window that appears, for more options, scroll down and select "GIF". Click on Export and a new window will appear as described below.
 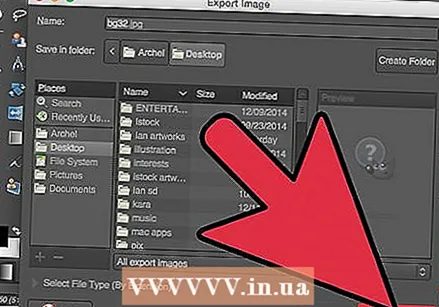 Set all options as desired and complete the export. In the new window titled "Export Image as GIF," check the box next to "As animation". Continue by clicking Export, or change the following options first:
 - Disable "Loop forever" if you want the animation to play only once.
- If you skipped the step of adjusting the timing, you can still set the delay here. By default you set it to 100 ms, or 10 frames per second. Decrease or increase this number to adjust the speed of the GIF.
- If you skipped the above optimization step, look for an option "Frame disposal" during the export, and select "Cumulative layers (combine)."
Tips
- Older versions of Adobe Photoshop come with Adobe ImageReady. If you have this program, create each frame in Photoshop as a separate layer and then use ImageReady to create an animation similar to the above method.
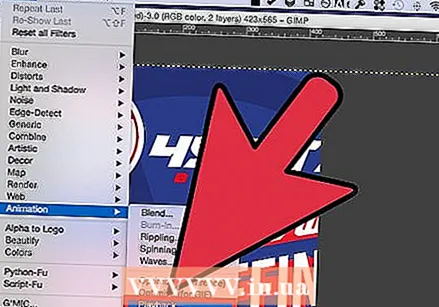
- GIMP has a number of animation effects under Filters → Animation. This adds a fading effect between layers, such as a ripple or blending.
- For more advanced capabilities, you can use the Gimp Animation Plugin install (GAP) and read the tutorial. GAP does not work for 64-bit versions of GIMP 2.8, so you may need to download GIMP 2.6.
Warnings
- Animated GIFs can get very large, making them slow to load in your browser. Don't use too many colors and avoid rasterized images to keep file size within limits.


