Author:
Roger Morrison
Date Of Creation:
26 September 2021
Update Date:
1 July 2024
Content
If you want to convert a raster image (bitmap) to a vector image in Inkscape, you will have to trace or "trace" the image. Fortunately, Inkscape has an automatic tool for this that does not require a steady hand and not much time. If you want more control over the paths you create, you can use Inkscape's built-in drawing tools to manually trace the image. Inkscape makes it easy to turn bitmaps into vector graphics, no matter which method you choose.
To step
Method 1 of 2: Automatic tracing
 Import your image. Click on "File" on the menu bar, and select "Import".
  Open the Trace tool. To open the Trace feature in Inkscape, click on "Paths" in the menu bar, and select "Bitmap Trace".
  Choose between Single Scans and Multiple Scans. Select "Single" if you want to create a single path from the image, or "multiple" if you prefer many overlapping paths.
 - Choose the options for a single scan:
- Limit value brightness uses the brightness of a pixel to decide whether it should be black or white. The higher the limit, the darker the image will be.
- Edge recognition creates a path based on differences in the brightness of pixels. The limit value setting determines the darkness of the output. Again, a higher threshold will produce a darker output.
- Color measurement produces a path based on the differences in color. Via the setting "Colors" you can indicate how many colors you want in your output, where it is possible to give an output in color. Using an algorithm, those colors are then converted to black or white.
- To choose multiple scans as an option:
- Brightness steps gives the option to specify the total number of scans.
- Color uses the number as stated in "Levels" to determine how many colors are included in the result.
- Grayscale is just like colors, but with grayscale.
- Additional options: The "Blur" option applies a Gaussian blur for the tracing, and "Scan Stack" tries to fill in gaps in the path's opacity. Check "Remove Background" to remove the background, which is usually the lightest in color.
- More options:
- Speck Suppress removes blemishes, speckles, irregularities and other unwanted items.
- Optimizing paths merges Bezier curves.
- Choose the options for a single scan:
 Click on "Update" for a preview. If lines are too thick or not clear enough, you have probably chosen a tracing mode that is not suitable for the type of image. Inkscape recommends turning the tracing feature three times to determine which of the three options best suits your personal needs.
  Click OK to create the paths. The bitmap image will be saved as an SVG file.
  Edit and adjust your results. Click the "Adjust paths via their nodes" button in the tool bar on the left side of the screen (or F2) to adjust the nodes and curves.
Method 2 of 2: Manual tracing
 Import your image. Click on "File" on the menu bar and select "Import".
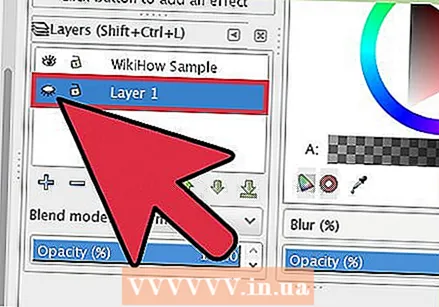
 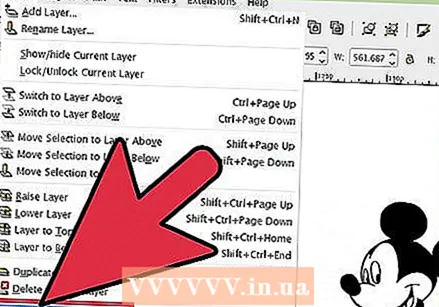 Open "Layers" from the main menu. While it's actually optional to trace into a new layer, it helps to see what you're doing by giving you the option to play with the transparency settings of your image (or the tracing layer). Click on "Layer" in the menu bar and select "Layers".
  Add a new layer. Click the "+" button to add a new layer. Type a name for the layer (such as "Tracing Layer") and choose "Above Current" as the position in the layer stack. Click on "Add".
  Select a tracing tool. There are several tools available, each with a different purpose.
 - Press the F6 key on the keyboard (or click the pencil icon in the tools menu) to choose the pencil / freehand tool. With this tool you can freely draw anywhere on the image. If you are using a drawing tablet, have a steady hand or not much to trace, this tool may be right for what you want to do.
- Press Shift and F6 simultaneously (or click the pen icon in the tools menu) to select the pen / Bezier tool. With this tool you can click on the ends of the lines you want to trace, creating small segments that are easy to manipulate. If you have multiple lines to trace and are using a mouse, this tool will give you the most accurate results. Double-click the end of each line to stop the path.
 Trace every line in your image with your drawing tablet or mouse. When using the pen tool, work with shorter lines instead of a single solid line. This will make the tracing line easier to edit, as you don't have to start all over with a long line if you make a small mistake at the end.
 - You can switch between layers in the Layers dialog. Double-click on the name of the layer you want to work on, and you'll switch to that view.
- It can help to make your bitmap slightly transparent as you draw the paths. Select the bitmap layer in the dialog box, and move the slider under "Opacity" to see which settings work best for you.
 Open the "Modify Paths" tool. In the tools menu, click the second arrow button from the top (the "edit" arrow) to enter edit mode. In this mode you can click and drag the nodes to make extra fine adjustments.
 - If you have too many nodes and it takes forever to move them all where you want them, you can reduce the number of nodes. This can change the shape of your line a bit, but not necessarily noticeably. Use Ctrl+L. (⌘ Cmd+L. on a Mac) to reduce the number of nodes.
 View your tracing lines without the bottom layer. To make sure you've traced every line you want to see in the vector image, click on the first layer (the bitmap) and increase the Opacity until only the lines you traced are visible. If you notice that you have forgotten a line, return to the Layers tool and decrease the Opacity so that the lines you need to trace are visible again.
  Delete the bottom layer and save your image. Click in the Layers tool on the first layer (the one with the original artwork) and delete it by clicking the minus sign. To save your tracing lines, click File and then Save As.
Tips
- Remove the background from your bitmap before converting it to a vector to improve the quality of your path. Experts recommend using SIOX to remove the background in your bitmap before you start tracing.
- Bitmaps with more colors and gradients generally require a bit more precision than what the auto tracing tool can handle.


