Author:
Judy Howell
Date Of Creation:
1 July 2021
Update Date:
1 July 2024

Content
- To step
- Method 1 of 3: Use wood filler or wood filler
- Method 2 of 3: Fill cracks with glue and sawdust
- Method 3 of 3: Repair cracks with epoxy
- Tips
- Warnings
- Necessities
- Use wood filler or wood filler
- Fill cracks with glue and sawdust
- Repair cracks with epoxy
Cracks are ugly, but there are a lot of products that can be used to repair a damaged piece of wood. Wood filler and wood filler are easy to use and work well to fill wide cracks in unstained wood indoors. If you want a quick fix, you can discreetly mend small cracks and holes in assembled furniture with a mixture of wood glue and sawdust. Buy epoxy to fill in larger gaps, such as in outdoor wood. After some wiping and sanding, nobody will notice the damaged spot you have repaired.
To step
Method 1 of 3: Use wood filler or wood filler
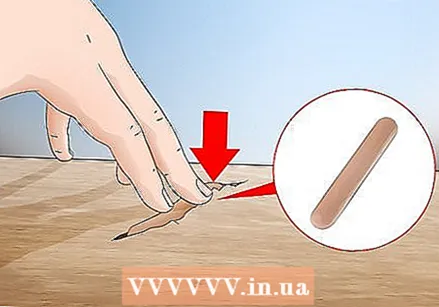
 Buy a filler in the same color as the wood. Look for wood putty or chalk-shaped sticks with wood filler. These products are available in various colors at hardware stores and web shops. Choose the color that best suits the wood you are treating.
 - If you can't find exactly the color you need, you can buy different colors and mix them to make a different color.
- If you want to paint the wood later, check the packaging to see if the product can be painted. It will take on the color of the paint or stain and will be indistinguishable from wood.
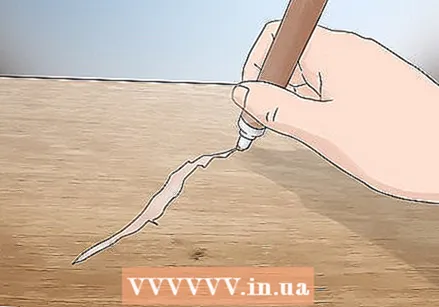
 Push the filler into the hole with your finger. If you're using a stick with wood filler, just rub the stick over the crack. You can then spread the product with your finger if necessary. If you are using filler, you can spread the material over the crack with a putty knife or chisel.
  Fill the crack with too much filler. Keep applying filler until it comes out at the top of the crack. When you later smooth out and sand the filler, the crack will be less noticeable because it is too full of filler.
 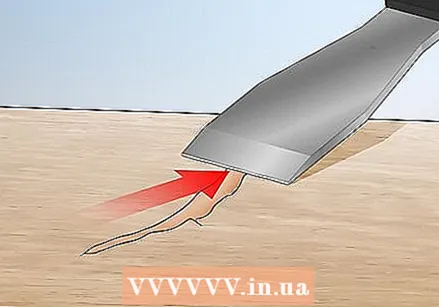 Smooth the filler with a putty knife. Before the material dries on the wood, smooth it out as much as possible. If you don't have a putty knife, run a clean cloth or your finger over the crack. Make sure the cloth is clean so that no dirt gets into the crack.
  Let the wood filler dry for 8 hours. Drying time differs per filler, so check the packaging for how long you need to let the product dry. To be on the safe side, leave the wood alone for 8 hours or overnight to ensure the filler dries completely.
  Sand off the excess filler. Treat the cracked wood with a plane or fine sandpaper. Use sandpaper with a grain size between 120 and 220. Sand away the filler until it lies as flat on the wood as possible. Afterwards, the crack should not show up as a discolored spot.
Method 2 of 3: Fill cracks with glue and sawdust
 Get sawdust in the same wood type and color as the wood in question. You use sawdust to cover the white glue and keep the crack from showing, so the sawdust should resemble the wood you are treating as much as possible. To hide the crack as best you can, use some sawdust from the wood itself by sawing or sanding it.
 - If this is not possible, buy a bag of sawdust from a hardware store.
 Squeeze wood glue into the crack. Buy a pack of wood glue from the store. Hold the opening against the crack and squeeze the package until the crack you want to fix is full of glue. In the case of a small crack, you can also use a syringe to make sure the glue gets all the way to the bottom of the crack.
  Cover the glue with sawdust. Sprinkle a lot of sawdust on the glue to cover it completely. Run your finger across the crack to make sure the glue holds the sawdust in place. When done, the sawdust should cover the glue and the area should be indistinguishable from the rest of the wood.
  Let the glue dry overnight. Let the glue dry until the next day. When the glue is completely dry, the crack should hardly be visible. If you can still see the crack, reapply glue and sawdust or some other filler.
  Sand the crack smooth. Treat the crack with a piece of fine sandpaper with a grain size of 120-220. Gently sand the treated area until the filler is smooth and flat and does not stand out.
Method 3 of 3: Repair cracks with epoxy
 Wear a breathing mask and work in a well-ventilated area. Epoxy isn't something you want to inhale, so protect yourself by putting on a mask beforehand. The safest option is to work outside. Keep pets and family members away from your workplace.
  Cover the crack with masking tape if it goes through the wood. If the crack goes all the way through the wood, tape off one side. The masking tape will hold the liquid epoxy in place long enough for it to harden.
 - Epoxy works better at treating large cracks than other fillers.
 Place equal amounts of the components in a bowl. Epoxy consists of a mixture of two components, resin and hardener. Check how much you need to fill the crack. Put the components in the bowl, but do not mix them yet.
 - The epoxy immediately starts to harden when you mix the components. You have about 5 minutes to get into the crack, so start with a small amount.
 Add a drop of wood-colored dye to the epoxy. You can usually buy all kinds of epoxy dyes, pigment powders, and metallic powders at hardware stores. Choose an agent that suits your job and then add a drop of food coloring or a pinch of powder to the epoxy to give it a color.
 - You can even add a scoop of ground coffee to blacken the epoxy.
 Immediately stir in the epoxy. Grab a spoon or stir stick and quickly mix the components together, as well as the food coloring you added. After a few seconds you will get something that looks like paint that you can shovel into the crack.
  Spoon the mixture into the crack. Spoon the epoxy into the crack with the stir stick or spoon. Push the agent as deep as possible into the crack. Most of the agent will flow to the bottom. If you don't have enough epoxy to fill the entire crack, just make more.
 - Use a needle to pierce any bubbles that form when you pour the epoxy into the crack.
 Mix more epoxy to fill in larger cracks. The epoxy hardens within minutes, so you'll know right away if you need to make more. Keep mixing equal amounts of resin and hardener until you fill the entire crack.
  Let the epoxy dry overnight. After 2 to 4 hours the epoxy will have dried considerably. Push your fingernail in. If you see a dent, the epoxy is not ready yet. It is always preferable to let the epoxy dry overnight. In fact, when the weather is cold, this is necessary to keep the epoxy in place.
  Sand the epoxy smooth with sandpaper. First, cut off the excess epoxy with a putty knife. Then use fine sandpaper (120-220 grit) or a file to carefully smooth and flatten the epoxy-treated area until the epoxy is level with the wood.
 - If you have a block planer, it will make this step easier and can help you avoid sanding some of the wood.
 Color white spots with a felt-tip pen. When you are done you may see some white spots of hard epoxy. You can color these with a felt-tip pen in the same color as the dye you used. You won't even know the crack was there and can get on with the rest of your job.
Tips
- Use isopropyl alcohol to remove epoxy from surfaces and tools.
- You can get epoxy off your skin with vinegar.
Warnings
- Wood particles are released into the air during sanding. Wear a breathing mask so you don't inhale them.
- Working with chemicals can be dangerous. Wear a breathing mask and work in a well-ventilated area.
Necessities
Use wood filler or wood filler
- Wood filler or wood filler in the form of sticks
- Putty knife
- Sandpaper
Fill cracks with glue and sawdust
- Wood glue
- Sawdust
- Sandpaper
Repair cracks with epoxy
- Breathing mask
- Liquid epoxy with two components (resin and hardener)
- Dye or pigment
- Mixing cup
- Stirrer
- Needle or pin
- Masking tape
- Colored felt-tip pen
- Sandpaper

")

