Author:
John Pratt
Date Of Creation:
12 April 2021
Update Date:
1 May 2024

Content
- To step
- Method 1 of 2: With a silkscreen frame and a squeegee
- Method 2 of 2: With an embroidery hoop
- Tips
- Warnings
- Necessities
- With a silkscreen frame and a squeegee
- With an embroidery hoop
Screen printing is a printing technique that is especially useful for printing textiles and other materials. The process is easy, versatile, and relatively inexpensive, so everyone should give it a try. This article will help you get started.
To step
Method 1 of 2: With a silkscreen frame and a squeegee
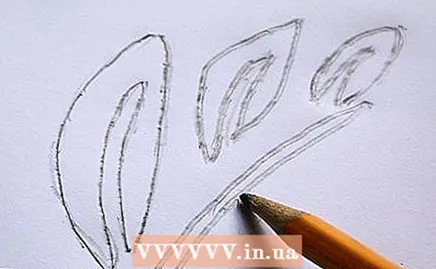 Create a design for your screen print. Think of something interesting and draw it on a piece of paper. Don't color it in or shade it - you'll be cutting it out and using the rest of it as a template.
 - First, keep it simple. An irregular pattern with geometric shapes and circles is the easiest and is never trite. Draw the shapes far enough apart if you're a beginner - of course you don't want the paper to tear when you're cutting.
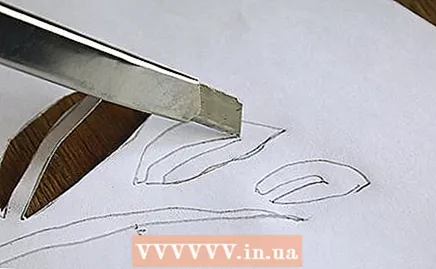 Use a creasing knife to cut out all the colored parts of your design. Keep the surrounding blank paper intact. You have now created a template. If it breaks, you will unfortunately have to start over. Be careful and work accurately.
 - Make sure your template fits well on your T-shirt. If not, you will have to make it smaller or adjust it in some other way.
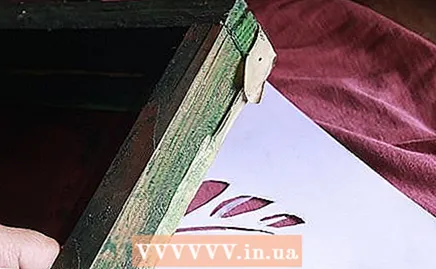 Place the stencil on top of the material (paper or T-shirt) and the screen printing frame on top of the stencil. Arrange the template so that the mesh is right on top (they should be touching) and the handles are facing up. If there is space between the edges of the stencil and the edges of the window, apply masking tape to the bottom. Of course you don't want paint to leak where it shouldn't.
 - If you are using masking tape, do not tape the stencil to the mesh. The stencil may shift differently if you run over it with the squeegee.
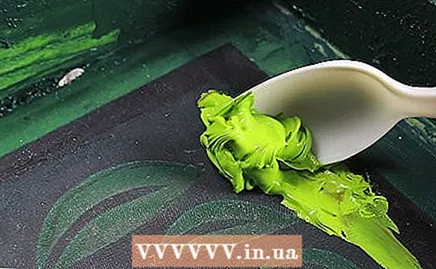 Spoon some paint onto the screen print frame. Make a line at the top of the window (the part furthest from you). You don't want paint to get on the stencil at this point. Spoon as much paint onto the window as you think is enough to cover the stencil.
 - It is somewhat tricky to use more than one color with this method. If you do give it a try, just know that the colors will eventually blend together. If you don't mind, give it a try.
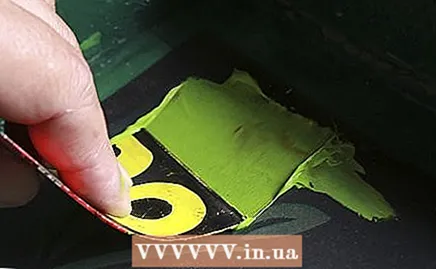 Use the squeegee to spread the paint over the mesh. Try to do this by pulling the squeegee down once - or doing this as few times as possible. The screen printing will look as even and professional as possible in this way.
 - Always make vertical strokes. If you do both horizontal and vertical strokes, the paint will bunch up, making it more difficult to dry and finish.
- When you get to the bottom, go ahead and spoon the excess paint above the handle so you can use it again.
 Remove everything from the material. Be careful! If something shifts, the paint can be smeared. It is best to do it layer by layer. Lift the layers one by one and then take them off.
 - Let it dry. The longer the better.
- If you have screen-printed clothes, then after the paint dries, put a sheet of wax paper or tracing paper on top of the design and iron it. This way your design stays on the garment and you can wear and wash it.
- Let it dry. The longer the better.
Method 2 of 2: With an embroidery hoop
 Print your design on the computer. A large, dark-colored, simple design is the easiest to work with. Print it in black and white or in dark colors - you should be able to see the pattern through the mesh. Your design should also fit in your hoop.
 - If you don't want to use the image editing software on your computer, you can also draw something yourself. Make sure your design is the right size, dark enough, and won't bleed on the mesh.
 Place a piece of see-through fabric in an embroidery hoop. Unscrew the hoop so it opens and pull the fabric taut over the bottom part of the hoop. Put the top part back in place and screw on the hoop. It does not matter if it is exactly in the middle. You only use the material that is inside the embroidery hoop.
 - See-through curtains are great for the frame. Choose a net-like fabric that is not completely transparent.
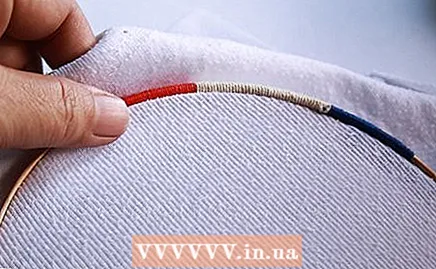
 Place the hoop on top of your pattern and start tracing. The fabric should touch the pattern. Use a pencil to trace your image. If you make a mistake, you can always erase it and start over. Trace the outline only.
 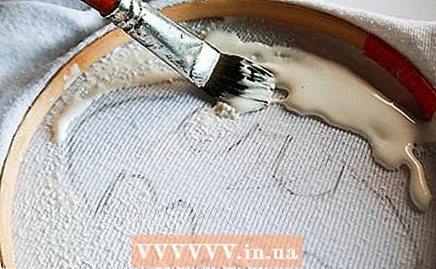 Turn the hoop over so the fabric is on top. Cover the outside of the pattern (where the tracing lines are) with a layer of glue. Do this not on your pattern, but around it. The glue acts as a kind of barrier when you apply the paint - if you get outside the lines, it won't show on the fabric. The paint then ends up on the glue.
 - It doesn't matter what the glue goes around outside of the cartridge - as long as it doesn't get on the cartridge. When you are done, wait for it to dry completely. Fifteen minutes should be enough.
 Put the framework in place. The see-through fabric should not touch the material you are printing on and should be separated from it by the hoop edge. Smooth the fabric under the framework to create an even pattern.
 - If you have a screen printing squeegee, use it to apply the paint to the material. Otherwise, use a sponge brush and hold the framework firmly.
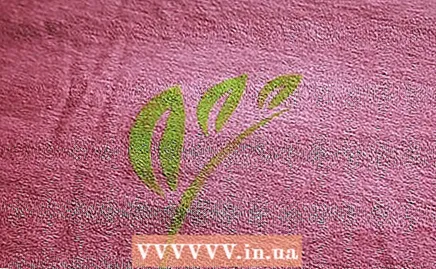
 Remove the hoop and let the material dry. Be careful not to smudge the paint when you take it off. If the paint has not dried properly, it may run. Give it at least 15 minutes to dry up.
 - Iron the fabric and follow the directions on the bottle of ink or paint you used. Wear your garment as often as you want.
Tips
- Spread the paint in one direction only. Otherwise, the paint will bunch up, making it more difficult to dry.
- If you're silkscreening a T-shirt, put a layer of newspaper in it. This is because the paint can pull through the fabric and stain the other side.
- If the edges of your stencil are rough or it keeps tearing, you are probably not holding your craft knife properly. Hold your hand in a different position.
- You can look at designs in magazines instead of drawing one yourself. You can also print a photo and cut parts there.
Warnings
- Paint stains. So wear old clothes.
- A hobby knife is sharp, so be careful. Always put the knife away or cover the blade when you are not using it.
- Use a cutting mat so you don't scratch your table.
Necessities
With a silkscreen frame and a squeegee
- Pencil / pen / colors
- Cutting mat / durable surface
- Colored paper
- Creasing knife
- Paint suitable for screen printing (textile paint or screen printing paint)
- Silkscreen frame
- Fabric or paper to print on
- Rakel
- Iron (if you are screen printing on clothes)
With an embroidery hoop
- Pattern
- Pencil
- Translucent fabric
- Embroidery hoop
- Glue
- Paint brush / squeegee
- Paint or ink suitable for screen printing
- Iron (if you are screen printing on clothes)


