Author:
Morris Wright
Date Of Creation:
28 April 2021
Update Date:
13 May 2024

Content
Do you want to go out for a bike ride? Maybe you are ashamed that you don't know how to cycle yet? Or you probably just want to start cycling, one of the most enjoyable and healthiest ways to get around! Follow these steps to learn to ride a bike.
To step
 Find a safe place to practice. Asphalt is the easiest surface to ride on, but unrelenting if you fall. (However, with proper braking technique and properly adjusted saddle, this shouldn't be a problem. See the steps below for more details.) Short grass or even gravel can be acceptable alternatives for those afraid of falling, but beware: these surfaces make more difficult to maintain balance and offer more resistance to bicycle tires. Wherever you go, make sure it has flat sections and gentle slopes (to get you started) but no narrow paths, steep slopes or traffic.
  Make sure you know how to cycle safely. If this is your first time riding, consider lowering the saddle so that your feet can reach the ground when you sit down. You should also pay attention to tire pressure, brakes, and the like. If you're wearing long jeans or shorts, roll up the right leg so it doesn't get caught in the mechanisms on the right side of the bike. Avoid long skirts or baggy clothing (which can get caught in the gears or spokes) and airy or open-toed shoes (which make it harder for you to stop if you can't or don't want to use the brakes).
 - Cycling on the sidewalk is inappropriate or illegal or dangerous in some areas, especially in the city.
- Helmets are necessary and useful.
 Know how to brake. While practicing, it's a good idea to give yourself a long distance to brake gently so you're ready to dismount if necessary.
 - If your bike's brakes are on the handlebars, try out which brake controls the front and which controls the rear, as that varies from country to country and can be adjusted depending on whether you are right or left handed. To do this, lift the front of the bike, turn the wheel by hand and test both the left and right brake levers separately. The rear brake is mostly used by beginners. The front brake works much better at stopping the bike, but it can cause you to fall if used incorrectly. If the rear brake does not work, gradually apply the front brake until the bike comes to a stop. It's much better to get used to using the front brake, as it gives you a much shorter braking distance than the rear brake. It's also important to get used to the individual use of the brakes, in case one doesn't work.
- If your bike does not have brakes on the handlebars, it will have a coaster brake. To brake, make sure the pedals are roughly parallel under your feet and then put pressure on the rear pedal as if you were cycling backwards. This will apply the brake and the bicycle will come to a stop. Apply the necessary amount of pressure.
- If your bike has no gears, it may not have brakes. Instead of braking, you have to slow the bike down by pedaling slower, which slows you down gradually, or brakes by slipping, which is faster. To do this, lean forward on the bike to take some of your weight off the rear wheel, then stand upright with the pedals both horizontal. Because the pedals drive the rear wheel (which no longer supports weight), it will lock, causing the bicycle to skid to a stop. Riding a bicycle without a gear is a lot more difficult than on a traditional bicycle and is not recommended for beginners.
 Get on your bike. With the saddle lowered, this should be a breeze.
  Practice balancing on the bike. Push yourself forward with your feet on a flat surface and get used to how the bike tilts and steers. Do this until you feel good and feel confident in handling the bike. Try to push yourself forward quickly and "slide" with your feet in the air, steering only with your hands. Notice that your body leans slightly in the turn to maintain balance if you only use your hands to steer. When you're ready, try curving your body instead of your hands, and let the bike follow you; you will notice that the front wheel also automatically turns. This is the most important skill of cycling: balancing and steering. Take as much time for this step as you need to to feel comfortable.
 - Balance is easier to maintain when the cyclist goes faster. Driving too slow will not keep the cyclist safe.
- If someone is helping you exercise, have that person hold the bike behind you while you try to find balance while pedaling.
 Try to drive down gentle slopes. Walk the bike to the top of a slope that ends in a fairly flat stretch, get on (keep one or two feet on the ground until you're done) and ride down, naturally allowing the flat stretch at the bottom to slow you down. . Get off and repeat this step if necessary to get used to the feeling of speed, balance (which should be easier now due to the increased speed) and incline.
 - If you are confident enough you can put your feet on the pedals and let yourself drift a few meters, try not to put your feet down so you can practice your balance.
- If you feel comfortable putting both feet on the pedals, practice braking gradually as you drive downhill. Do this until you no longer need to take your feet off the pedals.
- When you've mastered driving, pedaling, and braking in a straight line, practice steering light left or right.
 Get ready for a ride. Raise the saddle slightly, but still low enough that you can touch the ground with your toes while sitting.
  Pedal while driving down and onto the flat area. Use the techniques you've learned (pedaling and steering), but this time keep cycling instead of stopping at the bottom. Practice making gentle turns, then sharper turns. Brake to a stop and try to extend just one foot to keep yourself upright.
 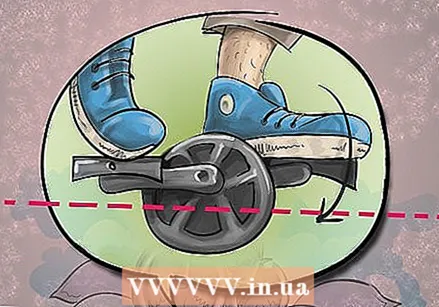 Start pedaling on the flat from a standstill. With your foot on it, make sure the pedal is level with the other (free) pedal, then push it down with your foot while putting the other foot on the pedal and start pedaling. Do this until you feel comfortable starting and stopping on a flat surface.
  Cycle up the slope. Cycle up the slope from the flat to get used to the extra work involved in cycling uphill. Lean forward or even stand to give yourself extra strength. Cycle up and down the slope several times until you've mastered both. After this you can stop halfway up the slope, and then cycle further up. Once you get it right, you are ready for tougher terrain.
Tips
- If you cannot get a helmet / gloves, it may be better to practice on grass rather than rocks first. Please note that in some areas it is required by law to wear a helmet on the bicycle.
- Don't give up if you get a scratch or minor injury. If necessary, wear extra protective gear but remember that the more you ride the less that will happen.
- Keep your arms relaxed as you learn to maintain your balance. The design of the bike ensures that it automatically remains in balance as long as you do not do too much about it. (This is why some people can cycle without hands.)
- Have a parent or other adult nearby if you wish.
- Cycling is like life: you will (unconsciously) go in the direction you are looking (difficult vs. easy road), so it is best to look ahead. (Looking at a ditch or curb will steer you there.) It's good to keep an eye on your stress level when a challenge comes your way, know you've already decided to go for it, so you can just as well relax, breathe and enjoy it.
- If you're interested in the physics behind riding a bike, bike balance and steering is about the movement of the rear wheel making a smaller radius than the front wheel, making the bike want to go straight. Tilting a bicycle does not so much cause it to turn, as it causes the front and rear wheels to be out of alignment. Once you have mastered cycling, you can see this effect when you cycle through a puddle and then make a turn; if you look at your tire tracks you will see the front wheel going the wrong way before making the turn, creating two paths for the wheels.Motorcyclists often employ this as countersteering, where the driver steers slightly in the opposite direction to take the front and rear wheels out of line, then applies enough steering to hold this state of tire imbalance for as long as necessary. and the steering is gradually neutralized so that the rear wheel is back in line with the front wheel. While this goes a little too far for this article, the same can be applied to bicycles where it is more noticeable at higher speeds. Although the theoretical understanding of this is not crucial to become a good cyclist, the practical application is important for cycling smooth and relaxed.
- Once you learn how to ride a bike, you will never completely forget how to do it.
- Be careful, don't overdo it and don't give up if you fall! Have faith!
- Do not assume that you know what other road users are planning; always assume that you are the most reasonable road user at the moment by behaving responsibly and looking out for others, including other cyclists.
- Don't worry if it takes a while to get used to the movement and balance. Keep working on it as it is an essential process.
- The saddle should only be low during learning, once you can ride it should be raised to avoid pressure on your knees. Your legs should be able to stretch almost completely when pedaling.
- Training wheels can help you get the "feel" of the bike. Just don't rely on it too much.
- Riding a bike with gears is more difficult than a bike without gears, especially for beginners. Just remember that a lower gear like 1 or 2 takes less effort, but slows you down. 1 or 2 is recommended for uphill and straight riding. A higher gear like 5, 8 or even 10 depending on the bike is usually better for downhill or experienced cyclists because while pedaling is harder, more speed comes from pedaling. This is ideal for downhill riding.
- Find a safe open area to exercise, away from traffic. Schoolyards, football fields or a garden and empty parking spaces are good practice areas.
- Be patient and don't be afraid of falling off the bike. This helps to "befriend" the bike (that is, trust and start slowly).
- Start on grass until you feel comfortable enough to try it on asphalt.
- Don't be in a hurry! Start slow if it's your first time. Then gradually accelerate as you become familiar with the bike.
- You can also wear a tok if you wish.
- Look up a rule book or manual for the bike, or similar, at your local department store, bike shop, or town hall. Such a guide should contain useful tips for safe road driving and bicycle maintenance.
Warnings
- Be alert when cycling and watch the traffic.
- Always wear a helmet. In an accident, a helmet can mean the difference between life and death. The one time you forget a helmet you could just have an accident. Cyclists without a helmet are even 14 times more likely to have a fatal accident than their colleagues with a helmet. Again, when you ride a bike, remember always that you have to wear a helmet!
- Before entering traffic, you should learn more about bicycles and the rules of the road. Remember that a bicycle is a legal vehicle and always ride with traffic, not against it. Even if you are driving on a sidewalk, go with the traffic. A car that makes a turn often does not look at traffic coming from the other side, including your bicycle.
- In some areas there is a minimum age for riding a bicycle. Usually this is something like 12 or 13, up to maybe 17.
- Do not ride in traffic if you do not know how to: 1) keep your bike consistently within a meter of the side of the road (unless there are multiple lanes you must ride in the middle of the correct lane); 2) indicate direction with your hands; 3) quickly look behind you while pedaling so that you can estimate traffic behind you.
- Elbow and knee pads are recommended for students.
- Teach your children and / or friends about the dangers of speeding and the basic road signs and signals.
Necessities
- A bicycle (preferably a bicycle with gears)
- A bicycle pump (to increase tire pressure)
- A helmet (optional depending on the law)
- Knee pads
- Elbow pads
- A quiet street or park
- Side wheels (optional)
- Gloves (optional, for better grip on the handlebars)


