Author:
William Ramirez
Date Of Creation:
21 September 2021
Update Date:
1 July 2024

Content
- Steps
- Method 1 of 2: North American Harness
- Method 2 of 2: Australian Harness
- Horse equipment
- We fix the cart
- What do you need
Carts and horses can be found all over the world, both in rural areas and in cities. For a horse owner, the ability to harness his horse is very useful. Services such as carriage rides or catering for weddings and other celebrations can be provided. You can harness the horses together, so you can even help your friend if you are familiar with the process. At first, the task seems difficult, but if you follow the outlined steps in order, then everything turns out to be quite simple.
Steps
Method 1 of 2: North American Harness
 1 Collect the harness items. These include the bridle, reins, saddle, bib, and harness patch.
 - With the help of the bridle, the rider indicates the direction to the horse. A bit (aluminum mouthpiece) and eyecups can be attached to the bridle. Eyecups are square pieces of leather attached to the bridle above the bit and positioned over the horse's eyes to keep the horse focused on the forward movement.
- Reins are very long leather straps that go from the bit to the rider. They are usually brown in color and are not attached to the bridle.
- The saddle is a strip of padded leather that sits just below the nape of the neck. It has reins guides and a girth that wraps around the horse's belly for fixation purposes. Also on the saddle there is a large tug that holds the shafts of the carriage.
- A harness patch is a flat leather piece that attaches to belts. It fits against the horse's ribcage and allows you to pull a wagon or implement. Sometimes this part of the harness is represented by a yoke that surrounds the wide part of the horse's neck.
- The stripe is a braking system for the harness, it has a wide strap that runs across the horse's rear and a smaller strap runs across the croup. The brake belts are attached to the rings on the wagon shaft. The stripe also includes a padded hanger that runs under the horse's tail.
 2 Curb your horse. Tell her to lower her head and insert the bit into the horse's mouth. If the horse doesn't open his mouth, slide your thumb past the front teeth along the horse's cheek and gently but surely force the animal to open its jaws. If it's cold outside, warm the bit in your hands first.
 - Pull on the snare carefully. Make sure it is two toes below the horse's high cheekbones.
- Adjust the eyecups so that they do not touch your eyes.
- Tighten your chin. The tension should be such that 2-3 fingers fit between the chin and the horse's neck.
 3 Place a chest strap or yoke on the horse. If straps are attached, check that they do not get tangled under the horse's feet. The collar chest strap should be adjusted so that it fits over the widest part of the horse's chest.
  4 Place the saddle just under the scruff of the neck.
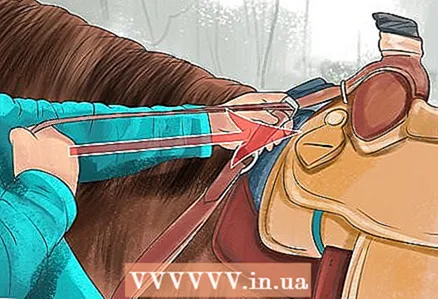
- Tighten the girth tightly. But don't overtighten. It is best to wait for the horse to relax and start moving until the girth is fully tightened.
 5 Place the patch on the horse's back. Move the tail so that the stripe fits flat on the back of the horse.
 - Raise the tail and thread the tail. Lock it in place. Make sure that the ponytail is not twisted, clean and does not pinch the hair of the ponytail.
- Attach the patch to the saddle with the longitudinal strap.
 6 Place the cart behind the horse. Ask a helper to hold the horse's head.
 - Pass the shafts through the saddle loops.
 7 Attach the harness straps to the wagon struts.
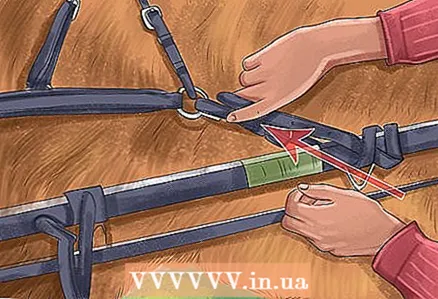 8 Attach the stripe to the wagon by passing the brake belts through the rings on the shafts. Wrap and secure.
  9 Run the reins from the cart along the guides to the bit and secure.
 10 The horse should take a few steps, then tighten the girth and recheck all harnesses and attachments.
Method 2 of 2: Australian Harness
Horse equipment
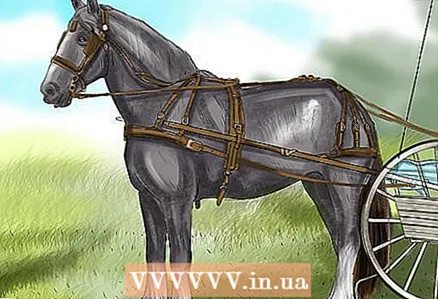 1 Start harnessing the horse from the front. By following the instructions, you will always cope with this task with confidence.
 - You can start with personal habits. For example, it used to be thought that for good luck, you should start with a collar (or bib). Next comes the saddle, the girth, the band, then the bridle / blinkers (so that naughty horses don't take them off; it's easy for them to scratch the skin, everyone knows that) and, finally, the reins.
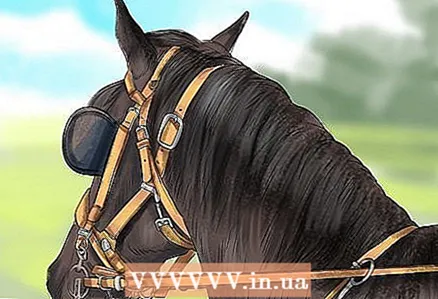 2 To properly secure the blinders (bridle), the horse's eye should be centered on the eyecup, and the part itself should not be pressed against the eye.
- The collar tightens slightly more than for riding. You can also attach the top of the bridle to the horse's mane; many ponies or twos can remove the bridles by simply shaking their heads or rubbing against each other.
- Check the collar again while driving so that it is not overtightened.
- The brace helps to strengthen the bridle and fixes the eyecups to keep them from moving.
 3 You can use a bit. The bit is optional, but excessive safety measures are better than insufficient ones. Stricter bits with dexterous handling will do you a great service and in which case you will not have to torture a frightened horse.
  4 Use open bridles. They are prohibited only on the obstacle course (and also for the Standardbred breed).
  5 Place the bib just above the shoulder blades to allow freedom of movement and below the windpipe for the horse's comfort.
 6 Place the saddle behind the withers. The girth is attached in the same position as when riding, snug but not tight.
  7 Secure the tailpiece carefully. Raise your ponytail and check that the ponytail is not pulling your hair. Then lift the tail strap to the croup over the thighs, while leaving the opportunity to pass your hand to the side (10 cm) under the strap.
  8 Put on a harness patch over your knee joints. Fasten at this level between the tail and the arches.
 - Stripes may not be used for light carts and some 4-knee carts if equipped with brakes.
 9 Fit. All equipment must be on the horse and adjusted before the cart is secured.
We fix the cart
 1 When securing the cart, hold the reins at the bend of your elbow and raise the cart. Don't forget to brush your horse's croup.
  2 Insert the shafts into the tug. First, the horse-drawn belts are attached, and then the stripe belts - in most carts, they are located lower, followed by a girth.
  3 If you do not have a helper, hold the reins as you walk around the back of the wagon. If you need the horse to stop pulling off the bridle or spinning, hold the reins as well.
 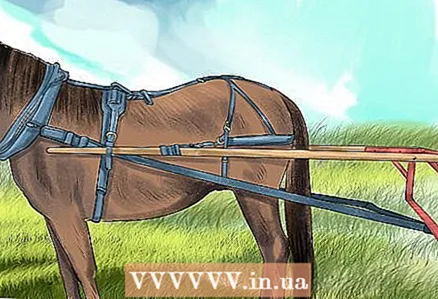 4 Re-check. Each piece of the harness is checked several times; when pulling the carriage between the croup and the stripe, there should be a palm-width distance (10 cm), the girth is attached securely, but not as tight as the race saddle.
 - The tension on the girth can be influenced by the movement of the cart, but usually you have to find a balance between over-tightening and under-tightening.
 5 Unharness should be done in the reverse order; loosen the girth, remove the stripe straps, and then the rest of the straps. Check that all belts are unbuckled before pulling the cart. If you forget to unfasten the stripe belt, then you will find yourself in an uncomfortable and dangerous situation, when the carriage is almost withdrawn, but at the same time you have both hands busy.
What do you need
- Horse
- Harness
- Carriage


