Author:
Carl Weaver
Date Of Creation:
1 February 2021
Update Date:
28 June 2024

Content
The bathroom sink can crack, get dirty or scratched. After that, you might want to install a new sink to enhance the bathroom ambience and create a new and clean look. Replacing a washbasin in a bathroom can take some time, but it is not difficult at all, and as a result, you will get a refreshed bathroom interior.
Steps
 1 Use a measuring tape to measure the dimensions of the old sink. When installing a new sink, it is advisable to buy one that would ideally match the size of the old one. Write down the length, depth, and width of the sink, as well as the length and width of the tile.
  2 Buy a new washbasin. Take your old sink and tile dimensions with you to buy new bathroom fixtures of the right size.
  3 Shut off the water supply to the sink. The water inlet valve is usually located under the sink. When replacing the washbasin in the bathroom, turn on the tap to check if you have cut off the water.
  4 Place a bucket under the siphon. Before installing a new sink, you first need to remove the drain pipe.
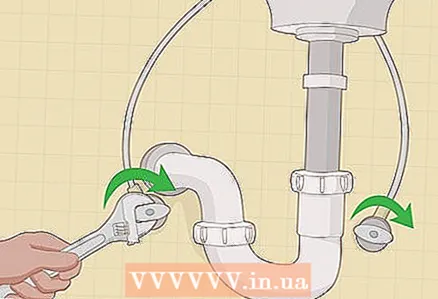
 - Use an adjustable wrench or wrench to loosen the bolts that secure the siphon to the bottom of the sink.
- Turn the siphon towards the bucket while slowly detaching it from the sink.
 5 Use an adjustable wrench to disconnect the hot and cold water supply hoses from the sink. Replacing a sink requires you to spend some time under the sink to detach the various parts.
 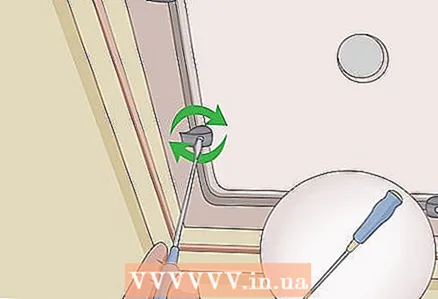 6 Use a screwdriver to unscrew the screws that secure the sink to the wall.
 7 With a spatula, remove any putty or other adhesive that is between the sink and the tile.
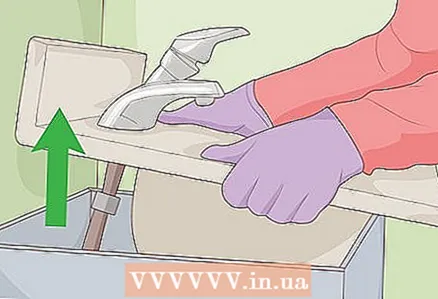 8 Pick up the old sink. When installing a new sink, it is advisable to do this on a flat surface, so clean the tile, removing any sealant residues from it.
  9 Remove the faucet and drain from the old sink if you intend to use them in the new sink.
 10 Install a new faucet and drain into the new sink. To install a new sink, you first need to attach all the parts. Do not forget to cover the joints of the faucet and drain with sealant. If you bought a new crane, follow the manufacturer's instructions to install it.
  11 When installing the sink, apply silicone sealant to the rim of the bottom of the sink. Lower the sink into the hole in the tile. Replace the sink and use paper towels to wipe off any excess sealant.
 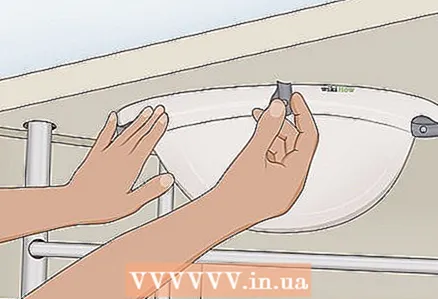 12 Climb under the sink and screw it to the wall. Make sure it is securely fastened.
  13 Connect the water supply hoses with an adjustable wrench, and secure the siphon under the sink with an adjustable wrench. Be careful not to overtighten the valves.
 - Turn on the water supply. Leave the bucket under the sink while you check for leaks. Occasionally, water may leak after assembling the sink.
- Unscrew the hot water and then the cold water. If there is a leak, turn off the water and reconnect everything by wrapping the thread of the hose with fluoroplastic tape.
 14 Leave the sink overnight.
What do you need
- Measuring tape
- Paper and pencil
- New sink
- Sliding key
- Wrench
- Screwdriver
- Knife
- Putty
- Paper towels
- Bolts
- PTFE tape
- New crane


