
Content
- Steps
- Method 1 of 3: Preparing Liquid Brine
- Method 2 of 3: Making a dry marinade
- Method 3 of 3: Roasting the chicken
- Tips
- Warnings
- What do you need
Soaking the meat in brine before cooking helps to increase its juiciness and enhance the delicate flavor before baking. This is especially important for chicken, which usually dries up in the oven. If the meat is soaked in salt water, then due to osmosis, its cells will absorb some of the liquid, which will make the meat more juicy during the cooking process. You can also make a dry marinade so the chicken is crispy, the meat retains its natural juiciness, and you don't have to bother with a liquid pickle.
- Preparation time (in brine): 30 minutes
- Cooking time: 8-12 hours (active cooking will take about 10 minutes)
- Total time: 8-12 hours
Steps
Method 1 of 3: Preparing Liquid Brine
 1 Pour some cold water into a large bowl. The bowl should be large enough to fit the chicken completely, but it should still fit in the refrigerator. Pour in enough water to cover the chicken. Use warm water to completely dissolve the salt. SPECIALIST'S ADVICE
Alex hong
Chef Alex Hon is the chef and co-owner of Sorrel, a New American Cuisine restaurant in San Francisco. Has been working in restaurants for over 10 years. Graduated from the American Culinary Institute and worked in the kitchen of Michelin-starred restaurants Jean-Georges and Quince. Alex hong
ChefSteaming will make the meat more juicy and flavorful. Alex Hon, chef and co-owner of Sorrel, agrees: “I don't like hammering the chicken as it ruins the texture of the meat. But when soaking, the chicken really becomes much juicier and more flavorful. "
 2 Add 3/4 cup (195 grams) salt for every 3.8 liters of water. All brine options include salt - it is necessary for water to penetrate the meat cells. The amount of salt can vary, but it is best to start with 50 grams of salt per liter of water. Stir well to completely dissolve the salt.
  3 Add sugar to the water. Sugar is not required in the brine, but it is very useful - it increases the caramelization of the chicken with any kind of heat treatment. It is best to add as much sugar as salt. You can use any kind of sugar - white, brown, raw sugar, or even molasses or honey. Stir the water until the sugar dissolves.
  4 Add any seasonings you like to the brine. Other ingredients can be added to the brine - black peppercorns, fresh herbs or fruit juices will perfectly complement the brine. Ingredients you can combine and add include:
 - Flavors such as: 2-4 cloves of garlic (chopped with a knife), bay leaf, a handful of thyme, sage, rosemary sprigs, 2-3 tablespoons of peppercorns, celery, juice of 1-2 large lemons or oranges, 1-2 tablespoons of mustard , cumin or coriander seeds.
- Beer and thyme brine: In a large saucepan, combine 4 350 ml cans of beer, 1 cup (260 grams) salt, 3/4 cup (150 grams) light brown sugar, a handful of thyme sprigs, 5 bay leaves, 1 tablespoon chopped black pepper, 6 cups ice.
- Lemon pickle with rosemary: 1 small onion, chopped into thin rings, 4 cloves of garlic crushed with the flat part of a knife blade, 1 tablespoon vegetable oil, 1 cup (260 grams) salt, 5 or 6 sprigs of rosemary, 1 liter of water, juice of 1 lemon.
 5 If you are adding spices to the brine, boil it before placing the chicken in it. Otherwise, the flavors will not penetrate the chicken meat. Combine all ingredients (salt, sugar, water, seasonings), bring to a boil and simmer for about 1 minute. Let the brine cool completely before continuing.
 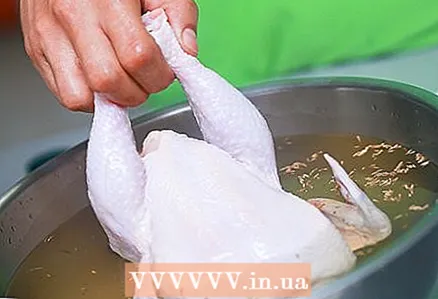 6 Place the chicken in the brine. Make sure the brine covers it completely. You can take both whole chicken and small pieces - the process technology remains the same.
  7 Place the chicken in the brine in the refrigerator and let it stand. Place the bowl in the refrigerator, covered with a lid or cling film. Leave the chicken in the brine for a few hours. Small pieces may take an hour or two, while a whole chicken will take 8-12 hours. If you are short on time, then even in a shorter period of time, at least 1-2 hours, the brine will have time to give the meat a different taste and improve its quality.
 - Never marinate chicken at room temperature, as this can lead to the growth of bacteria.
 8 Remove the chicken from the brine. Remove it from the brine and blot off excess liquid before cooking. Drain the brine into a sink.
Method 2 of 3: Making a dry marinade
 1 Know that dry marinade will make your chicken flavorful and very crispy. Liquid pickles and marinades are the traditional way to marinate chicken before baking, but many chefs have begun experimenting with dry marinades, which result in a stronger texture. The salt draws out moisture, the moisture dissolves the salt, turning it into a liquid, natural brine for the chicken to absorb.
 - For a dry marinade, use coarse salt. Fine table salt will cover too much of the chicken, dissolve too quickly, and the baked chicken will be too salty.
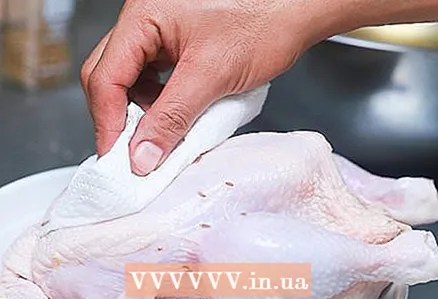
 2 Dry the chicken by blotting it. Take a paper towel and wipe off as much moisture as possible from the chicken's surface. Don't rub the chicken, don't squeeze it - just pat it dry with a towel.
  3 Mix dry marinade in a small bowl before applying. The dry marinade is simply rubbed into the chicken and consists almost of salt. However, you can add spices there. Start with 1 teaspoon of salt for every pound of chicken (two kilograms of chicken = 4 teaspoons of salt), then add any spices you like from the following:
 - 2 teaspoons of chopped black pepper
- 1 teaspoon paprika, chili powder, or cayenne pepper
- 1 teaspoon rosemary or thyme
- 1-2 teaspoons of garlic powder.
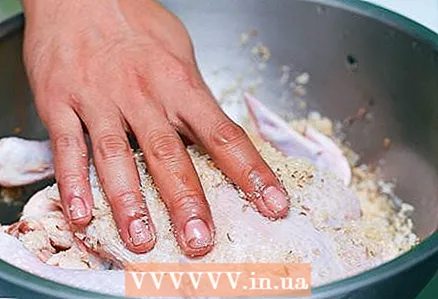 4 Rub the salt evenly on each side of the chicken. Rub the dry marinade over the top, bottom, inside, outside of the chicken. Rub a little more salt into thicker areas such as breasts and thighs.
 - Cover the chicken with an even, generous layer of salt. The chicken should not be completely covered in salt, but the salt grains should be visible everywhere.
- You may need another 1/2 teaspoon of salt to complete the marinating.
 5 Cover the chicken and let it rest in the refrigerator for 2 to 24 hours. The longer the chicken is marinated, the better the end result will be. But if you're in a hurry, two hours will be enough.
 - Try to leave the chicken to marinate overnight. Of course, two hours will be enough, but it will not be as effective. The longer the chicken is marinated, the better. But do not marinate the chicken for more than 24 hours.
 6 Remove the chicken and dry it. The chicken should have excess moisture and all the salt should be dissolved. Take a paper towel and blot the surface of the chicken, removing moisture. When you're done, it's time to put the chicken in the oven and add flavorings if necessary.
 - Try stuffing the chicken with lemon wedges, cloves of garlic, sprigs of herbs, placing the ingredients in the cavity of the chicken, by the legs and under the wings.
Method 3 of 3: Roasting the chicken
 1 Butcher the chicken so that the skin becomes crispy and the meat inside is juicy. It is known to be very difficult to keep roast chicken juicy, especially the breast. By cutting the chicken in this way, when it is cut and spread, the meat cooks more evenly and the surface is optimally crispy. It would be ideal to butcher the chicken before marinating, but at this stage it is not too late to do it. To butcher a whole chicken with Butterfly, you need:
 - Take a sharp knife or scissors, cut out the spine of the chicken. This is the long bone in the center of the carcass, opposite the breast.
- Place the chicken, breast side up, on a cutting board.
- Press with the back of your hand on the chest bones. You will hear a crackling sound and the chicken will flatten.
- Lightly brush the surface of the chicken with olive oil.
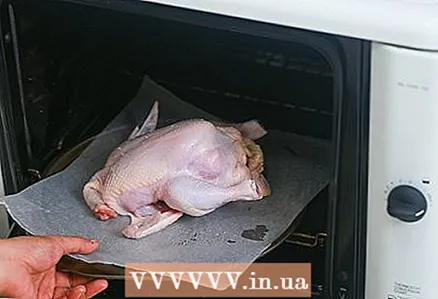
 2 Preheat the oven to 260 ° C, put the wire rack in the middle of the oven. Make sure there are no more grates on the bottom or top. Take a roasting or baking tray and place the chicken in the center of the tray.
  3 Add any flavors. Flavors like herbs and lemon add flavor during bake. Squeeze the juice of a large lemon on the chicken, add sprigs of rosemary or thyme under the wings and legs, sprinkle the breast with chopped black pepper.
 - If you are cooking a whole chicken, stuff it with lemon wedges, cloves of garlic, and herbs if desired, placing them in the center of the chicken cavity.
 4 Place the chicken in the oven and cover it with fat every 10-12 minutes. Take the olive oil and juice from the baking sheet and spread it over the chicken. Thanks to this, the meat will be juicy, the skin will become crispy. Use a long-handled spoon or paintbrush to spread the liquid over the chicken. Do not leave the oven open for too long as the oven will cool down and the chicken will take longer to cook.
  5 Cook the chicken for 45 minutes or until the cooking thermometer reads 65 ° C. This is the optimum temperature for breast meat; for complete safety, the legs should reach 76 ° C.If the outside of the chicken begins to darken faster than it is cooked on the inside, reduce the heat in the oven to 230 ° C.
 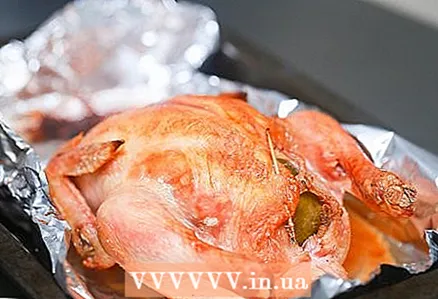 6 Let the cooked chicken stand for a while before you start cutting it. The chicken must stand for a while, otherwise the juice will leak out as soon as you start cutting it. Set the chicken aside, covered with cling foil. After 5-6 minutes, remove the foil, slice the chicken and start eating it.
Tips
- The amount of time to cook the chicken depends on its size, start testing a medium chicken (1.8kg or so) after 35 minutes.
Warnings
- Using a cooking thermometer can help you avoid the risk of food poisoning from raw meat.
What do you need
- Large bowl
- Water
- Salt
- Wooden spoon
- Sugar
- Chicken
- Cling film (optional)
- Refrigerator
- Paper towels


