Author:
Helen Garcia
Date Of Creation:
19 April 2021
Update Date:
1 July 2024

Content
- Steps
- Part 1 of 6: Selecting Sealant and Tools
- Part 2 of 6: Preparing the work surface
- Part 3 of 6: Sealing skirting boards
- Part 4 of 6: Working Safely
- Part 5 of 6: Finishing the Job
- Part 6 of 6: Deciding If Sealing is Right for You
- Tips
- What do you need
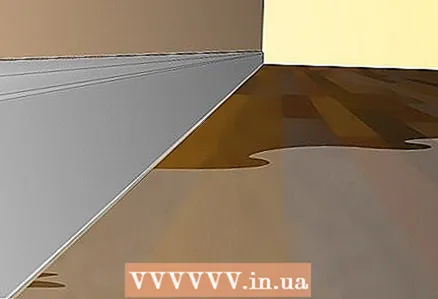
A sealant is a waterproof sealing material used to protect joints and joints in a home from damage and wear.While it is primarily used to seal crevices around doors, windows and more, sealant can also be used along the edges of your floor to seal the gap between the wall, floor, and baseboard. In addition to giving your room a finished look, the sealant also protects against possible water leaks and daily wear and tear. With the right tools, proper preparatory work and careful sealing, it is easy to ensure your skirting board is professionally sealed for a long time. Read on for how to get started with your sealant!
Steps
Part 1 of 6: Selecting Sealant and Tools
 1 Use latex sealer for delicate indoor work. One of the nuances of working with a sealant that can easily confuse newbies is the fact that there are different types of sealants for the same (at first glance) job. However, the different types of sealants have their own advantages and disadvantages, which may make some options more suitable for a particular job than others. For example, latex sealants are great for indoor and outdoor use. It does not have a strong odor, which is important in conditions of limited ventilation. It also has good filling properties, is easily washed off with water and is available in a variety of colors. Finally, the latex sealant can be painted over after drying, making it virtually invisible.
 - However, latex sealant is not as durable as other sealants, which can be a problem if the joint is exposed to temperature extremes, severe weather and heavy wear.
 2 Use acrylic latex sealant for long lasting results. As the name suggests, latex acrylic sealant is made from latex combined with acrylic resins. This type of sealant has all the benefits of latex sealant mentioned above. However, due to the properties of acrylic, this sealant is more flexible and durable than conventional latex, making it an excellent choice for interior work in areas that will be subject to high levels of wear and tear.
  3 Use silicone sealant for tough jobs and extreme temperatures. The most durable type of silicone based sealant. It is not easy to apply, but it is suitable for the most difficult conditions. The strength of the silicone sealant makes it an excellent choice for joints subject to extreme temperature fluctuations, difficult weather conditions and severe wear. For a durable joint in all weather conditions, there is no better option than silicone sealant.
 - However, silicone sealant has a couple of disadvantages. It cannot be painted, meaning you need to consider its original color (often transparent). It is difficult to clean with water, making drips and drips a serious problem during operation. And finally, when it dries, it gives off a rather strong odor, so good ventilation is essential when working with this sealant.
 4 Do not mix different types of sealants. While it may seem like a good idea to mix different types of sealant to take advantage of each type, you actually end up with a sealant that just doesn't work. Each type of sealant is formulated to work “alone”. If you mix different sealants, you end up with a kind of mishmash that either will not stick to the surface or harden, or will not be a reliable protection for the joint. Always use only one type of sealant to seal skirting boards where protection against water ingress is essential.
  5 Use a sealant gun for large jobs and tube sealant for minor repairs. If you are planning a relatively small and uncomplicated job, such as sealing a baseboard at the edge of a bathroom, you can usually get away with buying a couple of tubes of sealant that are squeezed out like toothpaste to make it easier to apply.For larger jobs, it is best to use a sealant gun and matching tube cartridges, which will greatly speed up the process. While working with a pistol requires certain skills, this option is definitely much more effective when performing a large amount of work.
 - Sealant guns are for the most part quite cheap and cost from 70-80 rubles.
Part 2 of 6: Preparing the work surface
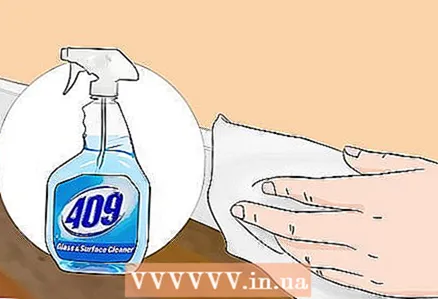 1 Clean the floor and baseboards. The sealant is very sticky - it sticks to anything it touches. Because of this, it is very important to ensure that both the wall and baseboard are cleaned prior to sealing. Dirt, dust and grease can mix with the sealant or stick to it, making it look unattractive. More importantly, they can reduce the sealant's ability to bond to the surfaces you are really want it to hold. Since one of the reasons for sealing skirting boards is to prevent possible water ingress, a secure connection is essential.
 - Use water and detergent to thoroughly clean the floor, baseboard and wall. It is advisable not to use soap and water, as this combination can leave a film of soap on the surfaces and prevent the sealant from adhering to them.
- If a lot of dust has accumulated on the floor, vacuuming is a quick and effective way to clean. If you have a fine nozzle, use it "hard-to-reach" to remove dust from corners.
 2 Protect the work area from interference. While working with a sealant is a perfectly safe process, having to redo work that has already been done is annoying. To minimize the risk of unnecessary mistakes, make sure your workspace is completely free of furniture, rugs, and other potential obstructions before starting work. If you have children or pets, it's best to make sure they can't get into your workspace by setting up a barrier or asking another person to watch over them. Stopping work to clean the sealant from the screaming toddler's hair couldn't be worse.
 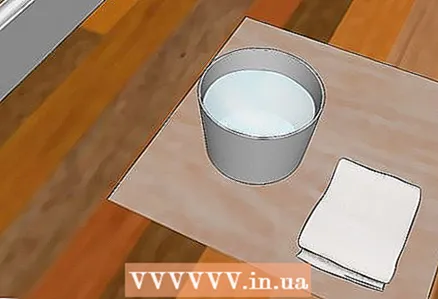 3 Keep water, detergent, and a couple of rags handy. When sealing a skirting board, mistakes are inevitable. And if this is your first experience, there will be many mistakes. Fortunately, when sealing, it is difficult to avoid serious errors. For the vast majority of mistakes you make, a simple combination of water and a rag will suffice, although many household chemicals do a pretty good job as well.
 - Additionally, since you will be on your hands and knees for most of the process, you can place rags under your knees to make it more comfortable.
- Note that, as will be explained below, water alone is ineffective in removing silicone sealant.
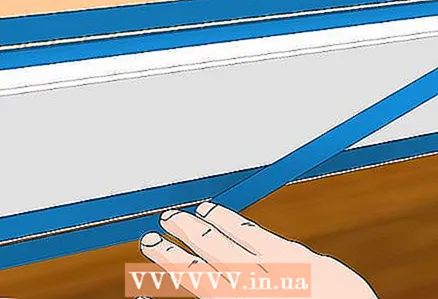 4 Apply adhesive tape before sealing. Perhaps the most important thing you can do to ensure an easy, effective sealing process is to apply the tape very carefully. Adhering the film will allow you to protect the surfaces from dripping and ensure that the sealant joint is smooth, clean and uniform. No special tapes are needed. Use regular duct tape (aka masking tape) made of thin paper, usually yellow or white.
 - It is advisable to glue two strips of tape along each area to be sealed. Glue one to the floor, along the plinth and almost touching it. Glue the other on the wall, about 1-2 mm above the plinth, parallel to it.
- One long strip of tape is the best option, but using multiple lengths of different lengths is also fine as long as they are parallel to the baseboard and aligned with each other.
Part 3 of 6: Sealing skirting boards
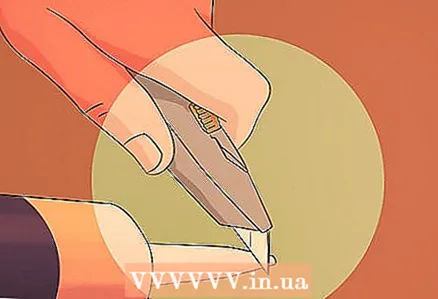
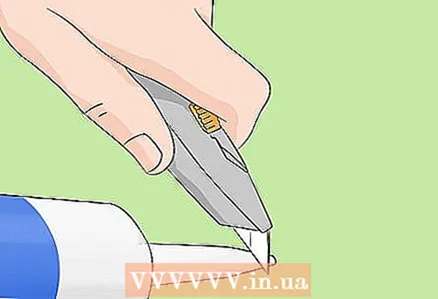 1 Cut off the nose of the sealant tube. Sealant guns use special cartridges to assist in applying the sealant. They look like elongated cylindrical tubes with a thin tapered "nose" at one end.Before inserting the tube, take a knife or sharp scissors and cut off the very tip of this "nose" at approximately 45 degrees to create a small, beveled hole. This hole should be 3 millimeters in diameter, like the thickness of a match.
 - Try to trim the tip as carefully as possible. It is easy to make a small hole larger, but it is not possible to make a large hole smaller.
 2 Punch through the septum of the tube. Next, using a punching tool (usually a piece of stiff wire attached to the gun), poke a few holes in the septum of the tube through the hole in the tip you just cut. This will allow the sealant to flow easily from the tube. The more holes you make, the easier the sealant will come out. 4-5 holes are usually sufficient.
 - Please note that in plastic tubes, as a rule, there is no septum. If you do not feel the slightest resistance when trying to break through the partition, then this is your case too.
 3 Insert the tube into the gun. Most sealant guns can be charged by:
 - Press and hold the trigger of the gun;
- Pull the pressure bar back while keeping the trigger pressed;
- Insert the tube into the gun, putting the tube back into the gun, then replacing the nozzle;
- Make sure the cut on the spout points down. You may have to twist the tube to do this.
- Rotate the hold-down bar so the grooves are facing down. Squeeze the trigger lightly so that the pressure bar touches the bottom of the tube until you feel resistance. You are ready to work with the sealant!
 4 If you have little experience with a pistol, practice first. To practice, spread a large piece of newspaper on the floor and hold the nozzle of the gun over it. Squeeze the trigger lightly to let the sealant flow out of the nozzle. When sealant begins to flow from the gun, slowly push it back while maintaining constant trigger pressure. Try to make a long, thin, unbroken line of sealant without gaps or thick beads. When finished, remove the spout from the work surface, rotate the hold-down bar so the slots "point" up and release the trigger. The pressure on the tube will disappear and the sealant will stop coming out.
 - Don't pull the trigger too hard - you could damage the tube, create a mess and have to start over.
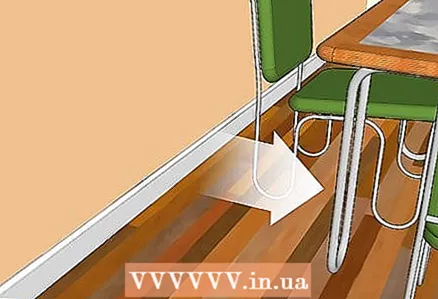
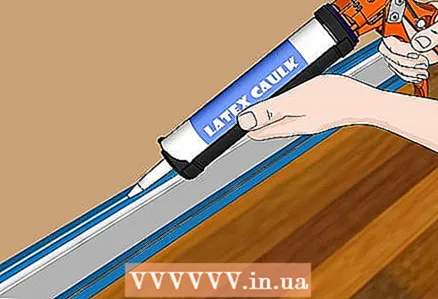 5 We seal the skirting board from above. When you are ready to work with a clean-cut sealant, hold the nozzle of the gun toward the area where the wall and the top of the baseboard meet. Keep the hole in the spout directly against the wall (this means you have to hold the gun diagonally). Turn the grooves on the pressure bar downward. Squeeze the trigger, applying even pressure, and start moving the gun along the baseboard as the sealant will flow out. Move slowly and evenly. Continue along the entire length of the baseboard. Wipe up any drips with a damp cloth.
 - Remember to repeat the process outlined in the workout step to stop the sealant flow when you complete the run.
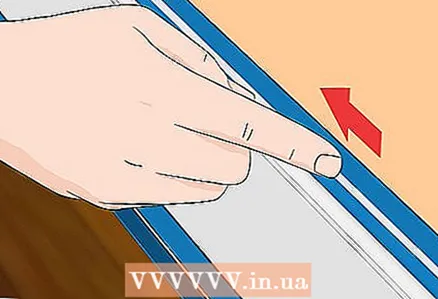 6 Smooth out the sealant with your finger. Once you have sealed one edge of the skirting board, it is advisable to smooth out the sealant with your finger to ensure that the sealant fits into the gap as securely as possible and to create an even and smooth surface. Run your fingertip over the sealant, about 50 cm at a time. Once a decent amount of sealant has accumulated on your finger, wipe it off with a clean, damp cloth. Wipe up any spills with a separate, damp cloth.
 - Do not press too hard when smoothing. Press only lightly with your finger. Pressing too hard can completely separate the sealant from the wall.
 7 We seal the baseboard from below. Now, repeat the sealing process at the bottom of the skirting board. Maintain constant pressure on the gun trigger to apply sealant along the bottom edge of the baseboard.Sealing the bottom edge of the skirting board after you have flattened the sealant on the top edge will ensure that no sealant residue from the top ends up on the bottom.
 - When finished, smooth out the sealant with your finger as described above.
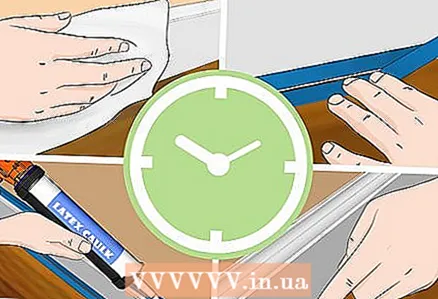
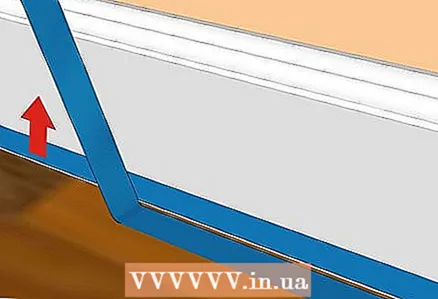 8 Remove the masking tape before the sealant dries. When you've finished sealing and nicely smoothed both edges along the entire length of the skirting board, it's time to remove the masking tape. Be sure to do this while the sealant is still fresh. If the sealant dries out before you remove the tape, you may end up tearing the sealant off the skirting board along with the tape and have to do all the work again. Grasp one end of the tape and gently pull it off the surface at a 45-degree angle. Continue tearing it off slowly and gently along the entire length of the tape. Do the same for the second strip of tape.
 - If you used several pieces of tape on the same surface, peel the tape off the wall in the same direction as it was glued. For example, if you glued three pieces of tape overlapping from left to right, similarly tear off the tape from left to right.
- Be careful with the tape that has been torn off - adhering sealant residues can easily stain clothing.
Part 4 of 6: Working Safely
 1 Provide adequate ventilation. For the most part, working with a sealant is not a particularly hazardous job. During this process, you are unlikely to endanger yourself or others. However, there are things you can do to improve your (already high) chances of finishing your sealant job unharmed. First, ensure proper ventilation of the work area. Installing a fan or opening windows will improve airflow through your work area, which will help to dispel odors and fumes that come from damp sealant. This is especially important for silicone sealant, the smell of which is the strongest.
 - If you work outside, you don't have to worry about it.
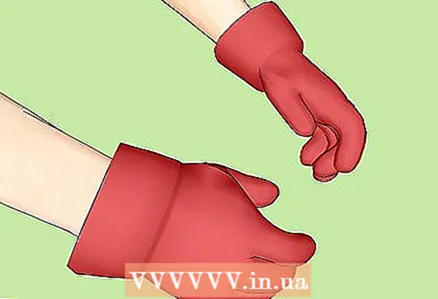 2 Use gloves if desired. The sealant is not hazardous or corrosive, like some substances used in repairs; it is designed to be as inert as possible. However, it is very sticky and difficult to remove from skin and clothing (especially if it dries), so you can wear gloves when working with the sealant to avoid sticking to your fingers and sleeves. It will also make cleaning much easier and faster.
 - You can also wear safety goggles if you wish, as the sealant can be painful if it gets in the eyes (although this is unlikely).
 3 Handle the knife with care. The moment when you are most likely to get hurt, ironically, comes at the very beginning of the work with the sealant. When cutting off the end of the sealant tube, be extremely careful not to cut yourself. If you are using a knife, keep your hand away from the tip. Always cut away from your body, not towards you. When not using a knife or scissors, move them away from your work area.
  4 Do not eat or inhale the sealant. Finally, remember that while the sealant is fairly safe, it is not intended to be ingested or inhaled and can cause serious health problems in such cases. If you, or someone close to you, accidentally eats the sealant, see a doctor immediately or call an ambulance.
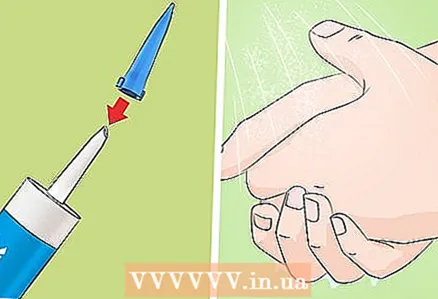
 - Be sure to wash your hands after handling the sealant so that it does not enter the body through food, drink, coughing, and so on.
Part 5 of 6: Finishing the Job
 1 Save the sealant until it cures. Once you've sealed the skirting board and removed the masking tape, you just have to wait for the sealant to dry. Different types of sealants have different drying times, so look at your sealant packaging for more information. Regardless of how long it takes to dry, it is advisable to keep the sealant free of dust and dirt while it dries.It is also advisable to keep small children and pets away from fresh sealant.
 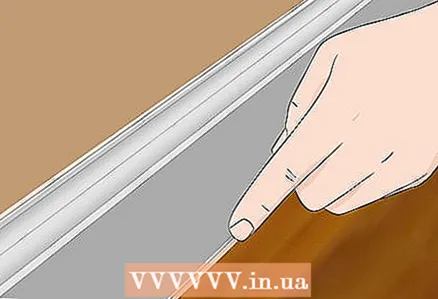 2 Correct errors manually. When working with a sealant, minor mistakes are common. Usually, fixing these errors manually before that how the sealant hardens with your fingers is much easier and easier than fixing mistakes after the sealant is dry. To do this, simply repeat the smoothing process with your finger, adding a little sealant if necessary. If you notice an error after thatOnce the sealant has dried, re-tape the tape to the desired area, apply the sealant to your finger, and seal the crack or crevice until the sealant coalesces with the surrounding dry layer. When the sealant is dry, the repair will be barely noticeable.
 - If you have worked with a sealant gun and have a tube of sealant in stock, you may find that using the tube is much more convenient for finishing touches than reassembling the gun, applying sealant, and possibly removing drips. But be sure to use the same type of sealant that you used for your main job!
- As usual, remember to remove the tape while the sealant is still wet.
 3 Clean up everything. Congratulations! Ready. It remains only to return the place where you worked to its original form. Relieve pressure in gun and remove sealant tube. Most tubes come with a stopper to keep sealant residues. If your tube is without a cork, you can wrap the spout in plastic and secure with an elastic band. Wash your hands with soap and water and dry or clean the equipment with a rag. Remove debris or debris and put back furniture, rugs, and other items you removed.
 - When you later want to use leftover sealant, you may need to punch through the dried sealant in the nose of the tube with a nail or piece of wire.
Part 6 of 6: Deciding If Sealing is Right for You
 1 Let's figure out where the use of a sealant is permissible. In general, sealant treatment is a fairly cheap and uncomplicated type of home repair. However, it has its limitations on its use. The sealant is suitable for sealing small, thin gaps between skirting boards and the floor or wall. However, he not suitable as a protective coating on the skirting board itself, which must be painted to provide protection against water damage and wear. In addition, while skirting seals are great for waterproofing floor edges, they provide little protection against significant flooding such as pipe breaks, leaking ceilings or walls, and so on. Thus, baseboard sealing is best suited as part of a full-scale waterproofing of a room, which should also include painting, plastering, tiling, and so on.
 - It is also worth noting that skirting boards cannot be sealed with sealant if the floor or wall is made of untreated wood. In this situation, the sealant provides little protection against water and cannot create a waterproof joint when applied to this type of surface.
 2 We estimate the time spent on working with the sealant. The time it will take you to complete the sealing depends on the amount of work, as well as how long it will take you to acquire skills in working with tools. A single room job can be completed in an hour or two, while larger jobs can take days. Regardless of the scope of your task, take your time, rather plan to spend more time on it than you think will be needed. Careful sealing can be time-consuming in the short term, but mistakes in such work due to haste can cost you much more time in the long run.
  3 We estimate the cost of sealing. In general, working with a sealant is inexpensive. Budget sealant guns cost from 60 rubles and about 200-300 for high-quality models.A sealant (depending on the volume) also costs from 80 rubles. Plus, you may need to purchase masking tape, scissors or knife, and gloves. In general, you are unlikely to spend more than 500 rubles. If you have any of these materials or tools, the cost will be lower.
 - The cost will fluctuate depending on the number of sealant tubes you need. For example, for a bathroom of 300x300 cm, you will need from 1 to 2 tubes. It would be wise to buy a little sealant with a margin - you can always leave the leftovers for later.
Tips
- If you drip the sealant onto the wall, floor or anywhere else, wipe it off immediately with a damp cloth.
- It is convenient to paint the sealant with a special brush for window frames, with bristles cut at an angle of 45 degrees.
- Allow the sealant to dry for at least 24 hours before painting.
What do you need
- Sealant (in tubes or tubes)
- Sealant gun
- Masking tape
- Knife or scissors
- Gloves (optional)
- Glasses (optional)
- Fan (for ventilation, if necessary)


