Author:
Alice Brown
Date Of Creation:
28 May 2021
Update Date:
1 July 2024

Content
Laying and tidying artificial turf is easy. By following the instructions in the article, you will be able to lay a neat, professional-quality lawn yourself. All that is required of you is diligence and attention to detail.
Steps
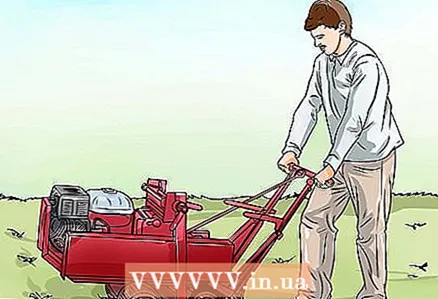 1 Remove vegetation (grass or weeds). You can use the Sod Cutter to complete this task. The tool can be rented from a local car rental company or garden supply store. The turf cutter has the following advantages: a uniform cut of the lawn, less damage to existing plumbing and irrigation systems, and if you have a lawn, you can simply roll it up and dispose of it with little time.
 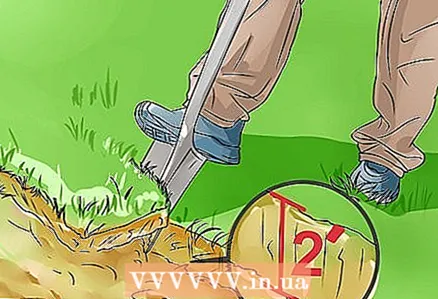 2 Remove a layer of earth at least 5 cm deep. You can remove a layer of soil to a shallower depth, but this is how much is needed to ensure proper drainage, which is especially important if pets walk on your lawn and leave waste products (urine and feces) on it.
 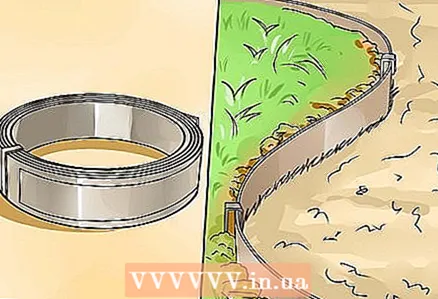 3 Install a flexible curb around the perimeter of your lawn. Thanks to this protection, dogs will not be able to rip out the lawn. Instead of a curb, you can nail the lawn with 150 mm nails every 10 cm.
 - When using flexible curbs, opt for composite materials that are not corroded. Wood will not work.
- Dig a small trench along the edge of the lawn to a depth of 15 cm using a trowel or shovel.
- Place the flexible curb in the trench so that the top is about 2 cm below the finished lawn surface - for example, if you put a cement board next to the lawn, then the top edge of the curb should be 2 cm below the slab.
- Secure the curb with stakes, then backfill the trench with gravel or excavated soil and tamp down firmly.
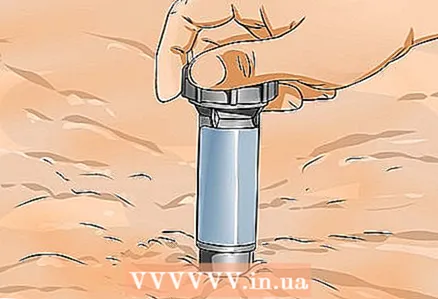 4 Cover all available irrigation points. You can also re-arrange them to "irrigate" the turf and keep the irrigation system.This will be very useful on especially hot days and will allow you to cool the lawn or rinse it after the remains of the animal's vital activity.
 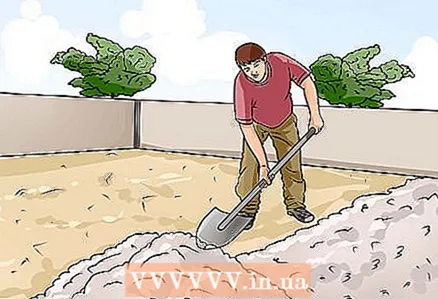 5 Add gravel. It is recommended to fill in a 5-6 mm layer of self-compacting gravel. Coarse gravel (12 mm or more) will not allow the embankment to be as flat as possible. The gravel layer should be 6mm above the flexible curb with a slight rise in the middle of the site. For a plot of 6x6 m, it is recommended to raise the level of the middle part by 25 mm relative to the edges. This will make your lawn look like a small “hill”. The fact is that flat artificial turfs look very unnatural!
 - 1 cubic meter m of gravel allows you to cover a plot of 35 sq. m with a layer of 25 mm. In this case, 1 cubic meter. m of gravel weighs about 1200 kg.
 6 Flatten and compact. Smooth with a large aluminum rake. This rake has teeth on one side and a flat leveling surface on the other. Spread the gravel as evenly as possible. Hose the area and compact with a vibrating plate (also available for rent).
 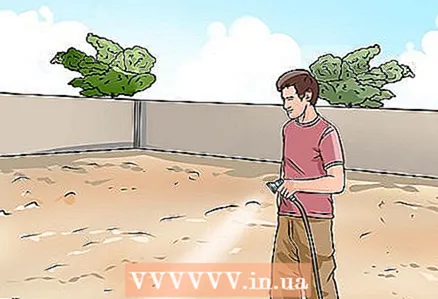 7 Spill water over the area again. At this stage, the site needs to be well moistened, as after a heavy rain lasting 10 minutes.
 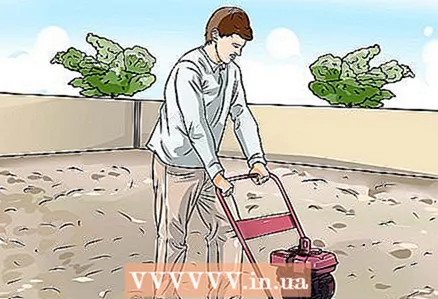 8 Compaction with a vibrating plate again. Small lines will remain at the edges from the edge of the vibrating plate. Flatten them with the flat side of the rake. Also, remove any raised gravel around the edge of the future lawn (along the flexible curb) so that the lawn does not look fake. You can use a stiff broom and sweep away excess gravel.
 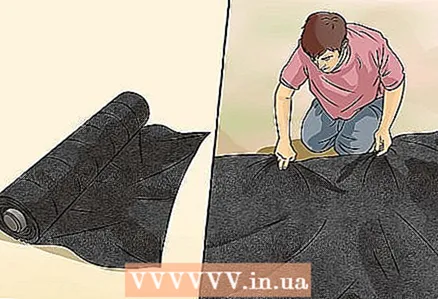 9 Lay a layer of weed control. It all depends on the weed situation in your yard. If weeds are raging in the yard, then be sure to lay a layer of protective material.
  10 Lay an artificial turf. At this stage, you need to know the following. The width of the lawn is usually 4.5 m, so you need to cut it correctly. It is very difficult to make a neat joint lengthwise.
 - For example, if the area of your lawn is 6x6 m, then you will need one piece 4.5 m wide and 6 m long, as well as a second piece 1.5 m wide and 6 m long.Unfortunately, the remaining material is 3 m wide and 6 m long will not be useful to you. Unfold the first piece, stacking it close to the edge and leaving a few centimeters of headroom. For example, for a 6x6 m section, cut a 6.2 m long strip.Place a 1.5 m wide and 6 m length next to it.
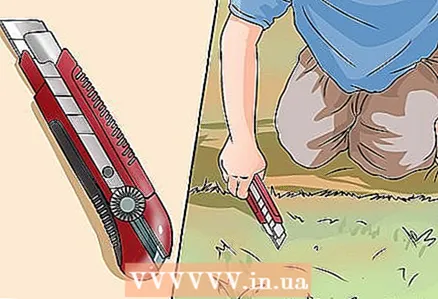 11 Rough cut. Cut off excess material on the sides before making a precise cut around the edges. We cut off a third of the stitch. By making these cuts, you will have two straight edges that will form the seam.
 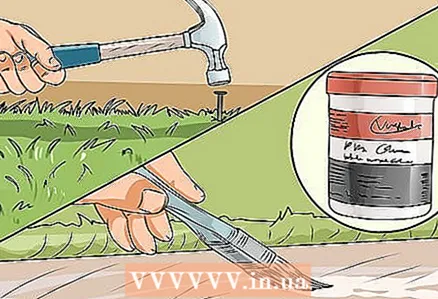 12 We carry out a seam. There are two options available. You can glue the seam or use staples / nails. It is recommended to use glue and professional joint tape. This will create an invisible seam without nails in the lawn. This will make the site safer and you will not tear the material when pulled.
 - To sew a seam, bring together the two edges of the sections with a small gap between them, which is intended to replace the stitches in the lawn. This means the following: if the stitches will be located at a distance of 10 mm, then bring the two segments together until the distance between the stitches is 10 mm. If you bring it too close, you get a kind of "mohawk" when parts of the material creep on top of each other. At a great distance, there will be a bald spot. But a longer distance is still better than a mohawk.
- After making the correct gap and giving the seam a neat look, secure the lawn with a few nails about 45 cm from the seam. A couple of nails per meter will be sufficient. They will help to completely protect the lawn from displacement.
- Now stretch the lawn sections a little, exposing a few tens of centimeters of gravel. Straighten the seam tape (should be 30 cm wide). Apply glue to the tape and spread it evenly in a thin layer.
- The glue should dry within 10 minutes. Place the turf back onto the seam tape, keeping an eye on the edges of the lawn.Place sandbags or similar weight on the seam so that it does not move.
 13 After the joint has dried, remove the sandbags (for example, the next day). Now you can stretch the lawn. Stretching is best done in length rather than width. If the plot is less than 40 sq. m, then it is enough to pull on only one side.
 - To do this, pull the turf by the edge, line it up with the edge of your site, and secure the turf to a flexible curb or 150mm nails.
- Use your feet to straighten the lawn from the nailed side, trying to smooth out any creases. Drive nails every meter of length by 1.5 meters wide so as not to lose tension. Repeat until you get to the edge of the strip.
- When you reach the opposite edge of the strip, cut the material off to the edge or curb and secure the edge. You can trim the edge and pin the sides at the same time. By securing the sod with nails around the perimeter, you can remove the nails from the inside of the lawn.
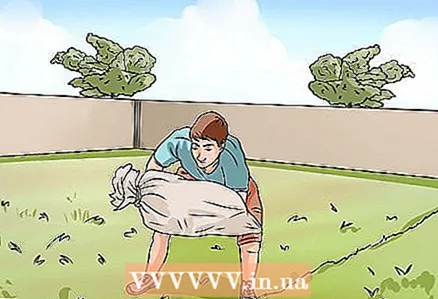
 14 Backfill. The last remaining step is backfill. Backfill promotes vertical orientation of the edges, gives the lawn a natural look and prevents the turf from heating up. As backfill, you can use quartz sand (clean beach sand), Durafill (acrylic sand, usually green), rubber crumb (there are reports of minor toxicity) and deodorant fill for animals. In most cases, sand will do. If you have multiple dogs, it is recommended that you use products such as Zeofill to remove odors.
 - Use a power brush to spread the backfill, keeping the edges of the lawn vertical. Then, using a bulk material distributor or a shovel, spread the backfill over the lawn at a value of 7 kg / sq. m. Then brush over the lawn again to distribute it evenly. If the lawn looks dusty, hose it down.
What do you need
- Sharp knife
- Saw
- Pick
- Shovels
- Wheelbarrow
- A hammer
- Nail gun


