Author:
William Ramirez
Date Of Creation:
15 September 2021
Update Date:
1 July 2024

Content
Installing your front door is fairly straightforward, but the mistake will cost you dearly. If you fix the door incorrectly, unwanted drafts will arise in the house, and the door frame may also be damaged. In this article, you will find helpful tips on how to properly install your new front door.
Steps
Part 1 of 2: Preparation
 1 Remove the old door, as well as the surrounding trim, exterior molding, and doorframe. Anything that formed the "frame" of the doorway should be removed.
 - Most doors are currently sold in a ready-to-install condition, meaning they are already attached to the door frame. When properly installed, this ensures tight contact between the door and the jamb.
- The doorframe is usually secured with nails, screws and putty. Removing the screws is fairly easy, while removing the putty can sometimes take a lot of effort. Some silicone-based putties and sealants require special chemicals available at many hardware stores to remove.
- Removing the external molding of an old door may require considerable effort; there are no special techniques, you just need to pry the frame with a lever (crowbar).
- The inner frame can also be torn off with a crowbar; when doing this, be careful not to damage the surrounding wall or peel paint or wallpaper from it. Together with the crowbar, you can also use a spatula, pushing it between the wall and the frame and gently prying the latter.
 2 Determine if the doorway is level. Apply a level to the threshold (floor), sides and top of the opening. If they turn out to be uneven (horizontal and vertical), it may be necessary to impose planks in some places to align the opening.
 - The most common problem occurs with the threshold. If the threshold is outside and exposed to the weather, it can warp and even partially collapse. In this case, remove the old threshold and make the same from the new boards.
 3 Measure the doorway. It is necessary to measure the height, width and depth of the opening, determining the exact dimensions of the door to be purchased.
 - Don't underestimate the importance of measuring the depth of the opening. If the walls are quite thick and the door frame you purchased will be significantly thinner, you will need to install door frame extenders. This shouldn't be too difficult, unless the difference between the thickness of the walls and the frame is very large, so be careful and be sure to take into account the depth of the doorway.
 4 Purchase the materials and tools you need. In addition to the door with the frame itself, you will need a few more things:
 - Wooden wedges or slats to hold the new door in place while hinged.
- Screws or nails to secure the door frame. Find nails or screws of the correct length.
- Electric drill for drilling holes and driving screws that hold the door frame in place.
- Putty or sealant to seal possible holes between the door jamb and the wall.
- Cornice and canopy (if the door is facing out) to protect the door and jamb from moisture.
Part 2 of 2: Installing the door
 1 Seal the edges of the opening with putty so that the door frame fits snugly against the wall. After installing the door, these areas will become inaccessible. Pay attention to irregularities and grooves in the wall, which should be filled with putty so that air does not pass through them and moisture does not accumulate there. Pay special attention to the threshold. The putty takes a long time to dry, so it will still be soft when you start installing the door.
  2 Place the door in the opening. As a rule, it is easier to first place the bottom edge of the door on the threshold, and then lift the door and fit it to the opening.
 - Insert the stored wedges between the door and the jamb, firmly locking the door in the correct position.Often this can only be done from the inside, since many entrance doors are equipped with external molding, which completely covers the gap between the door and the jamb.
- Before securing the door with nails or screws, use a spirit level to make sure it is level.
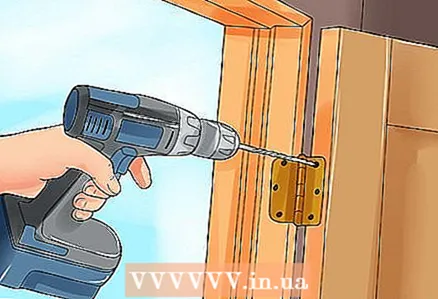 3 Install the door frame into the opening. Fix it firmly with nails or screws.
 - Most ready-to-install doors come with a few long screws specifically designed to secure the door to the opening. Remove a few short screws holding the door to the frame and replace them with long screws.
 4 Install the curtain rod and visor. The visor is screwed or nailed over the door so that it covers the threshold, and the cornice is attached to the top of the outer molding of the door.
  5 Fill in the edges, completely eliminating any holes. This is necessary so that there are no drafts in the house, and moisture does not accumulate in the gaps between the door and the wall.


