Author:
Janice Evans
Date Of Creation:
27 July 2021
Update Date:
1 July 2024

Content
We've all had this experience at least once. You are about to go out the door, the mood is great, and suddenly you notice disheveled eyebrows in the mirror. We'll teach you how to pluck them properly to keep them in check, and we'll show you a variety of quick methods to tame those annoying eyebrows, which will be especially useful with a limited amount of time.
Steps
Method 1 of 2: Pluck your eyebrows
 1 Determine how the eyebrows should be shaped to complement the face. Take your pencil and place it vertically on one side of your nose. The place where the pencil lies is the starting point of the eyebrow. If yours turned out to be a little shorter, in this case, you can slightly complement the missing part with an eyebrow pencil or shadows.
 - Then tilt the pencil towards the eye without lifting the base of the pencil from the nose. When the pencil is directly over the pupil, stop and see where it is pointing. The top of the brow arch should be where the pencil stopped over the pupil.
- Finally, while still holding the bottom of the pencil near the nostril, continue moving it towards the end of the eyebrow. The brow should end at the point where the pencil extends beyond the eye. As in the beginning of the eyebrows, you can always extend it a little if the length is not enough. If it is too long, then it is worth plucking out the excess for a more harmonious appearance.
 2 Pull out any hairs that don't fit your ideal brows. Use tweezers and a magnifying mirror to carefully remove any hairs outside of your constructed brow line. Match the curve at the bottom of the eyebrow to its top. The end of the eyebrow should be near the end of the eye socket.
 - Do not thin out the center of the brow. At this point, it should be the widest. Also, don't remove the hair at the top unless you have some particularly insanely frizzy hairs. Use the natural shape of the top of the brow to form an arch.
 3 Start at the bottom of your eyebrow. Act slowly, intermittently, to see how thin they get. Make sure not to overdo it. After finishing work with the lower part of the eyebrow, you should pay attention to the upper one. Many salons recommend not plucking this side, but it will help those who find the brow line "uneven". By thinning the excess hairs at the top, you will give them a cleaner look.
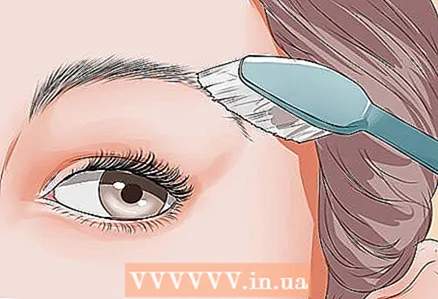
  4 Tidy up your eyebrows carefully. If you are doing this at home, then you should use an eyebrow brush to be able to brush upward. In the process, lightly trim the hairs that stick out above the eyebrows. Be very careful not to cut too short. Then repeat this process, brushing your hair down while trimming.
 - Although the entire procedure can be carried out at home, it is still recommended to consult a specialist in order to avoid accidents and not cut too short, which can lead to the formation of bald patches in the thickness of the eyebrow.
 5 Make your brows a little different. The eyebrows should not be symmetrical. Analyze the difference in their natural shape, the placement of the nose and eyes, to have a guideline for plucking. Contrary to the popular belief of most makeup experts, finish off one eyebrow before moving on to the second. In the end, you can compare them and make sure they look harmonious.
Method 2 of 2: Use other methods
 1 Use your toothbrush as a comb. Place an old toothbrush under running water, then shake off any excess. Then dry the bristles a little by placing your finger on the top of the bristles and going down while pressing firmly. You want it to stay slightly damp. Then take a brush and shape your brows.
 - Use only the top of the bristles to line up the arch and corner of the brow. You don't have to repeat the entire procedure again for the second eyebrow, but simply comb through it instead.
- If your eyebrows are really unmanageable, use a small amount of hairspray.
 2 Pull out in sharp movements. Use a pencil to draw the desired shape. Then use a pair of tweezers to remove any hairs that are outside and quickly brush with a dry toothbrush. Fill in the gaps with an eyebrow pencil and blend until they appear as uniform as possible.
 - Be sure to make sure that really long, edged hairs do not grow out of the center of the eyebrow. If so, you can trim them, but be very careful not to ruin the shape.
- Take a magnifying mirror to make the process easier. It really helps to spot some of the unruly hairs.
 3 Epilate your eyebrow. Use wax strips at home, however, to avoid potential eye hazard, do not use cold or hot wax. If you decide to do a full hair removal, then watch the video on how to draw eyebrows correctly and try some of these methods this coming weekend. Make sure your brows end up looking natural and match the color of the pencil to your hair.
 - Proceed gently while waxing. It's easy to overdo it and end up looking like a witch.
 4 Consider visiting a professional hair removal studio. Most nail salons will charge you inexpensively for such a service. However, you can ask your friends for recommendations about the most suitable salon for these purposes, since non-professional depilation can be very painful. After using the wax, you will most likely apply a special cream and pluck out the missing hairs. This is a great option if you are still looking for the right brow shape but are not sure how to get the desired result.
  5 Apply conditioner while you shower. It may sound strange, but applying a small amount of conditioner to your eyebrows will help them look smooth, shiny, and make them more obedient after showering.
Tips
- Once your eyebrows get used to it, repeat the procedure every two months.
- If you are having trouble finding petroleum jelly, you can substitute a sticky cream for it.
- Be patient. It takes a while for the eyebrows to get used to it.
Warnings
- Only pluck if you are confident in your actions.
- Never shave your eyebrows. It will look bad afterwards.


