Author:
William Ramirez
Date Of Creation:
16 September 2021
Update Date:
1 July 2024

Content
- Steps
- Method 1 of 5: Decorate the candle with sparkles
- Method 2 of 5: Decorate the candle with dried flowers
- Method 3 of 5: Translate images from paper napkins
- Method 4 of 5: Wrap the candle in different materials
- Method 5 of 5: Other Ways to Decorate Candles
- Tips
- What do you need
- Decorating candles with sparkles
- Decorating candles with dried flowers
- Translation of images from paper napkins
- Wrapping candles with various materials
- Other ways to decorate candles
Decorating a candle can be fun and easy enough on a boring rainy day. Decorated candles are a great gift for friends and family, and they are also perfect for various celebrations. In this article, you will learn how you can decorate candles with sparkles, dried flowers, ribbons, melted wax, and other materials.
Steps
Method 1 of 5: Decorate the candle with sparkles
 1 Choose a candle to decorate with sparkles. Thick straight candles are the most popular choice, but thin straight, tapered and small candles can also be used. However, it is not recommended to use tealight candles due to their small size.
 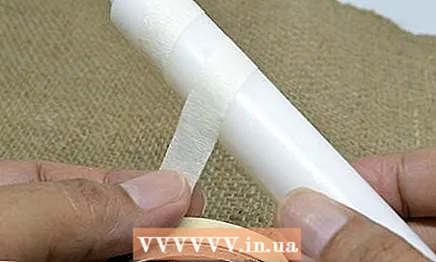 2 Cover with masking tape those areas of the candle that should not be covered with sparkles. If you wish, you can decorate the entire candle with sparkles in whole or only partially. For example, you have the option of only half-covering it with glitter, or applying a glitter stripe pattern. If you decide to decorate the candle only in places, cover with masking tape those parts of it that should not get glitter.
 - Instead, you can stencil the candle to create a shiny, specific shape, such as a heart or a star, on its surface.
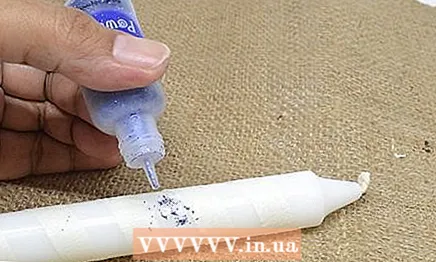
 3 Apply decoupage glue to the candle. You can use any kind of decoupage glue you want. Apply it with a wide brush or sponge to the areas of the candle that you want to cover with glitter. Try not to smudge the masking tape with glue if you use it. This way you will avoid chipping on the glitter coating in the future.
 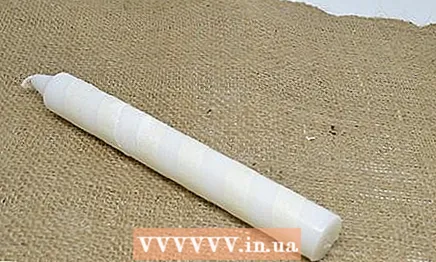 4 Let the glue dry and then apply it in a second coat. The first layer of glue will be the base on which the second layer will adhere better.In this case, the second layer of glue will allow you to level the first layer, eliminating traces of streaks. Do not let the second layer of glue dry.
 - If you decide to completely cover the candle with sparkles, apply the glue to just a small part of the candle this time. You will grease the candle with glue and cover the parts with glitter so that the glue does not have time to dry out ahead of time.
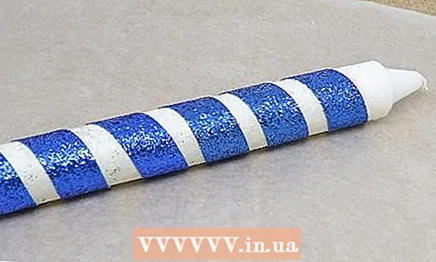
 5 Sprinkle sparkles on the candle. Place a sheet of paper underneath with a fold in the middle. Sprinkle a generous amount of sparkle directly over the leaf, rotating it as you work. Very small glitters will work best on a candle, but you can also add larger glitters to create a textured surface.
 - If you are covering the entire candle with glitter, after finishing the first section, apply glue to the next section. Sprinkle glitter on it as well. Continue in this order until you have glittered the entire surface of the candle.
- In fact, it is not necessary to use glitter. Try sand for a tropical effect, or Epsom salt (Epsom salt) for a snowy effect.
 6 Let the candle dry on a piece of tissue or wax paper. Now that sheet of paper you were working on can be used as a funnel to pour the spilled glitter back into the jar and not let them go to waste. The drying time of the candle depends on the glue you use. However, this will take at least a couple of hours.
 - Excess glitter will crumble from the candle on its own. Otherwise, you can gently knock on the candle.
- If you have covered a small-diameter straight or tapered candle with glitter, place it on the candlestick.
 7 Remove the masking tape or stencil from the candle, if used. Just pull on the tape or stencil to peel it off. Do not jerk it on glitter-covered areas, or you risk creating chips. If the glitter does come off, use a thin brush to fill in the decoupage glue with a thin brush and then sprinkle glitter over the area.
 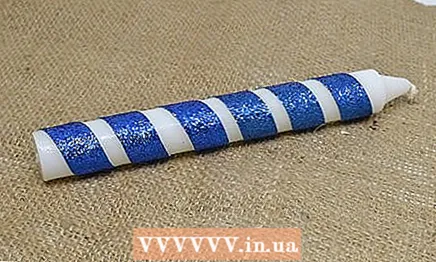 8 Apply a third layer of glossy decoupage glue to the candle to protect the glitter from shedding. It is permissible to use even aerosol glue, but you must first make sure that it can be used as a protective coating, otherwise, refuse aerosol glue. You should also check that the protective coating will give exactly a glossy result, otherwise the glitter will no longer shine so well.
Method 2 of 5: Decorate the candle with dried flowers
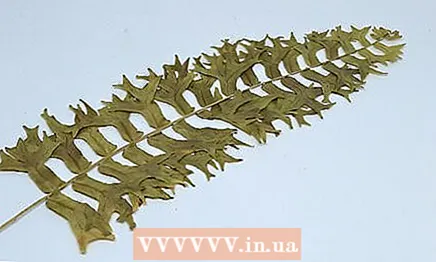 1 Choose flat dried flowers to work with. They can be purchased at a craft store or online. You can also dry the flowers yourself by placing them between the pages of the book. The flowers used must be flat.
 - It is not necessary to use only flowers, fern leaves and other plants will also serve as a good decoration.
- How many colors to use is up to you. You can take just one or three flowers, or completely decorate the candle with flowers.
 2 Heat a metal spoon over a flame. Light an extra candle (not the one you are going to decorate). Bring the bottom of the spoon to the flame (in the same position as you usually eat from it). Wait a few seconds for the spoon to heat up.
 - The spoon should not be too hot to burn your fingers. Its heat should only be enough to melt the outer layer of wax near the candle.
- Use an oven mitt if the spoon gets hot so you can grip it with confidence.
- If you don't have an extra candle, you can heat a spoon over a gas stove burner or even over a lighter.
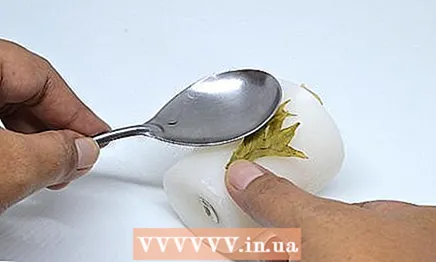 3 Use a spoon to press the dry flower onto a thick candle. Take the thick, straight candle that you are going to decorate and place it on its side. Attach the dried flower to the candle, then press down on it with a heated spoon. Wait a few seconds and remove the spoon.
 - If the wax does not soften, the spoon is not hot enough. Heat it again over the flame.
- Candles of white and milky colors allow you to make the original colors of dried flowers the most expressive.
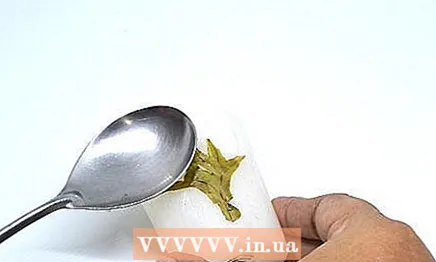 4 Continue pressing down on the flower until it sticks to the candle. Use the spoon to apply the spoon to different areas of the flower, including the stem and core, until the wax melts underneath and fixes the flower. Preheat the spoon periodically over the fire.
 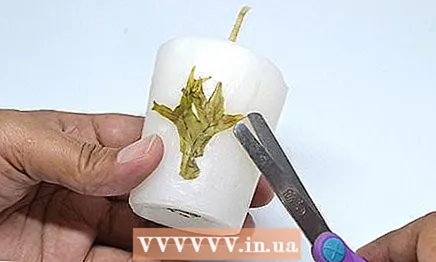 5 Cut off excess stems, petals, or leaves with small scissors. Examine the candle and notice the stems, petals, and leaves that are sticking out of the wax. Cut off excess protruding parts with small scissors. Nail scissors are especially well suited for this kind of work.
 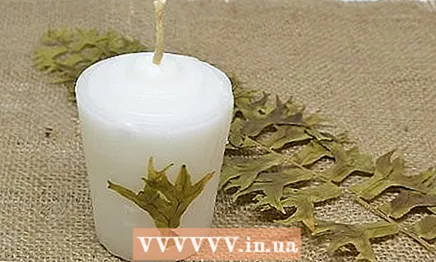 6 Dip the decorated candle in melted wax if you want to smooth its surface. Melt some colorless or clear candle wax. Pour the wax into a tall glass that is slightly wider than your candle. Dip the candle in this glass for 1-2 seconds, and then remove. Since only a thin layer of melted wax will remain on the top of the candle, dry flowers will be perfectly visible through it.
 - Use enough wax to cover the sides of the candle when you dip it into the glass, but not too much to prevent the wax from flowing out of the glass.
- First, check with the water to what level you should fill the glass with wax. Be prepared to fill the glass about halfway.
Method 3 of 5: Translate images from paper napkins
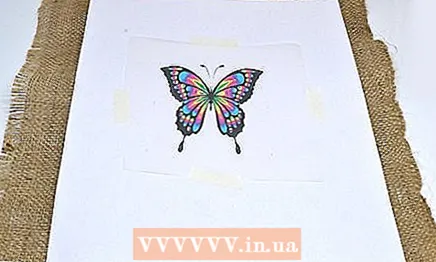
 1 Select a drawing on the computer with which you want to decorate a thick straight candle. You can use patterns or single images (for example, drawings of birds, flowers, or words). Find a suitable image on the web or scan it.
 - You can also just use patterned paper napkins. Pre-divide the napkin into layers so that you have only one layer of paper with the image applied to it in your hands. Click here to skip ahead to further work.
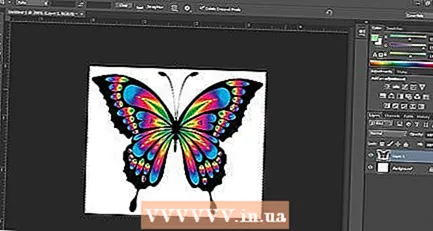 2 Resize the imageso it can fit on your candle. This can be done using an image editing program. The image should be small in height to fit on the candle. In width, it can be wide enough to wrap the entire candle, or also small to cover only part of the candle's surface.
 - Most operating systems come preinstalled with a free image editing program such as Paint (on Windows).
 3 Tape a white paper towel onto a sheet of printer paper. Cut the tissue to be the same width as the printer paper and 2.5 to 5 cm longer. Roll the excess napkin up and down onto the back of a sheet of printer paper and secure with tape on that side. This will give the napkin a little more strength so that you can print the image on it.
 - You can also glue the edges of the napkin to the edges of the paper sheet.
 4 Print the prepared image on a napkin. Make sure to insert the paper into the printer in such a way that the image will be printed directly on the napkin and not on the sheet itself.
 - First, run a test print to see how to insert the tissue paper into the printer.
- In most cases, if you are using a top-feed printer, place the sheet with the napkin facing up. If you are using a bottom feed printer, you will usually need to place the sheet with the napkin face down, but this depends on your particular printer model.
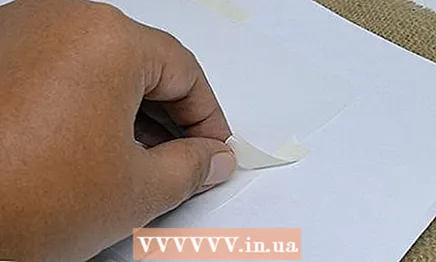
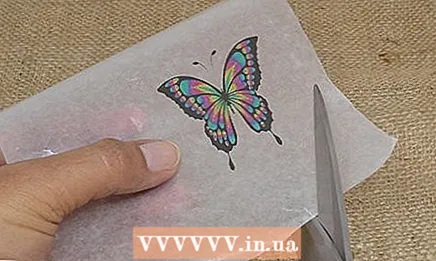 5 Cut out the image on a napkin. Try to cut the paper as close to the outline of the image as possible. If you have printed out a word or phrase (like LOVE), then simply cut the paper along the outer borders of the letter group. Leave what you cut out of the napkin and discard the rest of the paper.
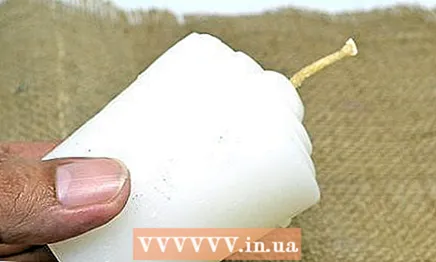
 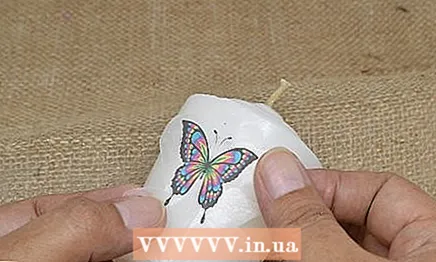 6 Place the image face up against a thick white candle. If desired, the image can be secured with an adhesive pencil.Make sure to place the image on the candle the right side and position it exactly as required.
 - The image does not need to be centered on the candle. For example, you can move it down.
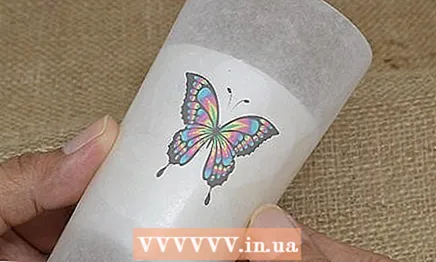 7 Wrap the candle in wax paper. If the paper is waxed on only one side, make sure that side is facing the candle. The waxed paper should be at least as high as the candlestick height or even more.
 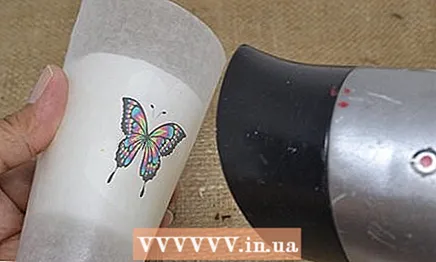 8 Wrap the candle tightly with wax paper and heat until shiny. This can be done with a building hairdryer, heat gun or hair dryer. Work in small sections to make the paper shiny. The length of the process will depend on which tool you are using. A construction hair dryer will cope with this task much faster than a hair dryer.
 - If your image covers the entire surface of the candle, rotate it as you work to be sure to warm up all areas.
- If the image only touches a part of the candle surface, you only need to warm up that area.
 9 Remove the waxed paper from the candle, leaving the design in place. The napkin, together with the image printed on it, should be glued to the surface of the candle. Now the decorated candle can be used as intended.
Method 4 of 5: Wrap the candle in different materials
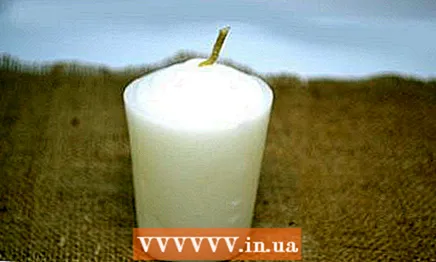
 1 Select the thick, straight candle you want to decorate. Short, thick candles work best for the job. Tall tapers, such as tapered ones, are not as good in this case.
 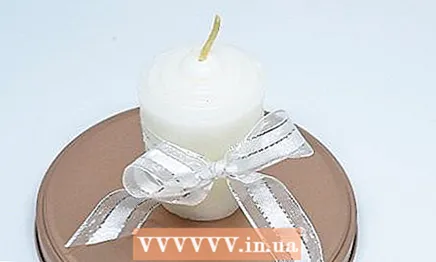 2 Cover the candle with wide tape if you want to add some color to it. Measure the circumference of the candle, then add 1.5–2.5 cm to the measurement for an overlap. Cut a piece of tape to the appropriate size and wrap it around the candle. Place the ends of the tape on top of each other and secure with a few drops of glue.
 - For an even more dressy effect, try taking a long piece of narrow ribbon and tying a nice bow around the candle.
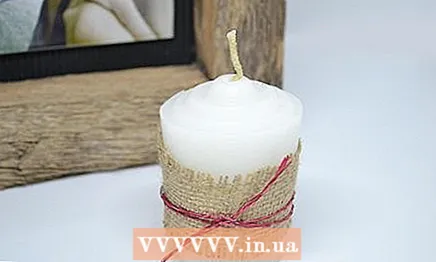 3 Decorate the candle with lace and a rustic canvas ribbon. Wrap a piece of wide canvas tape around the middle of the candle and glue the ends together. Place a piece of narrower lace ribbon over the canvas ribbon and glue the ends together as well.
 - The lace tape should be straight without ruffles.
- Tie a string over the lace ribbon, tying it with a small bow.
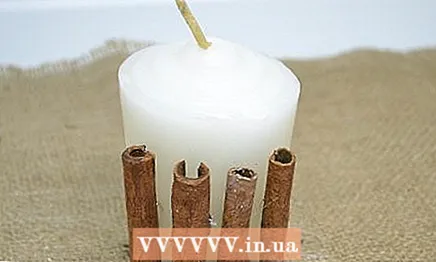 4 For extra aromatic effect, wrap cinnamon sticks around the candle. Using hot glue, glue the candle around the entire perimeter with vertically placed cinnamon sticks. Make sure all sticks are flush with the bottom of the candle. Tie a string or ribbon over the cinnamon sticks to hold them in place, and tie a bow.
 - If you wish, tuck a sprig of pine or holly under the string to make the candle even more elegant.
- It is not necessary to use a lot of hot glue. It is only needed to hold the cinnamon sticks while you decorate the candle with them. The glue itself will melt when you light the candle.
- Using a candle without aromatic additives will make the scent of cinnamon more expressive. However, a vanilla-scented candle will also smell good when paired with cinnamon.
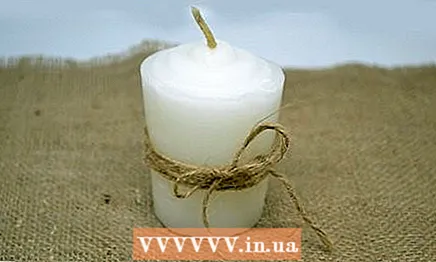 5 Tie string around the middle of the candle to create a modest decoration. Just wind the string 1–3 times in the middle of the candle. Tie the ends of the string with a bow.
 - To make the candle a little more elegant, slip a sprig of pine or holly under the string.
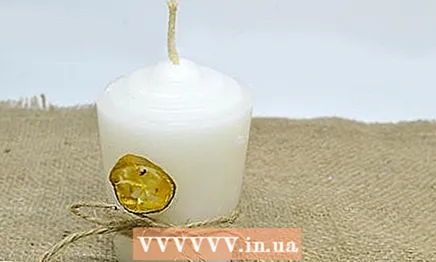
- For elegance, complement the bow on the string with a wax seal (real or just an acrylic sticker in the form of such a seal).
 6 For a festive effect, wrap dried orange slices around the candle. Make or purchase dried orange slices. Use hot glue to glue them in a circle at the base or center of the candle. Tie a string over the wedges and tie it in a bow.
 - It is best to use non-scented candles, but you can also use a vanilla-scented candle to get a scent similar to that of orange ice cream.
- It is not necessary to use a lot of hot glue. It should be just enough to hold the slices in place until you tie them with twine.
Method 5 of 5: Other Ways to Decorate Candles
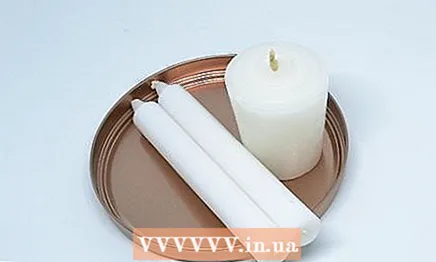
 1 Choose a candle with a large surface area. It is best to use large, thick candles in your work, but you can also use smaller thick candles. It is also okay to work with thin straight and tapered candles, but in this case you will not have very much room to create large or complex patterns.
 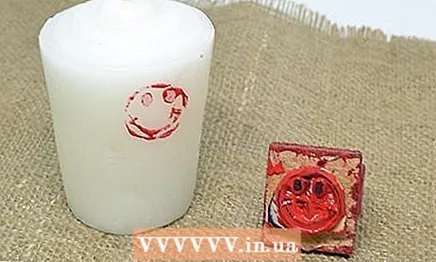 2 Draw or print patterns on the candle with acrylic paint. Wipe the candle with rubbing alcohol using a lint-free cloth. Then cover it with candle varnish and let it dry overnight. Use a brush or rubber stamp to apply the acrylic patterns. Let the paint dry, then coat the candle with an extra coat of candle varnish if desired.
 - Candle varnish can be purchased online or at large handicraft stores with a wide range.
- You can try to do without candle varnish, but acrylic paint may not adhere to the wax.
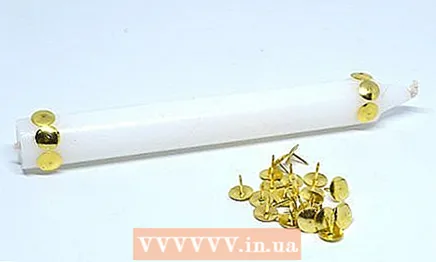 3 Create a pattern of flat pushpins on the candle. Stick the buttons all the way into the candle so that the metal tip is not visible. Use buttons to decorate the outlines of the top and bottom edges of the candle. Create a simple pattern in the middle.
 - For a change, remove the buttons from the candle and stick a carnation in their place.
- Use small tailor's pins instead of buttons for a more fancy candle. Hang charms or miniature jewelry on these pins.
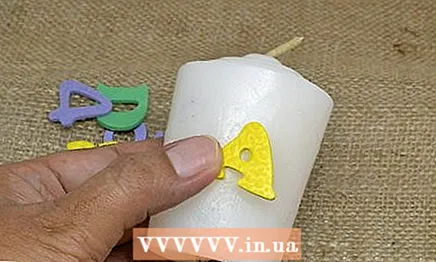 4 Use scrapbooking materials to decorate the candle. Find beautiful letter-shaped scrapbooking stickers to decorate the candles with. Arrange the candles on the table so that the letters form a word. You can also decorate candles with decorative rivets instead of stickers.
 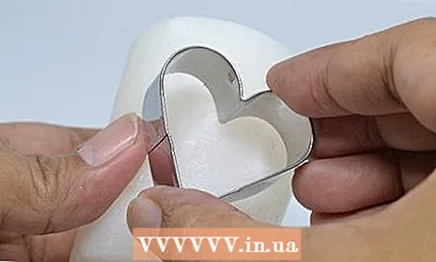 5 Place miniature metal cookie cutters into a thick, straight candle. The result will look as if a metal pattern has been embossed in the candle. Select a miniature metal dough pan, about 1 inch wide. Press it as deeply into the side of the candle as possible, and use the hammer to bury the rest of the dough. The shape should be flush with the surface of the candle.
 - Instead of cookie cutters, you can use fondant molds.
- You will not have the opportunity to return the used forms until the candle has melted.
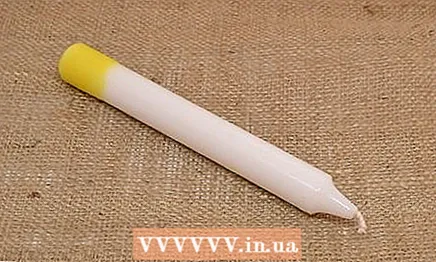 6 Decorate a white candle with colored melted wax. Melt a colored candle on the bain-marie stove. Successively dip the bottom of the white candle into the melted wax at different depths to create a color transition effect. You can also take a spoon, scoop melted wax into it and pour it over a white candle.
 - To melt a colored candle faster, break it into small pieces.
- Make sure the colored candle is dyed inside too. Some candles are painted only on the outside, but on the inside they are the same white.
Tips
- Before using the decorated candle, remove ribbons and other fabric decorations from the candle so that they do not catch on fire.
- When, after a couple of uses, a funnel forms around the wick in a thick decorated candle, place a tealight in it and then light it up. This way you don't have to deprive the candle of its jewelry.
- Consider decorating a battery-powered electronic candle instead of a real one. In many cases, these candles are also covered with wax on the outside to look more like real ones.
- Decorate a glass candle holder instead of the candle itself. This way you don't have to worry about the jewelry catching fire.
- Place the candles on the candlestick and decorate the candlestick itself with holly leaves or pine twigs.
What do you need
Decorating candles with sparkles
- Candle
- Decoupage glue
- Sequins
- Regular or spongy brush
- Decoupage aerosol protective coating (optional)
- Masking tape (optional)
Decorating candles with dried flowers
- Thick straight candle
- Flat dried flowers
- Metal spoon
- Small scissors (if needed)
- Extra candle (to heat the spoon)
- A potholder to hold a spoon (optional)
Translation of images from paper napkins
- Thick white candle
- White napkins
- Paper for printer
- Scotch tape or glue stick
- Wax paper
- Scissors
- Building hair dryer or hair dryer
Wrapping candles with various materials
- Big fat candle
- Ribbons (satin, canvas, lace)
- Twine
- Hot glue
- Cinnamon sticks
- Dried Orange Slices
- Pine or holly twigs
Other ways to decorate candles
- Big fat candle
- Acrylic paint
- Flat push pins
- Miniature metal molds for cutting dough
- Scrapbooking materials (stickers, rivets)
- Unwanted colored candles


