Author:
Mark Sanchez
Date Of Creation:
28 January 2021
Update Date:
27 June 2024

Content
Marble floors add beauty and elegance to your bathroom or hallway. With a variety of color options and finishes, marble tiles can complement almost any color scheme. This article explains how to install marble floor tiles.
Steps
 1 Wash the floor surface that you want to cover with marble tiles and let it dry completely.
 2 Use a long level to determine if your floor is level. If not, then you will have to flatten it with plywood sheets.
  3 Lay out the tiles according to the pattern the way you want them to be laid. This will allow you to determine where you will need to trim the tiles and will also help you determine the best place to start tiling.
  4 Apply a thin layer of adhesive to the floor surface using a notched trowel. Wear heavy-duty work gloves before starting work. Work one section at a time.
  5 Lay the tiles tightly on the glue, be careful not to move the tiles or get the glue on the top.
 6 Position the tiles in place using the X-spacers. Make sure the distances and lines between the tiles are even and equal.
 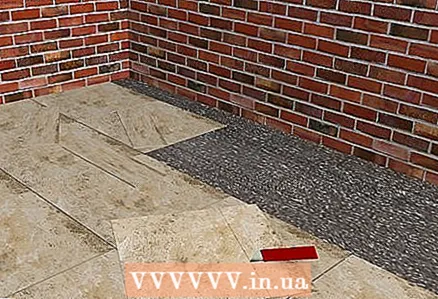 7 Measure the size of the tiles you need by placing one tile on top of another whole that is closest to the wall. Place the other tile against the wall so that the edge of the second tile is on top of the first tile. Use a utility knife to draw a line to mark the cut.
  8 Use a circular saw to cut the tiles to fit where needed: along the walls or elsewhere. To reduce the risk of tile breakage during trimming, cut the tile three-quarters of its length, then unfold it 180 degrees and then continue to cut the rest. Continue the process until you have tiled the entire surface.
  9 To ensure that the glue is completely dry, do not touch the tile overnight.
 10 Mix cement according to package directions. Be sure to wear a respirator, safety goggles and heavy work gloves. Wear a long-sleeved shirt to avoid damage to the skin from contact with the cement.
  11 Use a sponge to moisten the space between the tiles. Fill it gently with cement, being careful not to get any cement on top of the tile.
 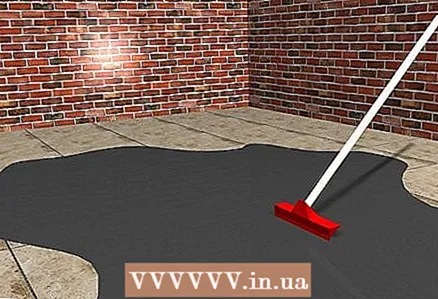 12 Using a squeegee, smooth out the cement evenly in the space between the tiles.
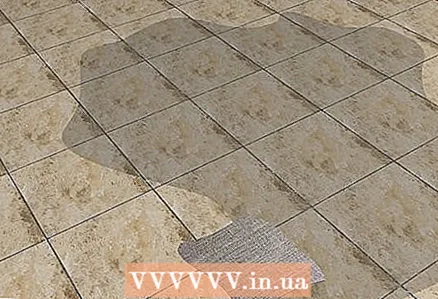 13 Let the cement stand for 10 minutes, then sprinkle a layer of dry cement on top of the wet cement and use burlap to grind the joints between the tiles.
 14 Remove excess cement with a clean cloth before it hardens. Rub the joints between the tiles to make them even and smooth. Wash the tiles with a clean cloth and clean water.
  15 Clean tools with acetone if necessary.
Tips
- If you don't have a circular saw, you can rent one from any hardware store. There you will also be consulted and shown how to use it.
- Reinforce marble tiles before grouting.
- 15 mm - 30 mm are the recommended gaps between marble tiles.
- Use a level as long as possible to make sure your floor is level. If the floor slope is greater than 16 mm, you will need to install additional underlayment every 90 cm.
What do you need
- Clean rags
- Bucket
- Long level
- Plywood and quick fixing kit (if the floor is not leveled)
- Notched trowel
- Liquid glue
- Marble tiles
- Tile crosses (spacers)
- Circular saw (can be rented from any hardware store)
- stationery knife
- Protective glasses
- Respirator
- White cement (low iron oxide content)
- Heavy duty work gloves
- Sponge
- Squeegee
- Sackcloth
- Acetone (for cleaning if needed)


