Author:
Janice Evans
Date Of Creation:
23 July 2021
Update Date:
1 July 2024

Content
- Steps
- Method 1 of 3: Orange Peel
- Method 2 of 3: sand spirals
- Method 3 of 3: Brushing claps
- Tips
- What do you need
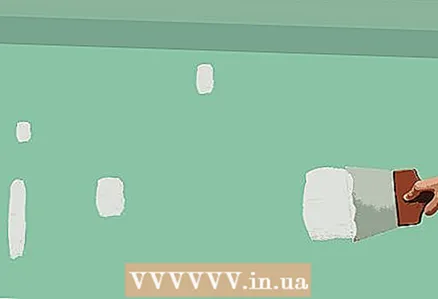
There are many techniques for treating the surface of drywall walls. They use paint sprays, wide brushes, and special pussies for painting, and rollers. Joint mortars and mortars are also common for textured surfaces. Let's look at some methods using different tools.
Steps
Method 1 of 3: Orange Peel
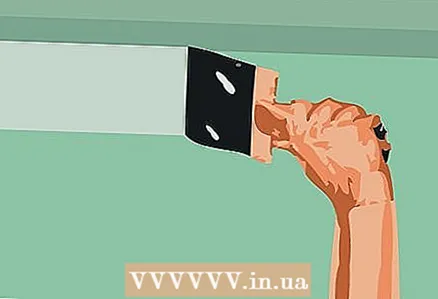
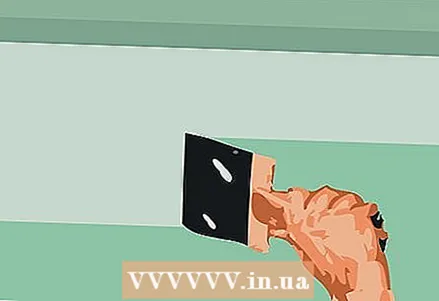
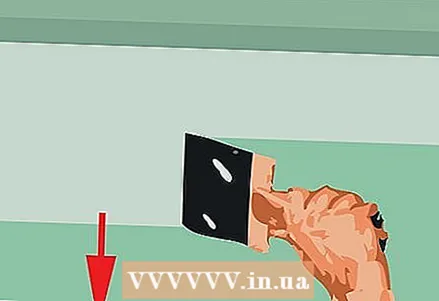
 1 Sand the surface. Use an emery bar to sand edges, notches, or ridges on your drywall.
 - One of the benefits of an orange peel finish is that it helps hide minor imperfections on your wall. However, it is better to pre-sand all the flaws, which will give us a smoother and smoother surface.
- You can use either a round or square grinder. According to some, rounds grind better and make the wall smoother, however, in fact, both do it quite well.
- Use a medium-sized emery pad in corners, joints and other tight crevices and cracks.
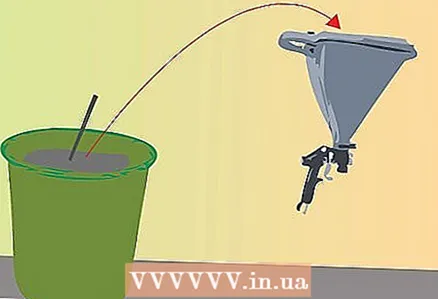
 2 Mix the solution. To do this, take a joint compound or putty and mix with water to a liquid paint consistency.
 - Do not use ready mixed solutions.
- Transfer the putty from the box into a large bucket. Add 1-2 cups (250 or 500 ml) water to the bucket and stir until smooth without lumps.
- Use a putty grinder called a stomper or an electric drill with a paddle to stir the mixture. One box or bucket is usually enough to decorate an entire room.
- You may need to remove the scoop or two of the mortar from the bucket if there is not enough room for water. As you use it and reduce the volume, add it back to the bucket.
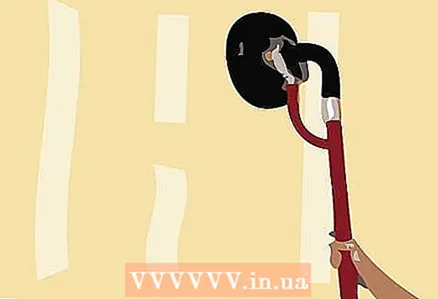
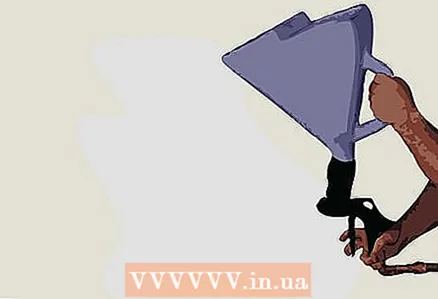
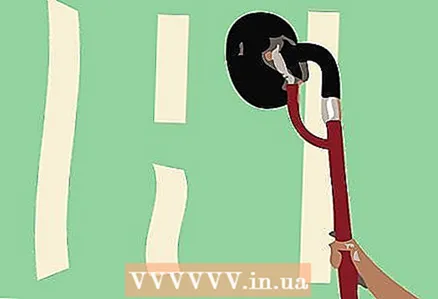
 3 Pour the prepared solution into a spray gun. Fill it half to three quarters full.
 - Do not fill the spray bottle to the end, because then it will be difficult to operate.
- Use a spray bottle with an air regulating valve.
- The spray gun should have an adjustable disc with different sized holes. Set it to the middle position and adjust the air valve to allow more air to pass through.
- If your atomizer does not have an adjustable air valve, attach the nozzle to the smaller tip for a fine spray. To create the texture of a real orange peel, you need small lumps. Larger lumps give a different texture, spray or splatter.
 4 Spray the solution onto the drywall. Do this with quick, even movements up and down and side to side.
 - Spray on a piece of cardboard before starting. Adjust the air valve and spray nozzle so that the texture looks attractive.
- Start sprinkling all over the drywall after you have selected the correct nozzle size. The spray gun must be in motion at all times during operation. If you hold it in one place, then the coating will be very thick.
- As soon as the flow of solution from the spray bottle decreases, shake the spray bottle vigorously. This will push the solution remaining in the nozzle. Once the solution runs out completely, refill the spray bottle and continue where you left off on the wall.
- Note that not the entire wall will be covered at once. The lumps should be evenly distributed all over the wall, but when you're done, you'll see that the drywall is still showing through here and there.
- Let dry completely. This can take up to 24 hours.
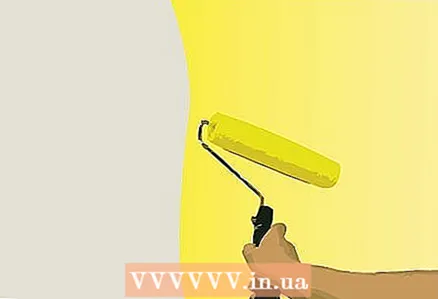 5 Paint it. Prime and paint over your drywall as if there were no texture.
 - You will need to paint the drywall or it will look messy and messy.
- When it's time to wash the walls, simply wipe them down with a damp cloth. You can use your all-in-one home cleaner to remove stubborn, tough stains if the paint you are using allows you to do so.
Method 2 of 3: sand spirals
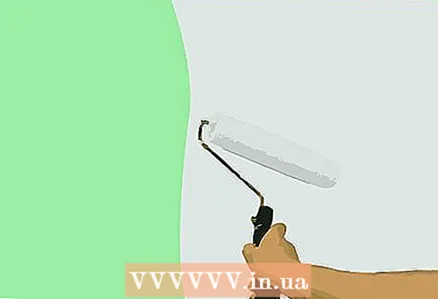
 1 Prime before starting. To smooth the surface, apply a plain white, non-textured primer using a roller. Let dry.
 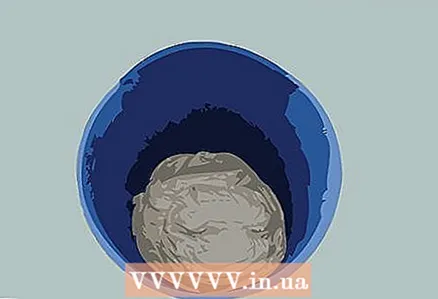 2 Prepare perlite. You will need a 19 liter bucket for a large room.
 - Perlite is a type of white primer in which sand is mixed. You can ask the seller "soil with sand" if you could not find a product with the special name "perlite".
- Shake and stir the perlite before starting work. The sand settles over time, so it is best to ask the seller to mix it for you when you buy. Otherwise, you will have to stir it yourself at home using a long sturdy wooden stick or an electric drill with an attached blade.
 3 Wet your brush. With a wide, flat brush, brush on just a little bit of soil, enough for a thin coat.
 - With a wide brush, you will achieve a large arched texture.Do not use a roller.
- Hold the brush closer to the hairline rather than the handle for better control. Otherwise, it won't be easy for you to create a spiral pattern.
- Dip the brush into the paint, lowering it to a depth of 5-10 cm.
- When removing the brush from the bucket, quickly remove excess paint by wiping each side of the brush on the inside of the bucket.
 4 Make the first row of spirals along the top of the wall. Start at the top-right corner of the wall, making large, interconnected arcuate movements along the entire top edge until you reach the left corner.
 - You can choose the size and shape of your spirals, relying on your own taste. The standard usual look will be given a half-circle 20 cm high and wide. Connect the left "leg" of each arc with the right "leg" of the next.
- You can play a little and create an abstract design by drawing jagged spirals.
- Dip the brush in paint after each spiral.
 5 Start with the second row of spirals. Use the same method of applying perlite down to the bottom of the first row.
 - The peak of each arc should cover the gap left by the arc of the top row.
- The size of the arcs of the second row should be approximately the same as the size of the arches of the first row.
- This must be done quickly, so that when the second row is applied, the first one does not have time to dry out.
 6 Continue row by row until you reach the bottom. There will be as many rows as needed so that the entire wall is covered with soil.
 - The peak of each arc of the bottom row should cover the gap left by the arch of the previous row.
- Each row should be similar in size and shape.
Method 3 of 3: Brushing claps
 1 Sand the wall. Align all defects, grooves, protrusions on the drywall with a grinding tool.
 - It can be round or square.
- Switch to a medium-sized emery pad in corners, joints and other tight crevices and cracks.
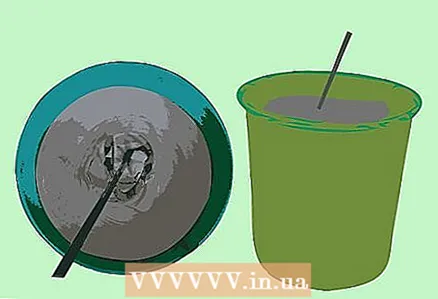 2 Prepare some solution. Mix a plain putty with water to a pancake dough consistency.
 - A thicker grout can be used, but it gives the wall a slightly dated texture.
- One box or bucket is usually enough to handle an entire room.
- Transfer the putty from the box into a large bucket. Add 1-2 cups (250 or 500 ml) water to the bucket and stir until smooth without lumps.
- Use a putty grinder or electric drill with paddle to stir the mixture.
- If necessary, remove the scoop or two of the mortar from the bucket if there is not enough room for water. Stir as usual and start applying the solution. As you use it and reduce the volume, add it back to the bucket.
 3 Dip the roller in the solution. Do this by immersing the roller in the solution and be sure to remove any excess.
 - For best results, choose a roller with a width of 1.25-2 cm.
- Submerge the full width of the roller sponge in the solution.
- When removing the roller from the bucket, shake it slightly to remove excess solution.
- Run the roller along the edge of the bucket to get rid of excess solution. Ideally, the sponge of the roller should be saturated with the solution as much as possible, but not drip all over the place.
 4 Cover the outer edges. Start at one corner and work your way around the entire vertical edge to the next corner or until the grout runs out on the roller.
 - If the grout runs out before you reach the corner, dip the roller in the grout again and continue where you left off.
- Roll a roller from the bottom to the top of the wall, starting at the corners that connect to the previously created grout boundary. Finish covering the area by joining the top and bottom edges together along the other outer edge of the wall, working from the top corner to the bottom.
 5 Cover the remaining areas with the solution. Apply the solution in crisscross rows.
 - Now roll the roller in straight intersecting rows from right to left. Continue until the entire wall is covered with an even layer.
- Roll again over the grout-covered areas, working in a perpendicular direction. You don't need to apply the solution anymore. It is only necessary to walk through the rows again, giving uniformity to the coating.
 6 Apply the solution to the brush. Place a generous amount of solution on the front of the long-handled brush.
 - Use a roller for this. Do not immerse the brush itself directly in the solution.
- Do this only with a dry brush. Since the initial layer of mortar has already been applied, the brush will be in unhindered contact with it on the wall.
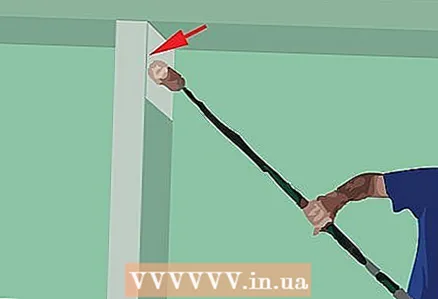
 7 Slap the brush against the wall. Use the brush to hit the grout on the wall, starting at the outer edges.
 - The claps with the brush should be done with the tip of the brush, not with the sides. The desired texture can be successfully achieved solely by pressing the grout with the tip of the bristles of the brush and not the sides.
- One of the advantages of this technique is that, in the end, the appearance of the wall depends on you, your skills and imagination. However, without some experience, it can be difficult to achieve cute claps.
- Rotate the brush with each pop. As you move left-right and up-visas, constantly twist the brush. Otherwise, you will end up with certain patterns that are unacceptable for this texturing technique. Rotate the brush away from the wall, not touching it.
- Make each blow strong enough. Otherwise, the solution will build up on the brush and make it too heavy.
- Pat around the edges. Rolled edges should also be covered with brush cottons.
 8 Rub the corners. Work around the edges with a trowel to smooth out the corners.
 - Take a small amount of corner smoothing mortar with a spatula.
- Run the trowel over a smooth adjacent edge without touching the finished textured part.
- Let dry completely.
Tips
- Before starting work, cover sections of walls, ceilings that do not need to be textured with several overlapping strips of protective masking tape.
- Spread a rag on the floor and remove furniture before cleaning the walls. This will help keep your room and furniture from splashing dirt and mortar. Also wear clothes that you don't mind getting dirty and safety glasses.
What do you need
- Sanding bar
- Medium sandpaper
- Mortar (joint compound)
- Water
- Mortar mixer or electric drill with paddle
- Perlite
- Big bucket
- Spray
- Wide brush
- Roller
- Bristle brush
- Priming
- Dye


