Author:
Sara Rhodes
Date Of Creation:
12 February 2021
Update Date:
2 July 2024
Content
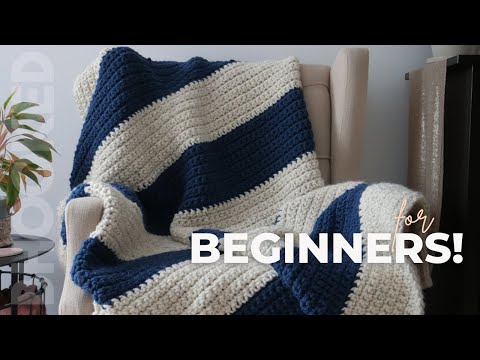
- Method 2 of 4: Simple stripe pattern
- Method 3 of 4: Grandma's Squares
- Method 4 of 4: Zigzags
- Video
- Tips
- Newborn swaddle blanket: 90x90 cm
- Blanket for baby: 90x105 cm
- Blanket for teenager: 120x150cm
- Blanket for adult: 125x175cm
- Plaid: 90x120 cm
 2 Choose a yarn. The choice of yarn is largely determined by the size and density of the quilt you are planning, as well as your knitting skills. If you are just starting to knit, then opt for yarn with a soft texture, light color (the loops will be more noticeable) and medium weight.
 - For a blanket and a swaddling blanket, you will need 3-4 skeins of yarn. For a larger blanket, you will need at least 2 times more yarn.
- If you're not sure if you have enough yarn, it's best to stock up on 1-2 extra skeins.
- If you buy yarn in a package of several skeins, be sure to check if the article numbers of the skeins are the same, because otherwise the skeins will slightly differ in color.
3 Choose the right hook size. Hooks come in different sizes, from 2.25mm to 19mm. Here's what to look for when choosing a hook: - The larger the hook, the larger the loop. Large loops are better visible, which means knitting a blanket will take you less time. But, do not forget that you will need more yarn.
- Another advantage of large hinges is that they are loose. Such a product will turn out to be lighter and more airy. But if you want a very warm blanket, then opt for a smaller hook, which makes the buttonholes smaller.
- If you are just learning to crochet, it will be better for you to use a crochet with a diameter of 10 mm or more, and as you learn and get used to it, you will be able to switch to smaller crochet hooks.
4 Choose a pattern. The pattern will determine the future look and feel of your quilt. The choice of patterns is endless, in addition, experimenting with a combination of basic types of loops, you can create your own pattern. In this article, you will learn about some of the basic easy patterns to get you started crocheting. Method 2 of 4: Simple stripe pattern
- 1 Dial the number of air loops required for the width of the product. Do not tighten the air chain, try to make the loops larger, because in the next row you will need to knit other loops in them. Tip: Try to choose the number of loops in multiples of 5 or 10. This will make it easier for you to count loops so as not to accidentally subtract or add their number. Consider the number of lifting loops (loops that are used to move to the next row of knitting and in order to turn around at the end of the row) - their number is determined by the selected pattern! So, for example, for single crochets, only one lifting loop is needed, and for a single crochet - as many as three.
- 2 Turn knitting and start knitting for the second row. Once you are done with the chain stitches, turn the work so that you continue knitting from right to left along the top of your chain. For a single crochet, insert the hook into the second loop from it, and for a single crochet into the third.
- 3 Continue this knit row by row until you reach the desired length. You can count your stitches as you knit them, or stop from time to time and recount the stitches that have already been knitted. If you wish, you can always decorate your blanket with additional elements in the form of appliqués or lace. If, when knitting a loop, you insert the hook only for its back half (the one that is farther from you), you will get an interesting ribbed pattern.
- 4 The blanket is ready.
Method 3 of 4: Grandma's Squares
- 1 Start knitting grandma's squares. You need to knit enough for the quilt you want. It is advisable to make the squares the same size, but you can always experiment with color combinations. You can sew a blanket from one-color squares, or by alternating different colors and creating your own unique pattern.
- 2 Sew the squares. First, connect the squares in a row with connecting loops, and then sew the rows together also using connecting loops. You can knit ruffles or trim the edges in any other way to decorate the blanket. Alternatively, between the connected squares, you can also knit a few rows in your favorite pattern to give the blanket a more finished look.
- 3 Finished.
Method 4 of 4: Zigzags
- 1 Zigzag rows.
- For the air chain, you need a multiple of 16 loops + 8 loops for symmetry + 3 lifting loops. We will knit in columns with one crochet.
- Row 1: Skip 3 stitches in the chain, in the next 2 stitches, knit 2 double crochets with a common top, 5 double crochets in each loop of the braid, * a bunch of 5 double crochets in one loop, 5 double crochets in each loop chains, 5 double crochets and a common top in the next 5 loops, 5 double crochets in each loop of * chain, repeat from * to *. At the end of the row, a bunch of 3 double crochets in the last loop of the chain.
- Row 2: 4 crochet stitches, 1 crochet stitch in the middle stitch of the previous row, 1 stitch, 1 crochet stitch in the last of the 3 stitches of the previous row, * 1 stitch, skip 1 stitch in the previous row and knit 1 double crochet in the loop of the next column of the previous row, 1 air loop, skip 1 column in the previous row, then knit 3 double crochets and a common top through the column of the previous row (the central of 3 columns should fall into the loop of 5 columns with a total top), 1 stitch, skip 1 stitch of the previous row, knit 1 stitch into the loop of the next stitch, 1 stitch, skip 1 stitch of the previous row, 1 stitch into the first of 5 stitches of the previous row, tied on the same base, 1 stitch, [1 double crochet in the central loop of 5 stitches of the previous row, 1 stitch] - repeat 3 times, 1 double crochet in the last loop th of 5 stitches of the previous row *, 1 stitch, skip 1 stitch in the previous row and knit 1 stitch in the next stitch of the previous row, 1 stitch, then knit 2 stitches with a common top as follows: skip 1 column in the previous row, in the next column tie one of the two columns with one vertex, skip 1 column in the previous row, tie the second part of the column in a loop of 2 columns with the common vertex of the previous row;
- Row 3: 2 lifting loops, in the next 2 loops knit 2 double crochets and a common top, 5 double crochets in each loop of the previous row, * a bunch of 5 double crochets in a loop of the middle of 3 columns of the previous row, 5 columns with crochet in each loop of the previous row, 5 double crochets and a common top, knit in the next 5 loops, 5 double crochets in each loop of the previous row *, a bunch of double crochets in 2 of the 4 extreme air loops of the row. Then repeat rows 2 and 3.
- For the air chain, you need a multiple of 16 loops + 8 loops for symmetry + 3 lifting loops. We will knit in columns with one crochet.
- 2 You can also combine different colors in this pattern to make your quilt more vibrant. This pattern will make your blanket dense and very original.
Video
Video: Crochet a Blanket
Tips
- Depending on how many initial clusters of three loops you create in the middle, "Grandma's Squares" can become hex or octahedron.


