Author:
Roger Morrison
Date Of Creation:
20 September 2021
Update Date:
1 July 2024

Content
- To step
- Method 1 of 4: Pick a good spot for your tree
- Method 2 of 4: Water your water cocoa
- Method 3 of 4: Prune and shape your water cocoa tree
- Method 4 of 4: Fertilize and repot your water cocoa tree
- Tips
- Necessities
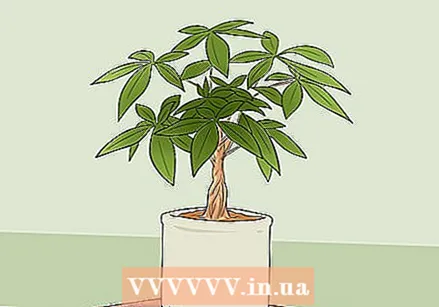
The water cocoa tree, also known as Pachira aquatica, is a houseplant that is easy to grow and usually has stems that are intertwined. Water cocoa trees don't require much care, but there are certain things you can do to keep your water cocoa tree healthy and green.
To step
Method 1 of 4: Pick a good spot for your tree
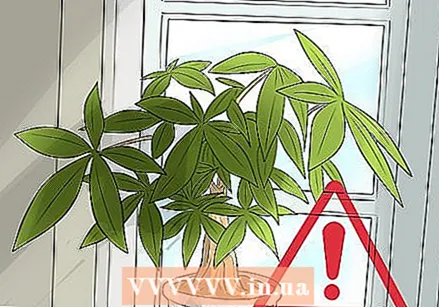
 Place the water cocoa tree where it will receive indirect sunlight. Any place with bright light that is not in full sun is suitable. Keep the tree away from windows if direct sunlight shines through it every day. Direct sunlight can burn the leaves of the water cocoa and kill the tree.
 - A stand in your living room or on top of the wardrobe in your bedroom is a good spot for a water cocoa, as long as the tree doesn't get a lot of direct sunlight.
- Try to turn your tree over every time you water. This ensures an even development and growth of the leaves.
 Keep your water cocoa tree away from extreme heat and cold. Extreme temperatures can trigger shock and cause your water cocoa tree to die. Find an area where the tree is away from heating or air conditioning vents. Do not place the tree near a window or a door where chilly drafts often pass through. Ideally, your tree is in a room with an average temperature of 15-25 ° C.
  Choose a spot with a humidity of at least 50 percent. Water cocoa trees need a lot of moisture to survive. If you live in a dry climate and are concerned about low humidity, you can place a humidifier near your tree. Buy an indoor humidifier so you can check how humid the room you have the water cocoa in is.
 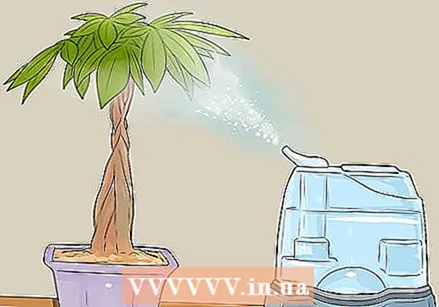 When the tree seems dry, you have to adjust the humidity in the room. Dry and falling leaves indicate that your water cocoa tree is not getting enough moisture. If you have already set up a humidifier, you can start switching on these longer periods. You can also choose to buy a second humidifier. Make sure your water cocoa tree is away from ventilation holes, as this could dry out the air even more.
 - Giving your water cocoa tree more water will not solve the drought problem and you may make the problems worse by causing root rot. The leaves can also start to turn yellow.
Method 2 of 4: Water your water cocoa
 Water your water cocoa tree when the top one inch - two inches of soil is dry. Do not water your water cocoa tree when the soil is still wet, as you could overwater and cause root rot. To check if the soil is dry enough, gently put a finger into the soil. When the soil feels dry 2.5 - 5 cm deep, it is time to water again.
 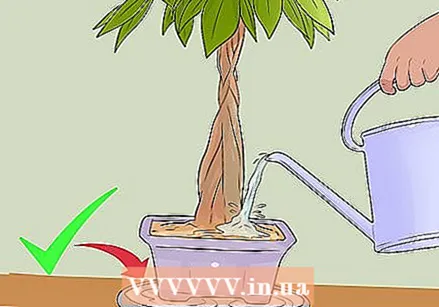 Water your water cocoa tree until the water runs out of the drainage holes. Once you see the water running out of the holes and into the bowl under the pot, stop watering. Make sure to keep watering until the excess water comes out or your water cocoa tree may not be getting enough water.
  After watering the water cocoa tree, pour out the bowl full of water. This way your water cocoa tree does not remain in water, which could cause root rot. After watering the water cocoa tree, wait a few minutes for all excess water to drain out of the drainage holes and into the bowl. Then you need to lift the pot with the water cocoa tree and remove the bowl full of water from underneath. Empty the bowl and place it under the tree again.
 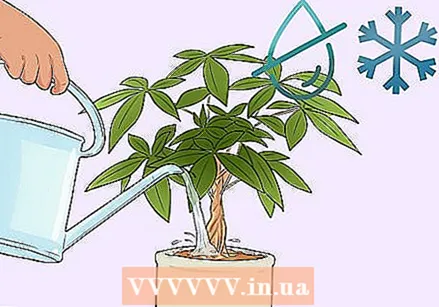 Water your water cocoa tree less in the winter. Water cocoa trees grow less in winter because there is less light. Because they grow less, they will also need less water. During the winter, you can wait an additional 2-3 days to water if you notice that your water cocoa tree is dry. Start watering regularly again when spring is around the corner.
Method 3 of 4: Prune and shape your water cocoa tree
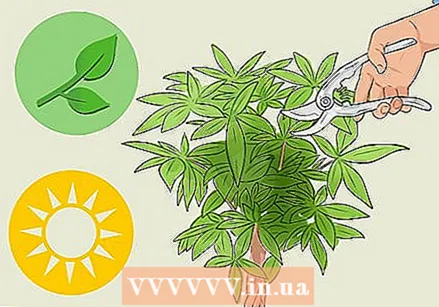
 Prune dead and damaged leaves with pruning shears. This will keep your water cocoa tree looking healthy and green. Dead leaves will be brown and withered. Damaged leaves will be torn or broken off the trunk. If you notice dead or damaged leaves, cut them off with scissors at the base of the growth.
 - Don't worry if you don't prune dead or damaged leaves from your water cocoa tree. Your tree just won't look as healthy as it could if you did remove those leaves.
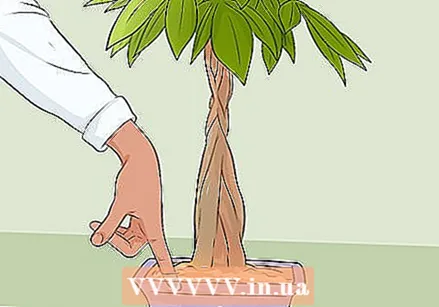
 Shape your water cocoa tree with pruning shears. To shape your water cocoa tree you have to look at the tree and imagine what contours you want to shape it. Then look for growth beyond the imaginary boundaries of that form. Take your pruning shears and cut away those fouling. When cutting the growth, cut just past the leaf node closest to the imaginary line.
 - Traditionally, water cocoa trees have a round shape, but you can give yours a square or triangular shape if you prefer.
 Prune your tree during the spring and summer to keep it small (optional). If you want a large water cocoa tree, you cannot prune it. To prune your water cocoa tree, use pruning shears and cut any unwanted growth immediately past the leaf node at the base of the growth.
Method 4 of 4: Fertilize and repot your water cocoa tree
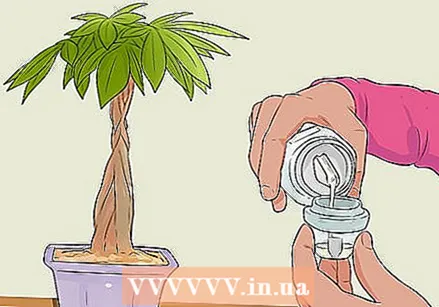 Fertilize your water cocoa tree 3-4 times a year. Water cocoa trees grow mainly during the spring and summer, and seasonal fertilization will keep your water cocoa tree healthy as it grows. Use a liquid fertilizer and halve the recommended dosage on the label. Stop fertilizing at the end of the summer. Your water cocoa tree does not need fertilization outside the growing season, because because growth slows down, the plant will also need fewer nutrients.
 - Make sure to halve the dosage of the liquid fertilizer. The recommended dosage on the package is the maximum amount intended for plants growing in perfect conditions. However, a full dose can be too much for your plant and this could have negative consequences.
 Place your water cocoa tree in a relatively small pot. A pot much larger than the water cocoa tree will contain too much soil and moisture, which can lead to root rot. When repotting the water cocoa tree, choose a pot that is only slightly larger than the pot the plant was in.
 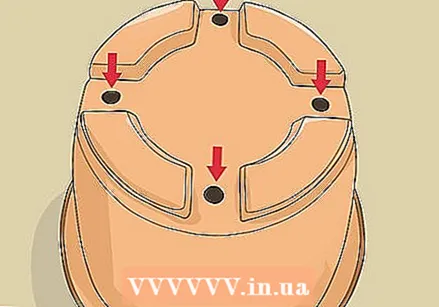 Choose a pot with drainage holes. Drain holes allow excess water to drain from the pot into the bowl below. Water cocoa trees are susceptible to root rot, which is caused by too much water, so it is important to provide good drainage for the water cocoa tree. When buying pots, look inside at the bottom of the pot. If there are no drainage holes then you should look for another pot that does have one.
  Pot your water cocoa tree in potting soil that drains quickly and retains moisture well. Use a pre-made bonsai mixture or make your own soil mix by using peat moss-based potting soil. Simply add sand or other organic matter to the peat moss-based potting soil. The peat moss will help the soil retain moisture and the sand or perlite will help with drainage.
 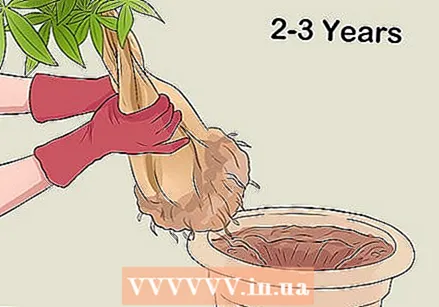 Repot your water cocoa tree every 2-3 years. To repot your water cocoa tree, carefully dig the roots and soil out of the current pot, trying to stay near the edges of the pot so you don't damage the roots. Then you can move the water cocoa tree to a new pot and fill the extra space with fresh soil.
 - If you notice the roots of your water cocoa tree starting to grow out of the bottom of the pot, it is time to repot the plant.
Tips
- Water cocoa trees are susceptible to scale insects. If you notice problems with scale insects, quarantine affected plants immediately. Then spray the plant with an insecticidal soap or treat the insects directly with rubbing alcohol.
Necessities
- Small pot with drainage holes
- Potting soil
- Fertilizer
- Humidifier


