Author:
Joan Hall
Date Of Creation:
3 July 2021
Update Date:
1 July 2024

Content
- Steps
- Method 1 of 4: Top or Dress
- Method 2 of 4: Wrap Skirt
- Method 3 of 4: Pants
- Method 4 of 4: Dress or Skirt from a Sock
- What do you need
Sewing clothes for dolls is interesting and not difficult at all! A doll can be made tops, dresses, skirts, or even pants. You just need to find unnecessary fabric scraps and a few other basic materials for needlework. Just grab your doll and start modeling a new wardrobe for her!
Steps
Method 1 of 4: Top or Dress
 1 Cut out a piece of fabric. The width of the flap of fabric should be approximately the same as the height of the doll, and the length should be equal to the desired length of the top or dress. The doll can be measured to accurately determine its height, or you can immediately use the doll itself instead of a ruler to mark the fabric.
 - For the top, the flap of fabric should fall below the level of the doll's waist by about 2.5 cm.
- For a short dress, the fabric should reach about the knees of the doll.
- For a long dress, cut a piece of fabric up to the doll's feet.
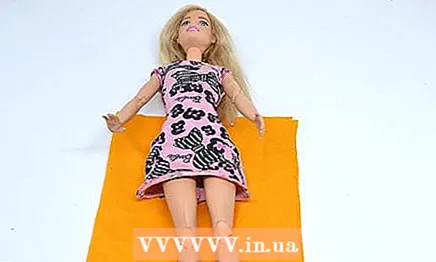
 2 Place the doll on the fabric and mark the fabric around her shoulders. The doll's shoulders should be about 1.5 cm below the top of the fabric. Place fabric marks on the sides of each shoulder. Use a pencil or tailor's chalk to mark. There should be two marks in total.
  3 Make slits in the area of the marks. To create armholes, cut openings in the area of the marks you just placed. Make sure the slits are wide enough to fit the doll's arms.
  4 Slide the doll's arms through the slots. Insert the doll's arms into both slots and pull the flap over her shoulders. If the armholes are not wide enough to fit the flap over the shoulders, trim them slightly to widen them.
  5 Cross the edges of the fabric on the doll's chest. Next, you need to cover the body of the doll with a cloth, as if you were wrapping it in a dressing gown. The fabric can be stretched as tightly or loosely as you wish. A piece of cloth should be enough to wrap the cloth even behind the doll's back, if you so desire.
  6 Tie the doll's dress around the waist with a long strip of fabric to hold it in place. Cut out a strip of knitted fabric to hold your dress in place. Wrap it around the doll's waist and tie it with a bow.
 - You can also use a ribbon to secure the dress if you prefer.
 7 Fold back the collar area if desired. The collar area can be left as is or folded back to create a collar. It's up to you to decide!
  8 Decorate the dress with rhinestones, beads and sequins. Use glue to attach rhinestones, beads and / or sequins to the dress. They can be positioned anywhere. Just drip a drop of glue onto a rhinestone, bead or sequin and press down on the dress where necessary. Let the glue dry overnight.
 - Add a rhinestone to the center of the front neckline.
- Glue a few beads along the bottom edge of the dress.
- Cover the skirt of the dress with sequins.
Method 2 of 4: Wrap Skirt
 1 Place the doll on the cloth to mark it out. A doll skirt can be made in the same way as a dress. A piece of fabric should be approximately the same width as the doll's height, and the length should correspond to the desired length of the skirt. First mark the doll's height on the fabric with two marks, then turn it and place the doll between these marks. Place the next pair of marks at the level where the skirt should start and end.
 - For example, if the doll is 45 cm high and you want to make her a skirt 25 cm from the waist, the rectangular piece of fabric should be 45 cm wide and 25 cm long.
 2 Cut a rectangular piece of fabric at the base of the marks. Using a pen or tailor's chalk, trace a rectangle along the marks on the fabric. Then cut it out with sharp scissors. This rectangular piece of fabric will be the main fabric of the skirt.
  3 Cut out a strip of fabric to hold the skirt in place. The length of the strip should be the same as the width of the rectangular piece of fabric. This is necessary so that you have the opportunity to wrap this strip around the doll's waist several times. If necessary, the strip can always be shortened after tying it over the skirt.
 - For example, if a piece of fabric is 45 cm wide, then the additional strip of fabric should be 45 cm long.
 4 Wrap a rectangular piece of fabric around the doll's waist. Place the doll in the middle of a piece of fabric so that its top edge is about 1.5 cm above the waistline. Then wrap the piece around the waist and legs of the doll to form a skirt. The fabric can be wrapped as tightly or loosely as you like. The main thing is that its edges overlap each other by at least 2.5 cm.
 - To create a pencil skirt, wrap the fabric tightly around the doll.
- For a flowy skirt, do not pull on the fabric.
- For an A-line skirt, wrap the fabric around the doll so that it fits tighter at the top and flares out at the bottom.
 5 Secure the skirt with a strip of fabric belt. Once you are satisfied with how the skirt fits the doll, take the prepared strip of fabric and wrap it tightly around the doll's waist several times. Tie a knot or bow to secure the belt.
Method 3 of 4: Pants
 1 Place the doll on a folded piece of cloth. You don't need a pattern to sew the doll's pants. Just take a piece of cloth long and wide enough to cover the doll's legs when folded in half. Fold the fabric in half and place the doll on top in the middle. Make sure the right side of the fabric is facing inward.
  2 Trace the outlines of the doll's legs on the fabric. Use a pen, pencil, or tailor's chalk to trace the outlines of the doll's legs onto the fabric. Depending on how tight or loose you want the pants to be, trace the contours closer or further to the legs themselves, stopping at the level where the pants should end.
 - To make the pants look tight, circle the outlines about 1.5 cm from the legs.
- To make the pants looser, drawing outlines, step back 2.5 cm from the legs.
- To get very loose pants, step back 5 cm from the legs.
- Full-length trousers should end at the ankle, cropped capri pants should end in the middle of the ankles, and the shorts should end in the middle of the thighs.
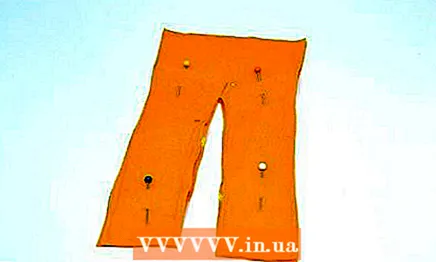 3 Cut out the details. When you are finished drawing the outlines, remove the doll from the fabric. Leave the fabric folded and use sharp scissors to cut out the outlines. Don't separate two parts between you. You will need to sew or glue them together in the position in which they are.
 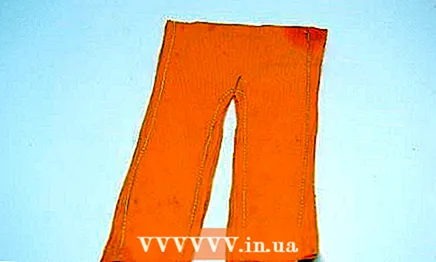 4 Sew or glue the pants together. Use a needle and thread or a sewing machine to sew straight stitches along the outside and inside seams of your trousers with an allowance of about 5 mm. Alternatively, you can apply small beads of glue between the two layers of fabric along the leg seams.
 - If you decide to use glue, be sure to leave it to dry overnight.
- If you decide to sew trousers, ask an adult for help.
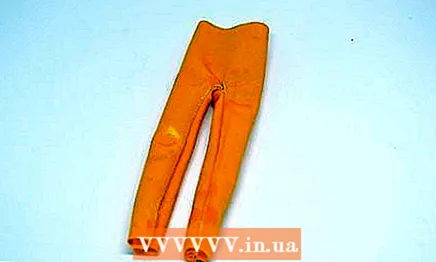 5 Turn the pants right over. When you finish sewing or gluing the pants, turn them right out so that the seams are on the inside and the pattern on the fabric is on the outside. If necessary, you can use a pen with a cap or a marker to make it easier for you to turn out the pants.
 - After turning out the pants, try them on the doll!
 6 If desired, secure the pants to the waist with a strip of fabric. If the pants are too loose at the waist, you can make a belt for them from a strip of fabric. Cut a strip of fabric long enough to wrap around the doll's waist several times.
 - For example, if the waist circumference of the doll is 12.5 cm, then the strip of fabric should be at least 37.5 cm in length.
- Wrap the strip around the doll's waist over the pants and tie a knot or bow to secure them.
Method 4 of 4: Dress or Skirt from a Sock
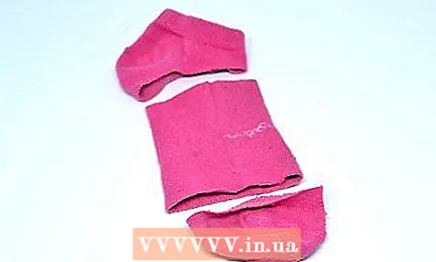 1 Cut the top of the sock (with elastic) from the foot. Find a sock that you don't need and is long enough so that its upper part can hide the doll's torso. You can use a plain or patterned sock. Cut off the top of the sock at about ankle level.
 - If you wish, you can then shorten this part of the sock if you want to make a shorter skirt or dress.
 2 Cut out the armholes for the dress. If you decide to make a dress for a doll out of a sock, cut out the armholes in it. Make a small hole on each side of the sock, 1.5 to 2.5 cm from the top edge with elastic. Make sure the armholes are large enough for the doll's arms.
  3 Decorate the sock if desired. Decorations are not absolutely necessary, but you can add them if you wish. Stick the necessary decorations on the sock and let the glue dry before putting the resulting dress or skirt on the doll.
 - Use textile dyes to paint polka dots, stripes, or other patterns on the fabric.
- Stick on beads, sequins or rhinestones.
- Use ribbon or scraps of fabric to make a simple or decorative belt for a dress or skirt.
 4 Put a finished dress or skirt on the doll. To do this, slide the doll's legs from above into a dress or a sock skirt. Next, insert the doll's arms into the armholes if you made a dress for her.
What do you need
- Doll
- Textile
- Scissors
- Glue
- Needle and thread (optional)
- Rhinestones, beads and sequins


