Author:
Eric Farmer
Date Of Creation:
4 March 2021
Update Date:
27 June 2024
Content
- Steps
- Method 1 of 3: Create an Account
- Method 2 of 3: Hide your account
- Method 3 of 3: Displaying the account
- Tips
- Warnings
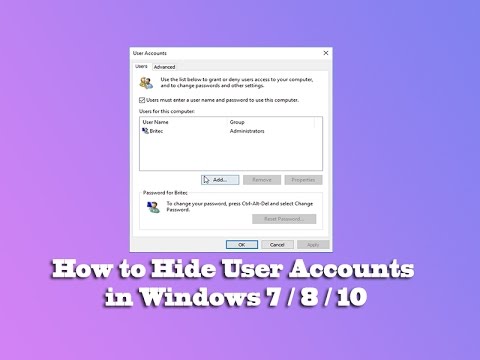
This article will guide you on how to create and manage a hidden account in Windows 7.
Steps
Method 1 of 3: Create an Account
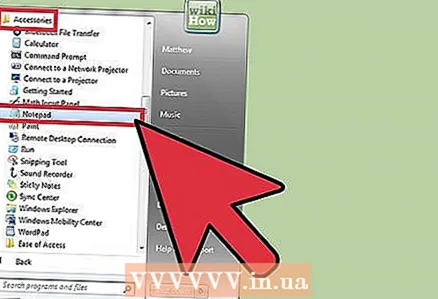 1 Open Notepad. To do this, click on "Start" - "All Programs" - "Accessories" - "Notepad" or type "notepad" (without quotes) in the search bar of the "Start" menu and press Enter.
 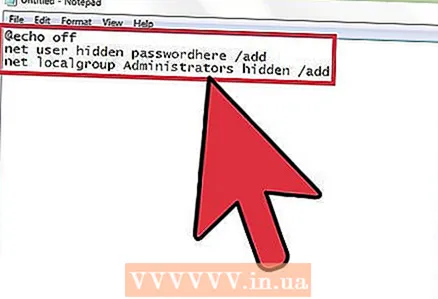 2 Enter the following code:
- @echo off
- net user hidden passwordhere / add
- net localgroup Administrators hidden / add
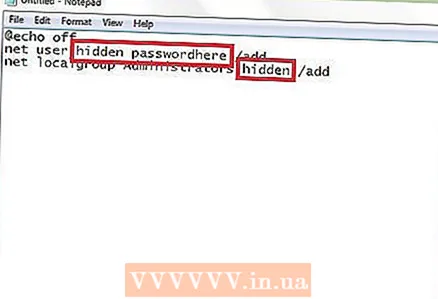 3 Attention! Replace passwordhere with your desired password and hidden with your desired username.
 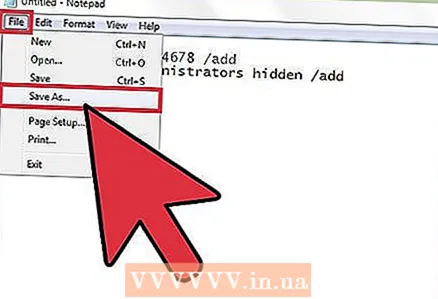 4 Click "File" - "Save As".
- From the Save as type menu, choose All Files.
- In the File Name box, enter hidden.bat and click Save.
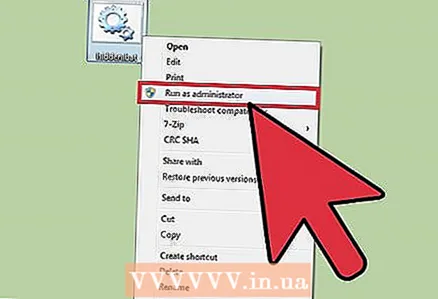 5 Right click on the file and select "Run as administrator".
 6 Click "Yes" in the User Account Control window (if opened).
- A command prompt window will open for a few seconds and then automatically close.
 7 Open a command prompt window by clicking "Start" - "All Programs" - "Accessories" - "Command Prompt" or simply type CMD in the Start menu search bar and press Enter.
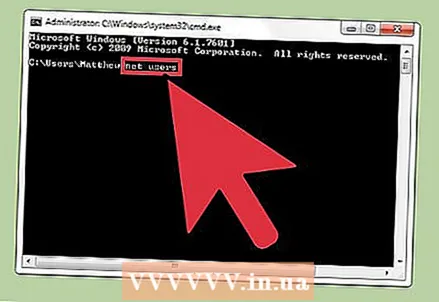 8 Type net users and press Enter.
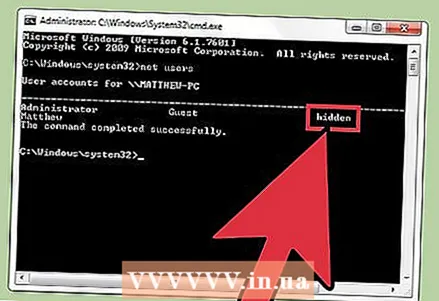 9 Find the created account in the list.
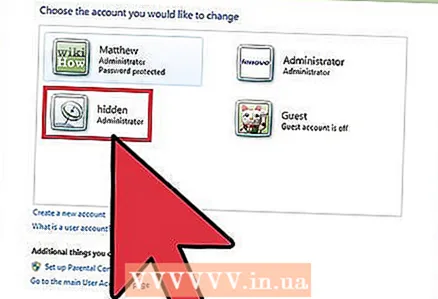 10 Excellent! You have just created an account with administrator rights! Read on to find out how to hide your account.
Method 2 of 3: Hide your account
 1 Open a command prompt window by clicking "Start" - "All Programs" - "Accessories" - "Command Prompt" or simply type CMD in the Start Menu search bar.
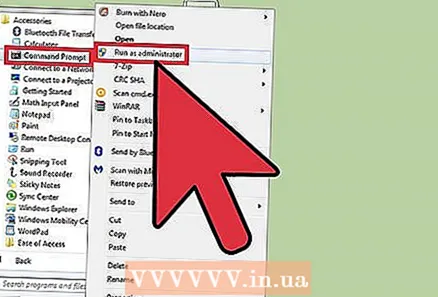 2 Right click on the file and select "Run as administrator".
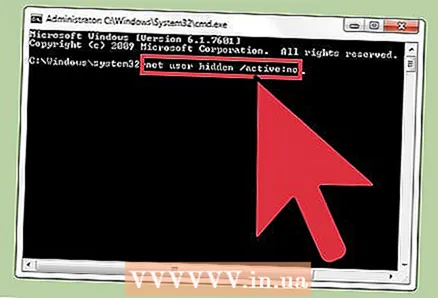 3 Type net user hidden / active: no and press Enter.
- Attention! Replace hidden with your specified username.
 4 The message "The command completed successfully" is displayed.
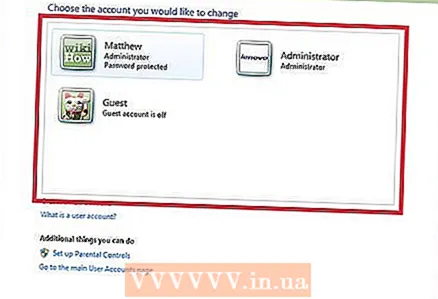 5 Excellent! You have just hidden your account.
Method 3 of 3: Displaying the account
 1 Open a command prompt window by clicking "Start" - "All Programs" - "Accessories" - "Command Prompt" or simply type CMD in the Start Menu search bar.
 2 Right click on the file and select "Run as administrator".
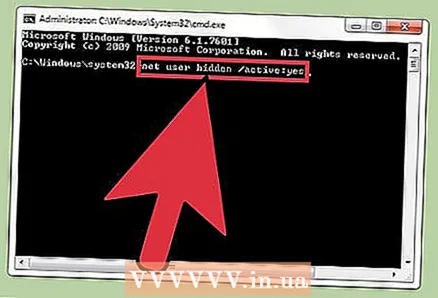 3 Type net user hidden / active: yes and press Enter.
- Attention! Replace hidden with your specified username.
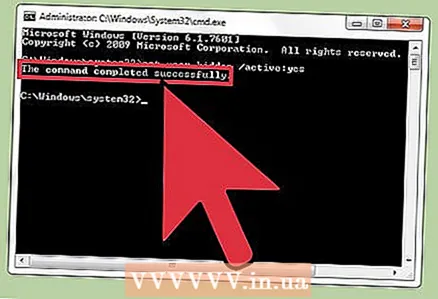 4 The message "The command completed successfully" is displayed.
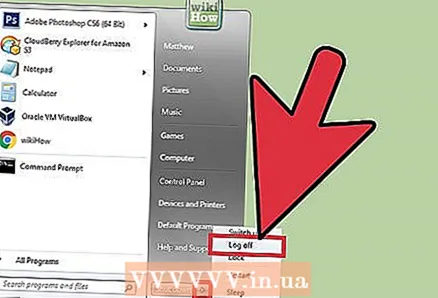 5 Log out and check if a new user account with the name you specified is displayed.
 6 After completing work in the created account, follow the steps in the "Hide account" section to hide it.
Tips
- The net user hidden / active: yes and net user hidden / active: no commands hide and show any account. Just replace hidden with the name of the account you want to hide or show.
- The described methods also work in Windows Vista!
Warnings
- Make sure you run the commands as administrator, but it is better to log in with administrator rights.
- The account is not completely hidden. It is displayed in the lists obtained by the net user command. But that should be enough for casual users.


