Author:
Helen Garcia
Date Of Creation:
14 April 2021
Update Date:
1 July 2024
Content
- Steps
- Part 1 of 3: Collect All Items
- Part 2 of 3: Put everything in your backpack
- Part 3 of 3: Pack your belongings professionally
- Tips
- Warnings
- What do you need
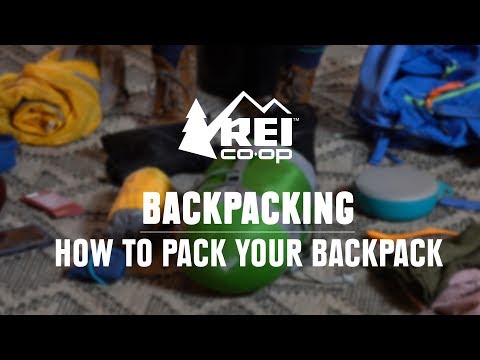
If you are planning a long hike, you should bring your backpack with food, water and other essentials for the hike. Instead of quickly throwing things in your backpack, take the time to plan ahead. Thus, you will be able to properly assemble the backpack so that you can easily get out of it any item that will be useful to you on the way. It may not seem like a very important task to pack your things, but it is thanks to such a little thing that an uncomfortable trip becomes magical.
Steps
Part 1 of 3: Collect All Items
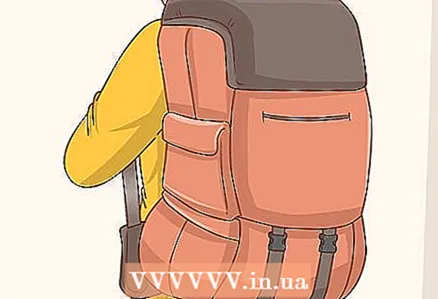
 1 Choose a backpack. If you are hiking, you will appreciate the lightest backpack available. Therefore, it is worth giving preference to a small, lightweight backpack in which all your belongings will fit. If you are going on a hike for a short time, you can easily fit all your belongings in a small backpack, but if you are going on an overnight hike (or going mountaineering), you will need a larger backpack that will fit all the additional equipment (sleeping bag, tent) as well as plenty of food and water.
 - The volume of backpacks is measured in liters, so backpacks with a capacity of 25 to 90 liters can be found on sale.The average volume of a hiking backpack (for a day trip) is 25–40 liters. The average volume for a hiking backpack for 5 or more days is 65–90 liters.
- In addition to the duration of the hike, there is another variable that is important when choosing the volume of the backpack. This is the season in which you are going to go hiking. In winter, you need a large, roomy backpack, because you will need to put heavier clothes and other additional things in it.
- Most backpacks are made with internal frames that support and distribute weight, although you can find backpacks with an external frame that are designed to carry heavy loads. In any case, instead of just grabbing your regular school backpack, it's best to get a custom-made backpack to make your hike more comfortable.
 2 Collect all the items you need. When it comes to hiking, it's best to only take the essentials. You may be tempted to take your camera, diary, favorite pillow with you, but extra unnecessary things will only add weight to your load. Collect only those things that are necessary for the hike. To find out exactly what to take with you, look for information on the Internet in advance, take into account the severity and duration of the hike, the number of nights, and the weather conditions.
 - Consider bringing the lightest yet sturdy gear with you, especially if you are going on a long hike. For example, if you need to take a sleeping bag with you, it is best to choose the lightest and most compact bag that will weigh only a couple of kilograms than a large fluffy blanket, which will take up a lot of space and will be too heavy. Consider the weather, climate and the area where you are going to travel. In some cases, you may need more bulky items.
- If there is an opportunity to make things easier, do so. Instead of bringing a box of accessories with you, take them out of the box and put them in a bag. Instead of carrying a heavy camera or camera with you, use your mobile phone camera. Some people are particularly creative - they cut off the handles of toothbrushes and halve the head of the toothbrush itself.
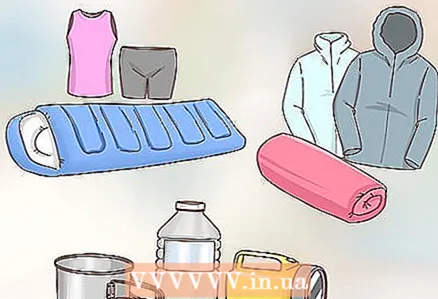 3 Arrange all of your belongings according to weight. Lay out everything that you decided to take with you and sort it into several piles (depending on the weight of the item). You will have a pile for heavy items, a pile for medium weight items and small light items. Such an organization will help you pack your things correctly so that the trip is as comfortable as possible.
 - Light items include a sleeping bag, light clothing, and other light night gear.
- Medium weight items include heavier clothing, first aid kit, and lighter foods.
- Heavy items include heavy food, cooking items, water, torch, and heavy equipment.
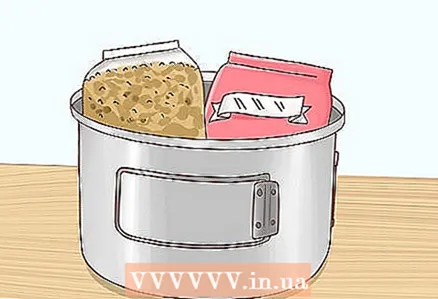 4 Try to combine things if possible. It is important to maximize space and concentrate weight. If you combine the items, they will not "dangle" all over the backpack. The backpack will be more organized and weight-optimized if you store small items in extra space.
 - For example, if you have a small cooking container, fill it with something before packing it. For example, you can put food or an extra pair of socks inside. Try to fill every free corner.
- Small items that you intend to use at the same time must be packed together in the same place. For example, all toiletries should be packed in a small, lightweight bag so you have them all at your fingertips.
- This is a good opportunity to remove items that take up too much space.If you have an item that you cannot pack with other items (because it is an awkward size or different material), you may need to leave it.
Part 2 of 3: Put everything in your backpack
 1 Place the lightest items on top and the heaviest items down at the back. Try to distribute the weight so that the lightest items are on top and the heaviest items are in the center between the shoulder blades. Medium objects should be stacked around them - this is the best way to maintain a healthy back while hiking. If you pack heavy items first, the load on your back will be greater. By spreading heavy items in your backpack along your upper spine, you focus your weight on your hips, rather than where it could cause injury.
 - If you are going to camp overnight, pack your sleeping bag and other items related to light sleep first. Also place extra clothes, extra socks, gloves, and so on on top.
- Pack your heaviest items: water, lantern, heavy food, and so on. They should be between the shoulder blades straight along the back.
- Then pack medium-weight items (food, first aid kit, and other items) - these will surround other items and stabilize the overall weight of the backpack. Wrap flexible items (tarp or clothing) around heavier items to keep them from moving as you walk.
 2 Essentials should always be at hand. There are several items that you will definitely need. Even if they are lightweight, they should be stored on top or in external pockets. You should also have water, food, a map, a navigator, a flashlight and a first aid kit on hand. These items need to be packed very carefully so that when you need them, you know exactly where everything is.
 - After a few days of hiking, you will begin to better understand what things should be “close at hand” and what not. As soon as you realize that some things are not very conveniently folded, put them in your backpack so that it is as comfortable as possible.
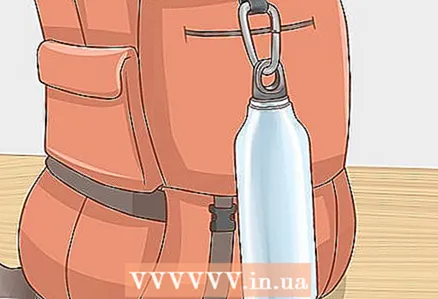 3 Attach some things to the outside of the backpack. If you have items that won't fit in your backpack, you can attach them to the outside by tying them to the top or sides of the backpack. For example, you can attach tent poles to the top of your backpack and hang a water bottle on the side. If you decide to attach some things outside, there are a few things to keep in mind:
 - Try to attach as few things as possible on the outside. It's best to pack whatever you can in your backpack. This is to ensure that things attached to the outside do not get caught in trees or other obstacles when you go hiking. It will be much more convenient for you if you put all your belongings in a backpack.
- Remember the rules for weight distribution. For example, attach a heavy tent or support poles to the top of your backpack, not the bottom.
 4 Check your backpack to see how heavy it is. Lift it up and put it on, tighten the compression straps to a comfortable position. Walk a little to understand how you will feel with a backpack on your back. If it's convenient for you to move around, the backpack is not so heavy, but compact and compressed, and you will be comfortable on the hike.
 - If you feel that the weight of the backpack makes everything cloudy in front of your eyes, remove the backpack and shift the items to make them tighter and more organized, then put the backpack back on.
- If the backpack is unstable on your back, it should also be removed and repackaged so that heavy objects are stacked between the shoulder blades right along the spine. Most likely, before that they were just in the backpack on top.
- If you can't keep your balance while wearing the backpack, again repack it and try to distribute the weight more evenly on both sides.
- If it's too hard for you, think about what things could be left behind. If you are hiking with a group, consider if someone else has extra space.
Part 3 of 3: Pack your belongings professionally
 1 Use food storage bags (solid only). The grocery bag is a popular solution for organizing your backpack properly. These are lightweight yet sturdy bags that are useful for storing food and separating it from the rest of your backpack. Many people fill one bag with food and the other with toiletries. You can pack anything in grocery bags, but seasoned tourists usually do not pack other things in such bags, because packing soft and flexible items around heavy ones is a more efficient use of space.
 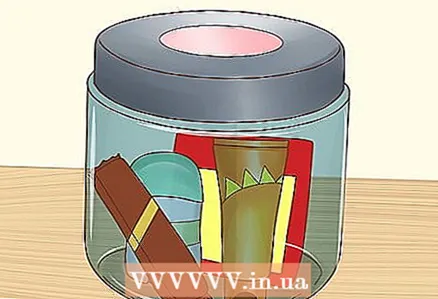 2 Pack the special containers correctly. These are tight containers that store food, deodorants, sunscreens, and other items that can attract bears. These containers are required if you are hiking in a bear area. If you are going on a hike in such an area, it is important to properly pack such a container so that it does not get in the way of your backpack.
 - You shouldn't try to fill the voids in such a special container with clothes. You can use a raincoat or packing bags to fill up the extra space. But don't put everything that you intend to use on the hike there. You don’t want the bear to be attracted to your tent by the smell of the clothes you put on after being saturated with the smell of food.
- Such a container is likely to be heavy, so it should be packed as a heavy object between the shoulder blades and along the spine.
- Pack a flexible item (such as clothing or tarps) around the container so that it does not twitch as you walk.
 3 Buy a film cover to protect your backpack. It is a comfortable and lightweight item that can save your backpack from getting wet in the rain or snow. This plastic wrap needs to be attached to your backpack in bad weather. When there is no rain or snow, you can put this protective packaging film in your backpack so that you can quickly reach it later when you need it.
Tips
- Remember, you need to drink 3 liters of water a day and also consume 2,000 calories a day to feel good. Study the area and natural conditions in which you are going to travel in advance. You may need to take water from a water source or from plants because you can't store more than three liters of water in your backpack - it's too heavy.
- Take a map and compass with you to get directions and directions.
- Check the lighter you are going to take. There must be enough gas in it.
- Wrap the matches in a waterproof cloth to keep them dry.
Warnings
- Explore the wildlife in the area where you will travel. Get ready to face wild animals (bear, snake, wolf, and so on).
- Don't put useless items in your backpack. For example, if you want to take a sleeping bag, do not bring a bulky blanket.
What do you need
- Water
- Food
- Clothing (and spare socks)
- Signal mirror
- Matches wrapped in waterproof fabric
- Lighter
- Environmental protection cream (sunscreen in hot weather)
- Sleeping bag or warm blanket
- Guide
- Compass or map
- Knife
- First aid kit
- Rope


