Author:
Virginia Floyd
Date Of Creation:
13 August 2021
Update Date:
22 June 2024
Content
Removing plasterboard panels may be necessary when repairing a room, repairing local damage, or when restoring a house after flooding. Learning to do the right job will help you get it done much faster. Learn how to prepare walls and learn a few simple steps to complete the entire process efficiently.
Steps
Method 1 of 2: Getting Started
 1 Disconnect electricity, water, gas and other utilities in the area where you work. If you want to remove drywall, it is very important to turn off all utilities in the part of the house where you will be working. Before starting work, you need to turn off the water and electricity at the point of their supply.
  2 Find obstacles with the Discontinuity Detector. Whenever you are going to dig deeper into a wall, it is important to use a discontinuity detector to figure out what exactly you are dealing with. Most modern discontinuity detectors have settings for pipes and electrical wiring, so you can use these to identify and locate any communications that might be embedded in a wall to safely and successfully avoid them.
 - Mark areas with uprights or utility lines with duct tape and walk around carefully when working with sensitive areas.
- If you don't have a discontinuity detector, walk around the room and gently tap on the wall. Places with hollow sound would mean solid plasterboard, while points with more resonant echoes would be stands and possibly pipes. Care must be taken in these areas to work very slowly in their direction.
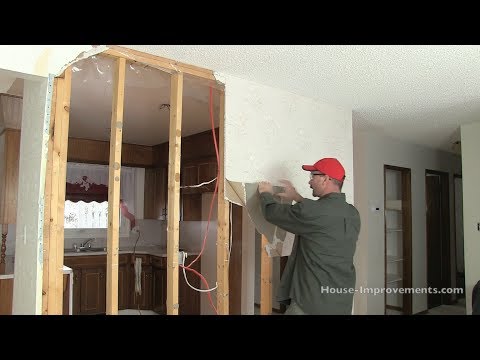
 3 Remove the profiles first. As a rule, you need to remove the skirting boards and ceiling moldings before accessing the drywall and starting to remove it. This is done with a pry bar or other lever tool. Both types of profiles are usually nailed and need to be slowly pulled out of the wall, moving from one nail to the next. Do the same for all profiles or trim around windows and doors before getting to the drywall.
 - Using a utility knife, cut the seam between the profile and the drywall. The joint is usually filled with paint, sealant or some kind of adhesive mixture. If you want to reuse the profile, cut the edge of the seam on the side of the drywall panel to encourage cracking of the wall where the profile and drywall will separate.
 4 Remove the covers from electrical appliances. Make sure these circuits are not energized, then carefully remove the covers from switches, outlets, and thermostats. Drywall is usually placed around the boxes of these devices, so they will not be damaged when removing the drywall.
Method 2 of 2: Removing drywall
 1 Find the self-tapping screws holding the drywall. Depending on the age of the house you work in, drywall can be nailed to the uprights or screwed onto them. To remove the drywall nailed to the uprights, simply start prying on the drywall sections one by one. If the drywall is screwed on, it may take a little longer for you to unscrew the screws before you can pry on and off the sections. Self-tapping screws embedded in the seam can be difficult to find and remove.
 - Drywall screws can sometimes be removed with a Philips screwdriver, but depending on the condition of the wall, this can be more hassle than it's worth.Look at the screws and the condition of the wall itself. If they are easy to twist, then get down to business. This will cut down on your hard work in the future.
- If the drywall is wet, or if the screws are twisted, rusted, or difficult to unscrew, then start prying the panels off as if they were nailed to the uprights.
 2 Start at the bottom of an intact drywall panel. Standard plasterboard cladding is made with 1.2x2.4 m panels. Usually they are installed horizontally with spaced joints. In this case, two sections cover a standard wall section of 2.4 m. The panels are attached to vertical wooden posts, standing in the center with a gap of 40-60 cm.
 - In the case of an uncontaminated drywall panel, use a pry bar to pry the bottom of the panel away from the posts, allowing the entire sheet to be removed. Driving the short end of the pry bar under the bottom of the panel will allow you to use the long end as a lever, making the initial part of the lift easier.
 3 Continue to release the side of the section. Mark a portion of the wall approximately 60 cm from the floor and 20 cm from the end of the wall, remembering to avoid electrical outlets. Using a hammer nailer, make a vertical series of holes 30 cm long.
 - The point is to open up some space, grab the drywall, and pull it out. This isn't top math: punch a few holes in the side and create yourself something to grab onto.
 4 Take out the section. Grasp the top and bottom holes you made and pull a large piece of drywall with nails nailed to the nearest rack. Move along the wall, pulling out pieces of drywall along the way. If the drywall breaks on the rack, make another vertical hole in the adjacent slot and continue pulling the drywall out by hand.
  5 Start in the center of the water-damaged drywall. In the case of water damaged drywall, a good strategy is to create a hole at the midpoint of the 35cm space between the uprights. In these circumstances, it is convenient to use a sledgehammer or some kind of ram.
 - If water damage has spread to the top panel, the same action will usually cleanly separate the wall from the ceiling.
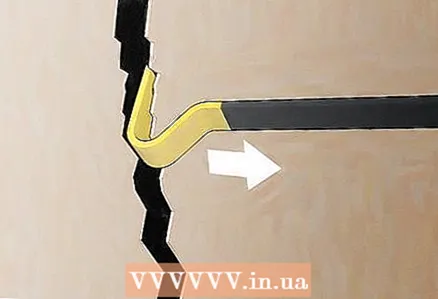
 6 Pull out the drywall nails remaining in the racks. Use a pry bar to remove any nails left in the racks, or take care to unscrew the screws left in the wood. A pry bar or nail pry bar works well for this purpose.
Tips
- In some situations, nails are difficult to see. Rub the tool up and down the lengths of the open rack to find the remaining nails.
- If you plan to reuse the covers for electrical outlets, remove them in advance using a screwdriver.
Warnings
- Drywall is a dense, heavy material, and some varieties contain fiberglass, which can cause significant irritation if appropriate protective equipment is not used.
- Always wear safety glasses, gloves, hard hat, and closed shoes or boots when dealing with demolitions. A respirator will also help to reduce inhaled dust.
- These instructions are for removing drywall panels installed on walls only. Removing drywall from a ceiling can come with additional threats and challenges that are not covered in this article.
- Old drywall systems may contain asbestos or be painted with lead paint, which are hazardous materials that require specialized equipment and training to handle safely.
- Make sure there is no electricity in the room where you intend to remove drywall. When in doubt, turn off the current at the main board.


