Author:
Ellen Moore
Date Of Creation:
17 January 2021
Update Date:
1 July 2024

Content
- Steps
- Part 1 of 2: Buy what you need
- Part 2 of 2: Connecting and Installing a Lighted Makeup Mirror
- What do you need
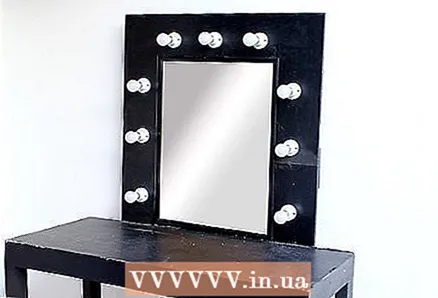
Make your own illuminated vanity mirror if you want to create a glamorous make-up area. Such a classic mirror will breathe vintage-style Hollywood charm. Plus, it will provide even lighting to help you apply the perfect make-up.Once you have decided on the location of the mirror, take all the materials you need and follow the simple installation instructions that come with your wall lights (lightbars). A little more - and you will shine!
Steps
Part 1 of 2: Buy what you need
- 1 Buy a mirror. First you need to decide where you want to place your illuminated makeup mirror. Take measurements of the space in which the mirror will be installed. You also need to find out the exact width and height of the mirror. Buy a mirror of the right size from a home improvement store, home improvement store, or even a thrift store.
- The frame of the mirror must be wide enough to accommodate light bars.
 2 Buy all the equipment you need for your makeup mirror. It is possible that you already have a few useful items for this project at home. Find two extension cords, scissors, and strips of double-sided tape (the ones that need to be peeled off before use). For bulbs and wall lights, head to a lighting store. Use only the type of bulbs recommended by the lightbar manufacturer.
 - You can also find wall lights in a variety of sizes on the internet.
 3 Open the packing box of the wall lights. Remove both lightbars from their packaging. Remove the protective caps that cover the contact areas of each connector. Set the caps aside and don’t lose them as they will need to be reinserted after the lightbars are installed.
 - Lightbars usually have a mirrored body, so the base of the screwed in bulbs is almost invisible.
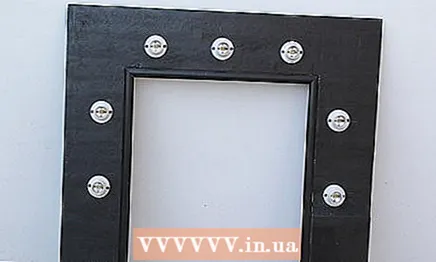
 4 Screw the light bars onto the mirror. Choose a location on either side of the mirror for the lightbars so that they are flush with the frame. Depending on the type of wall light you purchased, you will find screw holes in several places. Use a screwdriver or drill to attach the fixtures to the mirror.
 - Usually, screws are supplied with wall lamps, with which they are attached.
 5 Cut off the extension cords. Take an electrical extension cord and use scissors to cut the cord from it. Be very careful not to injure yourself and cut off both extension cords. Make a half-centimeter cut at the end of the cord, on the side from which you just cut the extension cord.
 - Cut the cord right down the middle, between the two thin wires.
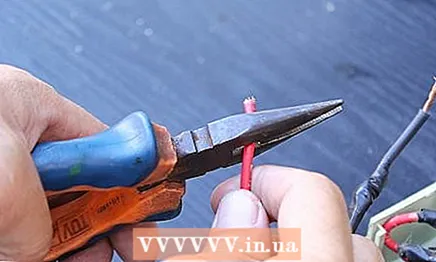 6 Strip the copper wire. Cut the cord and you will have two thin wires in your hands. Take them in different hands and gently pull in opposite directions. Pull until you have two separate 13 centimeters long wires in your hands. Using scissors, cut approximately 2.5 centimeters of plastic insulation from the end of each copper wire. Cut and strip the insulation so that only the bare copper strand remains. Repeat the procedure on all wires for both cords.
 - Peel off the plastic insulation very carefully so as not to damage the copper wire.
Part 2 of 2: Connecting and Installing a Lighted Makeup Mirror
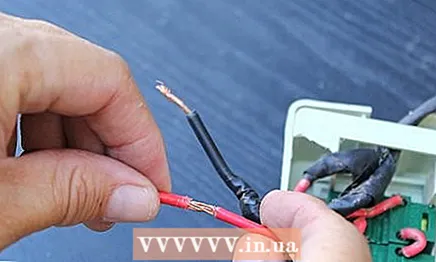 1 Connect the wire to the fixtures. Remove the wall light cover. Underneath you will find copper wires (black and white insulated). Feel the copper strands of the cord you cut from the extension cord. Take whichever wire feels softer to the touch and twist it into the black wire from the light. Now take a hard wire and twist it with white.
 - Just twist the wires together several times until they are tightly braided into a single strand.
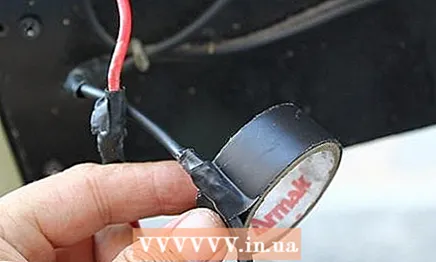 2 Put on the resulting twist plastic caps for wire connections. The set of the wall lamp includes plastic caps (usually they are orange or yellow in the form of a cone, with an internal thread). Take one of these threaded plastic caps and slide it tightly over the bare copper wire you just twisted. Screw it in until it stops.Do the same for all connections between the lightbar and the extension cord wires to insulate the exposed ends of the copper wires.
 - The caps will help securely connect the wires and reduce the likelihood of an electrical fire, so it is very important to use them.
- 3 Put the lightbar protector back in place. Check that the insulation caps are screwed tightly over the black and white wire connections on the wall switch. Screw on the cover of the wall light so that no wire sticks out of the body.
- At the same time, try to run the white and black wires as far apart as possible in the lightbar case. This way they will not come into contact with each other, which can lead to tripping of the automatic switch (fuse) or even a fire.
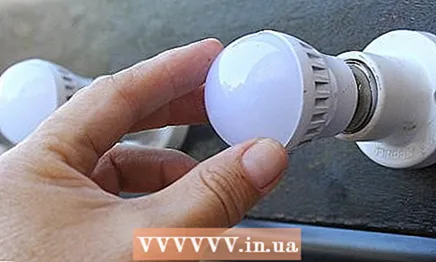 4 Now you can screw in the bulbs. Take the metal caps that you set aside earlier and place them over each electrical connection. Screw one bulb into each socket as far as it will go. Connect the extension cords to the power terminals and turn on the lights.
 - Follow the manufacturer's set-up instructions if using a remote control to adjust the lighting.
 5 Hang a mirror. On the back of the mirror base, mark the attachment points. Some types of mirrors are sold with hooks already attached to the back to hang it on the wall. Measure the distance between the hooks. Transfer this dimension to the wall where the mirror will hang and make small marks. To hang the mirror, drill holes for fasteners (such as anchors or screws).
 - Weigh the mirror and be sure to use a mount that can accurately support its weight. Otherwise, the makeup mirror will damage the wall or even fall over.
What do you need
- 2 wall-mounted light bars (with screws for fastening)
- Screwdriver or electric drill
- 2 extension cords
- Scissors
- 2 packs of double-sided tape
- Light bulbs
- Remote control (optional)


