Author:
Joan Hall
Date Of Creation:
25 July 2021
Update Date:
1 July 2024
Content
- Steps
- Method 1 of 4: Making a rope frame for your kite
- Method 2 of 4: Preparing the kite webbing for the rope framing
- Method 3 of 4: Making a Kite Canvas from a Garbage Bag
- Method 4 of 4: Preparing the kite frame from the trash bag
- What do you need
Diamond-shaped kites are among the simplest traditional types of kites. And making them is much easier than it might seem at first glance. After collecting all the necessary materials, you can create a kite on a rope frame or make a kite out of polyethylene from a garbage bag on a wooden frame. The last option will be somewhat stronger than the first.
Steps
Method 1 of 4: Making a rope frame for your kite
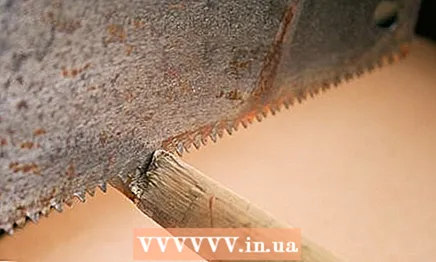 1 Prepare two wooden battens of the correct size. Saw off two pieces of thin, light wood to the length you want. You can take one lath and just cut it into two parts, or you can take two laths and shorten them to the required length. You can work with a small hacksaw or a construction knife. Try to make the ends of the workpieces as smooth as possible.
 - Work outside or on a trash can to avoid clutter.
- The exact length of the slats depends on how big you want your kite to be. Reiki can be the same length, or you can make one of them shorter. For example, both of them can be 1 m long or 80 and 40 cm long. It is up to you to decide which shape your kite should have.
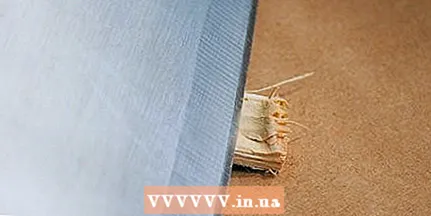 2 Make serifs at the ends of the slats. With a saw or knife, make notches at the ends of the slats, on which the frame twine should be held. The serifs should not be too deep. Their depth should be just enough so that the rope is securely anchored there. Make sure the serifs on both ends of each rail are symmetrical.
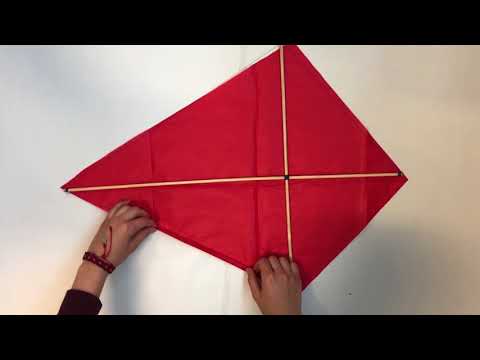
 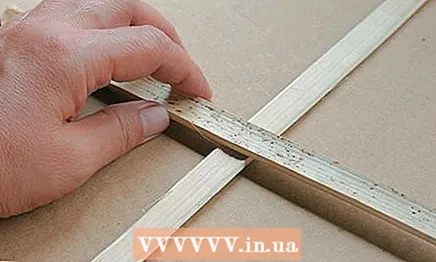 3 Fold a cross from the slats. If you have prepared two slats of different lengths, place the largest one vertically and the short one horizontally. In this case, the horizontal staff should be located at a distance of ⅓ from the top point of the vertical staff.
 - For the notches, the notches on the vertical bar should be parallel to the horizontal bar and the notches on the horizontal bar parallel to the vertical bar.
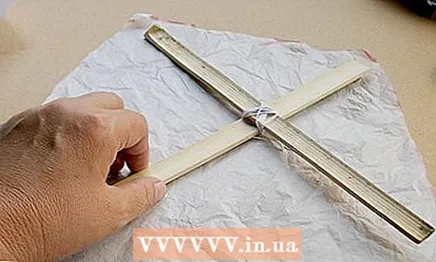
 4 Tie the slats together at the crossing point. You will need about 30 cm of sturdy kite string.Wrap the twine in a circle in two directions at the crosshairs formed by the laths. When tying the string, make sure the staves are held securely at a 90-degree angle to each other.
 - Tie the string in a few knots to secure the cross in place.
 5 Wind the end of the string around the bottom end of the vertical strip. Starting at the very bottom edge of the vertical strip, wind five to six turns of string around it. Finish wrapping by returning to the very end of the rail.
 - The purpose of this step is to secure the string to the frame before you stretch it around the perimeter.
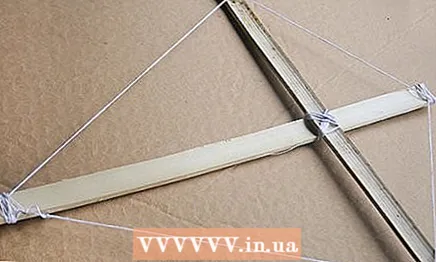 6 Pull the string through the notches around the entire perimeter of the frame. Starting from the bottom point, where the string is already secured, successively stretch it along all the serifs of the frame (wrapping around them) and follow the quality tension.
 - When finished, hook the string back to the bottom end of the kite and tie it securely.
- Pulling the string along the perimeter of the frame is necessary in order for the kite to retain its shape during flight. In addition, the stretched string will become a guide for you to cut out the snake's canvas.
Method 2 of 4: Preparing the kite webbing for the rope framing
 1 Trace the outline of the kite on a large piece of paper. Newspaper sheets are usually well suited for this purpose (provided they are large enough). If you cannot find a large enough newspaper, you can use any other large-format thin paper. When you transfer the contours of the frame to paper, do not forget to provide about 2.5 cm of allowance on all sides, so that you can wrap and glue the canvas.
 - There is no need to create perfectly straight lines as you will have to fold the paper later.
 2 Cut out the canvas of the snake. Set the snake frame aside and cut out a piece of paper for it. Throw away the scraps of paper as you no longer need them. Work strictly along the drawn contours, or even a little further than them, so as not to accidentally carve out too small a kite canvas.
 - When the canvas is cut, lay it out on the table and place the kite frame on top.
 3 Fold the edges of the fabric over the string and secure in this position with tape. First, make sure that the frame itself lies exactly in the center of the prepared paper web. Moving consistently along the entire perimeter of the kite, wrap the edges of the paper with twine. First secure the paper with tape on the tops of the kite, and then on all the folded sides.
 - For extra support, also glue a few pieces of tape along the wood strips of the frame to also stick them to the paper.
 4 Tie a long string to the cross of the kite. Now that the kite itself is ready, create a bridle on it and tie a string to it, for which you will launch the kite into the sky. The length of the string (line) should be about 18 m. A long length of string is necessary in order for the kite to fly freely.
Method 3 of 4: Making a Kite Canvas from a Garbage Bag
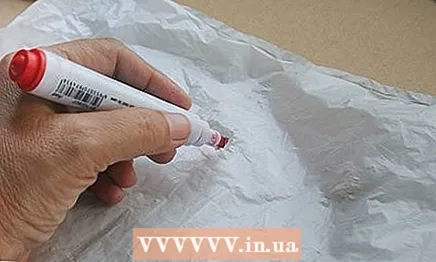 1 Mark the top point of the kite canvas. Place a large garbage bag (in two layers) on the table. It is best to use large garbage bags for street bins, as they are made from a denser material. Use a marker to mark the first vertex of the kite canvas a few centimeters from the top of the bag along the left fold. The fold of the bag itself will become the center line of symmetry of your kite.
 - To make a kite, you usually need a garbage bag with a length of at least 1 m.
- Based on the color of the garbage bag, make sure that the marker marks on it are clearly visible. For example, a silver marker is best for black bags.
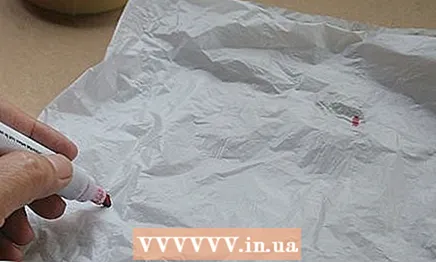 2 Measure and mark the side tops of the canvas. Using a ruler or tape measure, measure from the previous mark 25 cm down the fold. Then, from the last point, move perpendicularly to the side by 50 cm. This point will be somewhere in the middle of the canvas of the bag. Mark it to indicate the side vertices of the kite.
 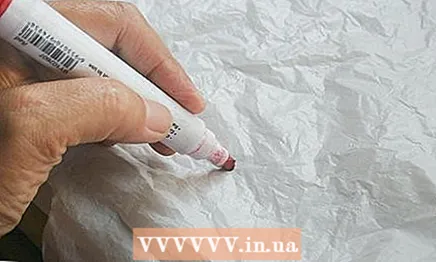 3 Measure and mark the bottom point of the canvas. From your very first mark, go down 1 m along the fold of the bag. The three points on the bag should form a triangle in which the side vertex is located closer to the top.
 - If you will be using a smaller garbage bag, make sure that the marks you place maintain the above proportions. The distance from the fold to the side mark should be half the length of the kite so that its unfolded canvas has the same length and width.
- For example, from the fold to the side top, you can measure 25 cm if the length of the kite is 50 cm. Subject to the proportions, it is permissible to create smaller kites.
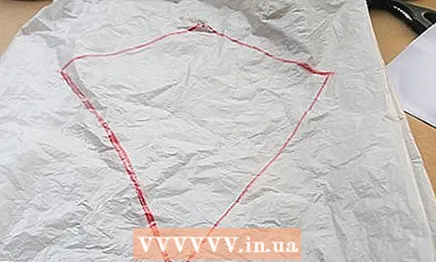 4 Connect the dots with a marker. Using a ruler or other straight object, connect the top and side vertices of the triangle together, as well as the side and bottom vertices. The lines don't have to be perfectly straight, but try to make them even more even.
 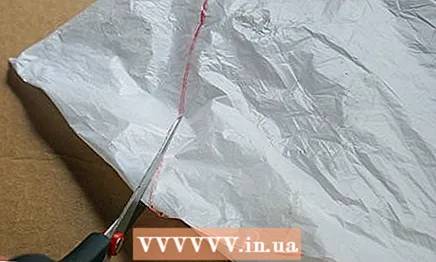 5 Cut out the canvas of the kite. Use sharp scissors or a construction knife to cut the garbage bag as evenly as possible along the lines. When using a knife to protect the work surface, you will need to first place a large sheet of cardboard under the polyethylene.
 - After cutting out the kite, leave some scraps of polyethylene. You will need them a little later.
- When the snake canvas is cut, unfold it to a diamond shape and lay it out on the table.
Method 4 of 4: Preparing the kite frame from the trash bag
 1 Prepare two wooden slats or bamboo sticks each 1 meter long. These slats will be used to create the snake frame. It's not bad if you can immediately get the slats of the required size, but otherwise you will need to saw them down to the desired length.
 - Use round battens with a diameter of about 6 mm.
- Use a small hacksaw or construction knife to prepare the slats. Work either outside or on the trash can so you don't create unnecessary clutter with sawdust.
- If you made a smaller kite canvas, use a frame that is the same size as the canvas.
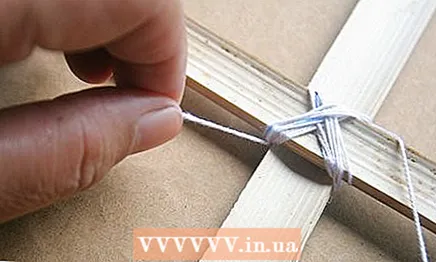 2 Fold the slats with a cross and tie the cross. The horizontal staff should be 25 cm from the top of the vertical staff. Use a piece of kite string about 30 cm long to tie the D-piece tightly. Tie the string in several knots to secure the slats in place.
 - It is not necessary to rewind the crosspiece strongly with twine, the main thing is that the slats are securely fastened. For extra strength, the twine on the cross can be coated with glue or wrapped with tape on top.
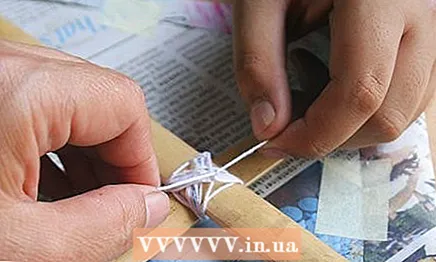
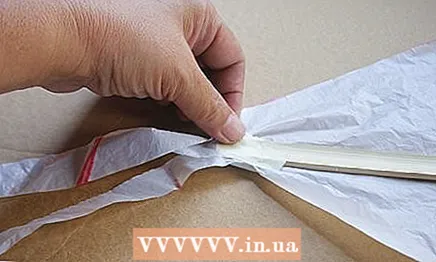
 3 Attach the crosspiece to the kite's polyethylene sheet. Make a small notch at each top of the canvas. Wrap the resulting pairs of shreds around the ends of the slats and tape them securely to the frame. It is best to use an adhesive tape designed for sealing, but it is more important to make sure that the tape is securely holding the snake canvas on the frame.
 - When the tops of the kite are secured, you can take 2-4 additional pieces of tape to stick them along the frame rails and secure the canvas to the frame more securely.
 4 Tie a strip of polyethylene about 60 cm long to the bottom end of the kite. It will become the tail of the kite, which will stabilize its position in the wind. Additional shorter strips of polyethylene can also be tied to the main tail to make it wriggle better. For more colorfulness, bright fabric ribbons can be used as a tail.
 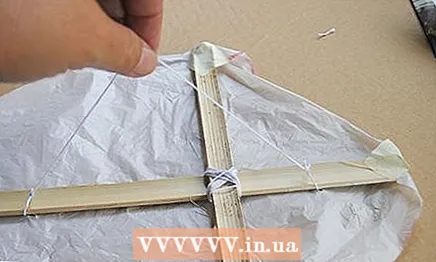 5 Attach a string (rope) to the snake frame. Punch 4 small holes in the kite fabric around the cross (one at each corner).Note that the paired holes should be closer to the side apexes of the kite. Thread a piece of string through all 4 holes, making a bridle, and tie it securely to the crosspiece. Tie a long string to the bridle in the middle.
 - This string will be used to launch and control the kite, so it should be long enough. The height of the kite will depend on the wind, but you will likely need at least 18m of string.
What do you need
- Round wooden lath (2 m long and about 6 mm in diameter).
- Small hacksaw or knife capable of cutting wood (construction knife)
- Special kite string or other lightweight string
- Large newspaper or thin paper
- Marker
- Ruler or tape measure
- Scissors
- Scotch
- Large trash bag


