Author:
William Ramirez
Date Of Creation:
24 September 2021
Update Date:
1 July 2024

Content
- Steps
- Part 1 of 4: Gathering Information
- Part 2 of 4: Planning your video
- Part 3 of 4: Create a video
- Part 4 of 4: The Final Stage (Post Production)
- Tips
- Warnings
- What do you need
Draw My Life videos have been a trending trend on Youtube for a long time; in part they are so popular because they are relatively easy to make yourself. All you need is a camera, something to paint on, something to paint with, and life. This tutorial assumes you already have a YouTube account, subscribers and a camera.
Steps
Part 1 of 4: Gathering Information
 1 Start preparing the relevant document either on paper or digitally on your computer in order to gather all the information you need. This document should reflect all the significant events in your life, so you will need a lot of paper if you decide to use it.
  2 Get in touch with your family. Chances are, your family will have the deepest knowledge about your life, and your relatives will help describe you. Your parents remember you better than you were at a young age. Make sure you have enough time to interview them informally about how you behaved and what you did.
 - They will also remind you of those embarrassing experiences that you wish you could forget, but that still play an important role in shaping your personality.
- They will also be able to remind you of those happy moments that you may have already forgotten about.
- Try interviewing each member of your family individually so they can feel more comfortable sharing their thoughts and experiences about your life.
 3 Connect with your current and former friends. Send messages to friends you haven't seen for a long time and ask if they would like to chat a little. Explain to them that you are doing something like an autobiography and would like to ask them for help. Take an informal interview with each of them, just like you did with your family members.
 - It can also be a great excuse to re-establish relationships with friends you haven't seen in a long time. Try not to lose contact with them even after the project is finished!
 4 Reflect on your life and try to remember those events that are especially important to you. These events have clearly shaped you today. For example:
 - Labor experience. At work, we gain different experiences, hard work shapes our personality.
- Relationship. This can include everything from romantic relationships to friendships. Relationships with people help us understand ourselves and help us figure out how to relate to other people. These important aspects should be included in the video.
- Any moves to a new location. Everyone is afraid of moving to a new place. It is necessary to establish new connections, and sometimes abandon old ones. Moving helps shape your personality.
 5 Write down all the information you have gathered in one document. If all the data is collected in one place, then the project will be easier to visualize.
 - Writing everything down will help you piece together what was really important in your life.
- Do not try to delete anything at this stage. Just write down everything you have; later you will decide what exactly you want to include in the project.
Part 2 of 4: Planning your video
 1 Decide what exactly you don't want to tell your audience. You can decide for yourself what to tell your audience and what not. The videos from the Painted Story of My Life series tend to be quite personal, but it's up to you to decide what to tell.
 - Remember that your audience is likely to expect some pretty personal details to be revealed in the video, though ...
- Try to focus on the 8-10 events or periods in your life that have truly shaped you today. If you include all the memorable aspects of your life in the video, it can get too long.
 2 Once you've decided what you want to include in your video, storyboard and sketch out a free script. While My Life Story Painted videos are less formal and more personal, they still need to be well structured. These videos are presented as "slides". The author draws an event from his life, and then out loud explains why this event was so important. Have a general idea of what you want to communicate with each slide. Here's what you can talk about:
 - Why did you decide to include this event. Why is this event so important? How did it shape your personality?
- How do you perceive these events from the position of today. Tell us how this event makes you feel today. Most likely you have already managed to change your mind about what happened.
- Drawn My Life Story videos tend to start at birth and continue to the present, so you should try to maintain that structure.
 3 Consider if the video will have a negative impact on anyone in your life. For example, do not name anyone who has wronged you, as this can ruin their life (depending on the characteristics of your audience).
 - If you do not have consent from people about mentioning them in your video, then use fake names in order to keep them anonymous.
 4 Think about how you want to talk about memorable events in your life. How emotional should your video be? Do you want to fully show an anonymous audience how you are feeling? If you have subscribers, they will most likely appreciate your sincerity. Remember that not all people on the Internet are friendly. Sometimes they can attack your vulnerabilities.
 - For example, if you were offended as a child, then decide how honestly and in detail you want to talk about it in terms of future emotional reaction. People who attack your vulnerabilities can awaken painful memories.
- Do you want to focus on the good or the bad? Decide what will be the most honest expression of your feelings.
 5 Decide how you will actually create your video. Many people position their camera over a whiteboard so that only it is in the frame. You can also use software such as Paint or Photoshop (if you prefer) to paint.
 - If you are using drawing software, you will also need an application to record screen actions. A popular screen capture program is Fraps.
Part 3 of 4: Create a video
 1 If you are using a camera and a whiteboard to record your drawings, then position the camera above the whiteboard and capture the entire whiteboard in a video lens frame. Try to only grab the board, as the border around it can be distracting.
 - A good way to do this is to set up a tripod over the board and tilt the camera lens downward.
- If you do not have a camera or tripod, but have a phone that can record video, you can still make a video from the "Painted Story of My Life" series. Just place your phone on the table with the camera lens off the edge of the table. Place the board under the table so that it fits into the camera lens.
 2 If you are using a screen capture program with a drawing program, then open both programs and start recording.
 3 Turn on board recording and draw your first scene. Decide in advance (based on the storyboard) what you will be drawing. Most likely, you will start from where you were born and where you were born.
 - Draw as you can. Schematic drawings are perfectly acceptable. Your audience is more interested in your life story and will forgive you bad drawings if they like your comments.
 4 After you finish painting the scene, erase the drawing and start painting the next scene. Each scene should represent a separate event or memorable period in your life. Try to draw each scene as fully as possible before you move on to the next.
 - Use the rule of thirds to focus on the scene. The Rule of Thirds helps draw your viewer's attention to specific parts of a scene.
 5 Make your drawings exciting and interesting. Since the entire video will consist of shots of the whiteboard, you will have to work on making your drawings more fun and interesting so that the viewer does not get bored.
 - Use different colors to add variety to your footage.
Part 4 of 4: The Final Stage (Post Production)
 1 Download the video to your computer. If you like your drawings, then the only significant editing you will have to do is speed up the video. Videos from the Drawn Story of My Life series are usually accelerated to make the video more interesting to watch. Use editing software such as iMovie or another application to speed up your video.
 - You can also cut out scenes that you think are unnecessary in your video. If you don't like a scene, then cut it out. If you think that a particular episode is unnecessary, then cut it out. Take advantage of the editing skills you've developed while working on other videos.
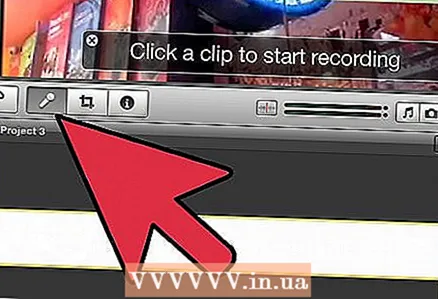
 2 Mute your video and record your comments on the video. Make sure you do this in a place where no one will disturb you. It is much easier to annotate a video than to explain something while drawing. Use the free script that you prepared earlier and try to edit the audio recording so that it describes the events drawn in a concise and concrete form.
 - Speak clearly and concisely so that your audience can understand you.
 3 Synchronize audio and video streams. Make sure that the comment strictly matches what is shown in the particular picture. This step is considered the most time consuming in terms of editing.
  4 When you're happy with the result, upload the video to your YouTube channel! Or you can keep it for yourself and revisit it as you get older.
 - Don't pay any attention to negative comments.
Tips
- Plan out everything you are about to share as if you were writing a script.
- Drawings on a chalkboard are easier to read than reading 20 pages of your life.
Warnings
- If you reveal some very personal aspects, then remember that many people can use this against you, so be on the alert.
- You probably shouldn't paint anything about those you hate. Remember that thousands of people will be able to see this video.
- Set up the camera so that it records your drawings correctly. Otherwise, your drawings will be blurry.
What do you need
- YouTube account
- Video editing app or something similar
- Whiteboard and markers
- Board cleaner
- Camera


