Author:
Carl Weaver
Date Of Creation:
22 February 2021
Update Date:
1 July 2024

Content
- Steps
- Part 1 of 3: Sizing the new neckline
- Part 2 of 3: Remove the piping and V-neck
- Part 3 of 3: Attach the neck piping
- What do you need
- Additional articles
V-necklines on clothing suit most people. They draw more attention to the face and visually lengthen the body. That said, you can easily transform a regular crew-neck tee into a V-neck tee with just a ripper, fabric scissors, tailor's pins and basic sewing skills.
Steps
Part 1 of 3: Sizing the new neckline
 1 Gather the required materials. For this project, you will need: a T-shirt with a round neckline, a ruler or tape measure (if using a tape measure, you will also need some kind of auxiliary item with a straight edge), tailor's pins, a fabric marker, a ripper, matching threads for the T-shirt fabric, a sewing machine, or needle.
  2 Determine the size of the V-neck. The easiest way to do this is to use another V-neck T-shirt as a guide. Fold this tee in half lengthwise with the shoulder seams aligned. Place it folded on a table. Then use a ruler to measure from the top of the shoulder seam (where it joins the piping) to the bottom of the cutout. Record the measurement result.
 - Unless you have another V-neck T-shirt, you will have to figure out the depth of the neckline yourself. In this case, it is better to start with a smaller one first, as you can always make the cut deeper later.
- You can pre-try on a T-shirt to see the approximate depth of the neckline you need. Put on a T-shirt, look in the mirror and mark the desired bottom of the cutout with a tailor's pin.
 3 Fold the crew-neck tee in half lengthways. The front of the T-shirt should look outward. Check that the neckline, shoulder seams, and sleeves are in perfect alignment. Lay the folded T-shirt on a table and straighten the fabric to avoid wrinkling.
  4 Draw the outlines of the V-neck. Apply a ruler diagonally from the top of the shoulder seam to the center fold of the shirt. Using the measurements you made in the previous step, use a fabric marker to mark the bottom of the V-neckline. Then, draw a line from the top of the shoulder seam (where it joins the piping) to the mark you put in.
 - Flip the shirt over to the other side and repeat the operation.
Part 2 of 3: Remove the piping and V-neck
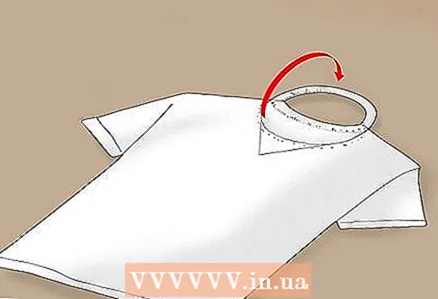
 1 Rip open the seams of the neckline. Unfold the shirt, turn it inside out, and lay it out on the table. Make sure the front of the t-shirt is facing you. Then take a ripper and rip open the seams of the neckline on the front half of the shirt.
 - If you don't have a ripper, you can use sharp scissors to gently rip the stitches.
- Stop at the shoulder seams. Unless you plan to sew a new piping to the T-shirt, leave the back sewn on.
 2 Spread the shirt out on the table. Be sure to pull back the ripped part of the piping so that it does not interfere with making a new cut. This will allow you to keep the cut as straight as possible and avoid mistakes.
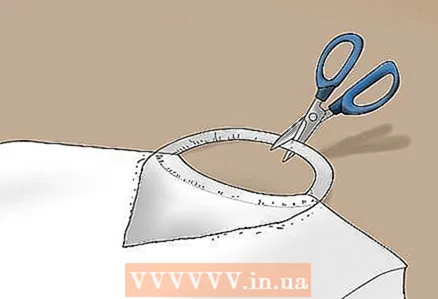
 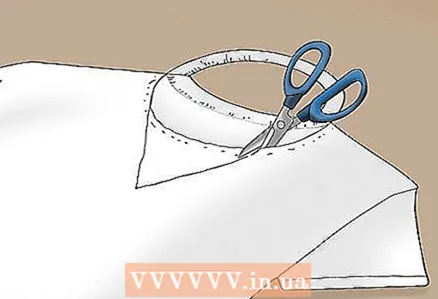 3 V-neck your shirt. Starting at one shoulder, cut the front of the shirts along one of the marked lines. Stop at the bottom of the notch. Repeat the procedure on the other side. Be careful as you only need to cut the front of the shirt.
 - If you do not plan to process the cuts of the neck with stitching, then the work on the T-shirt can be considered finished.
Part 3 of 3: Attach the neck piping
 1 Cut the ripped off of the neckline in the center. First, it will be necessary to determine its center point. To find this point, lay the shirt front side up in front of you. Measure the length of the trimmed piping, then use a fabric marker to mark a dot in the middle of the piping. Cut the piping at this point.
  2 Stretch each end of the piping along its own side of the V-neck. In most cases, the piping on T-shirts is made of knitted fabric that can stretch a few centimeters.
  3 Chip off the raw trim and V-neck cuts. Stretch one end of the piping along your side of the neckline as you work it in.Place pins every 1 inch so that the piping is in its extended position by the time you start sewing. Do the same for the second end of the piping.
 - Remember that you will need to fold the front facing T-shirt inward, matching the raw edges of the facing and the neckline.
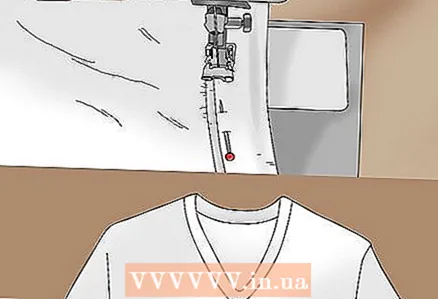 4 Sew the piping by running two stitches from the shoulder seams to the center point of the cutout. Sew approximately 6mm from the edge of the aligned trim and neckline. When you finish laying the second line, stop a little before reaching the end of the first half of the facing, insert it (the first end) into the seam, and put the second end of the facing on top and sew the resulting corner. Finish the work by ironing the seams with an iron.
 - Be sure to use thread that matches the fabric of the T-shirt.
- If you do not have a sewing machine, you can manually sew the hem to the V-neck.
What do you need
- Flat surface
- Fabric marker
- Ripper
- Ruler
- Fabric scissors
- Tailor's pins
- Sewing machine
- Threads
- Needle
- Iron
- Ironing board
Additional articles
How to patch holes How to take measurements for clothes without a measuring tape
  How to narrow a dress at the waist How to sew on a button How to make a bandana How to measure shoulder width
  How to measure your waist
 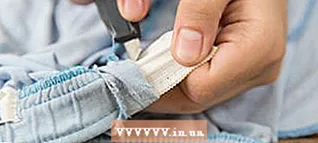 How to stretch an elastic band How to finish a stitch
  How to sew a T-shirt How to make a T-shirt-top from a T-shirt
  How to hem a T-shirt or shirt How to thread a needle and tie a knot
  How to make straps for a strapless dress


