
Content
- Steps
- Method 1 of 3: Budget Studio Lighting
- Method 2 of 3: DIY Light Modifiers
- Method 3 of 3: Homemade softbox
- What do you need
- Budget studio lighting option
- DIY light modifiers
- Homemade softbox
If you just set foot on the path of a photographer and want to create a simple home studio or an experienced professional who wants to save a little, you do not need to spend tens of thousands of rubles on expensive equipment that you can make yourself. A typical lighting kit includes a three-light circuit, lightboxes, reflectors, and softboxes that you can make yourself and replace with the most basic household appliances. Patience and thoughtfulness will help you create your own lighting equipment with minimal costs!
Steps
Method 1 of 3: Budget Studio Lighting
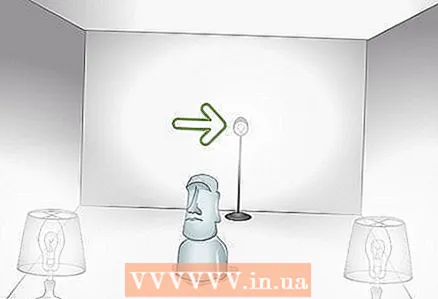 1 Use a floor lamp and table lamps to create a three-light setup. The three light sources represent the standard lighting scheme used by all professionals. One light source is placed behind and above the subject, and two more on opposite sides of the camera. For a three-light setup, you can use two table lamps and a floor lamp with LED or fluorescent lamps.
 - The light behind the subject is called backlight.The main light to the side of the camera is called the key light, and the opposite side is the fill light.
- Place the floor lamp behind and slightly above your subject for backlighting. Use table lamps as the key and fill light, which you want to place in front of the subject on both sides of the camera. Use the strongest or brightest lamp for the key light.
 2 Position the studio next to a window to replace the key or fill light. In a three-light setup, the key light is the main source that illuminates the subject. Fill light is placed on the opposite side and is intended to soften shadows. If the studio will be located near the window, it will be possible to do without one additional source. Use window light as fill or highlight depending on the brightness of natural light versus lamp light.
 Advice: the light from the window gives the subject a natural look that is sometimes difficult to recreate with artificial lighting. Select the east side window for morning shots and the west side window for evening shots.
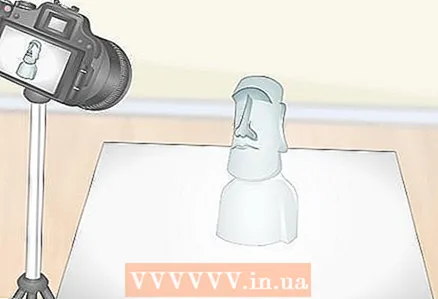 3 Use foam board as reflectors. If you are shooting the subject on a table, place a sheet of white foam board under the subject. Use clothespins to secure the foam board and tilt the camera over your subject. The foam board will reflect the light and allow you to expose the frame at a higher shutter speed, as well as create a clean, minimalistic background for your composition.
 - White paper can be used instead of foam board, but it tears and deteriorates quickly.
Method 2 of 3: DIY Light Modifiers
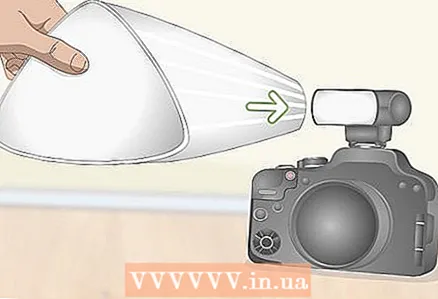 1 Use a funnel as a flash diffuser. Light diffusion is the process of spreading light evenly from a focused source. This is an important aspect of photography, especially when using a standard flash. Take the white funnel for a homemade diffuser. To do this, simply slide the funnel over the flash through the flared hole. The shape of the flash will hold it in place as you shoot.
 - If you cannot fix the funnel, hold the flat surface of the funnel about 5–10 centimeters from the flash head.
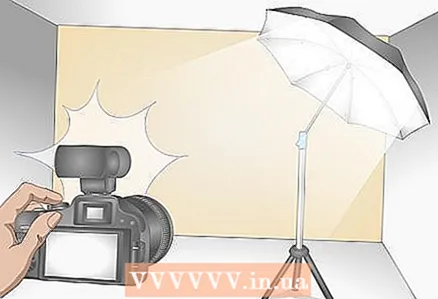 2 Attach the umbrella to the pole to create a reflector. Another way to soften harsh light from flash and other light sources is to direct it onto a reflective surface. For a simple reflector, you can use a black umbrella, inside which should be fixed with plain paper for printing. Position the paper so that it covers the entire surface. Point the flash inside the umbrella away from the subject.
 - The light will fill the room depending on the angle at which the umbrella is located. It is necessary to adjust the position of the umbrella to obtain the desired brightness and direction of the light.
Advice: there are tripod attachments with which you can attach special reflective umbrellas. Use this attachment to secure a regular umbrella. Often, stands and tripods are initially equipped with a special mount. Look for such an umbrella hole at the top of the holder.
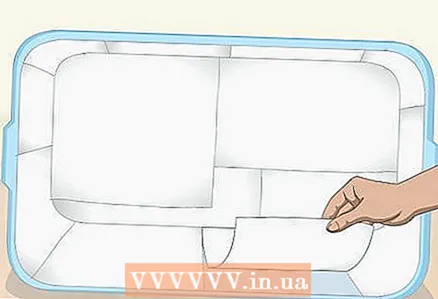 3 Use an empty plastic container and white paper to make a lightbox. A lightbox is a small box with reflective sides that bounce light in all directions to create diffused light and soften shadows. Make a DIY lightbox using a clear plastic container and white paper. Position the drawer so that the inside of the drawer is facing the camera. Take a large sheet of white paper and tape it to the top of the container. Arrange the paper in a semicircle without sharp corners or creases to create a smooth slope.
 - Place your subject in the center of the lightbox.This method is only suitable for shooting small subjects.
- Place several lights around the container to illuminate it from all directions.
- Sometimes a lightbox is called a light cube.
Method 3 of 3: Homemade softbox
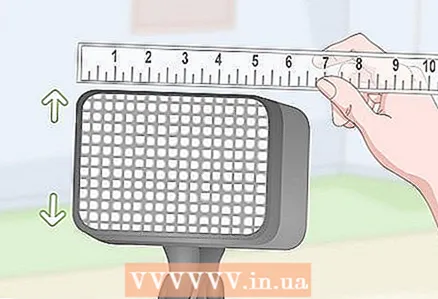 1 Measure the sides of the light source to determine the dimensions of the base. A softbox attenuates harsh glare to produce more uniform shadows and highlights. First, measure the height, width and depth of the light source to determine the dimensions of the base. If you are using a clip-on lamp, measure the horizontal head on the stand to which the softbox will be attached.
 - The dimensions of the edges of the light source determine the size of the base of your softbox panels.
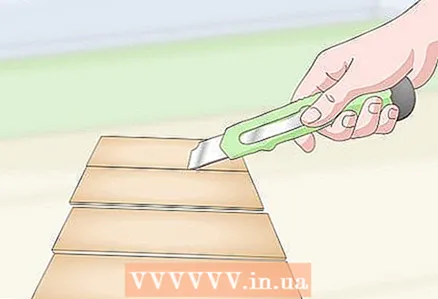
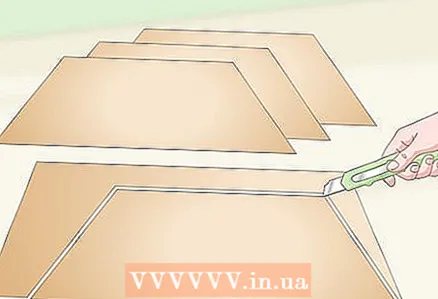 2 Use a utility knife to cut four panels out of large sheets of cardboard. Cut all sides of the panels at an angle from the center of the cardboard to create four isosceles trapezoids. The smaller side of each panel should be 13 millimeters larger than the horizontal tripod head. The largest side of the panel should be 40-60 centimeters, depending on the size of the light source.
 - For a large light source, make the panels larger.
- Use the finished edge of the cardboard as the largest baseline. This will keep the hole as straight as possible, which will simplify the fastening process.
- Place all elements in a square shape on a flat surface with the largest base from the center. If the outer edges are flush, the panels are sized correctly.
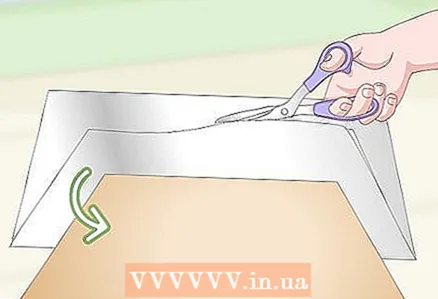 3 Trace the panels over a sheet of aluminum foil and cut along the outline. Place the panel on a sheet of aluminum foil so that the foil extends beyond the panel on all four sides. Trace the panel with a marker to transfer the outline to the foil. Carefully cut along the contour with scissors.
 - Repeat for all four panels.
- You can also use the panels as a ruler and cut out the foil with a clerical knife if you don't want to trace the contours.
 4 Use a glue stick to glue the foil sheets to the cardboard panels. Cover the panel with glue. While the glue is still wet, gently place the foil over the panel and smooth with the palm of your hand. Work carefully so that the edges of the foil do not extend beyond the edges of the cardboard panel.
 - The foil should face up with the shiny side!
- Foil the panels one at a time to keep the glue from drying out before you apply the foil.
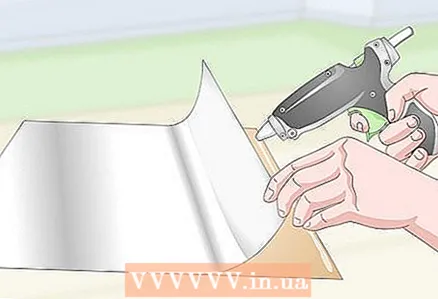
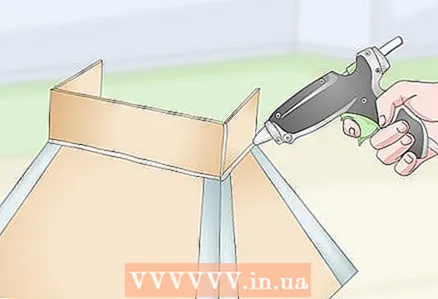
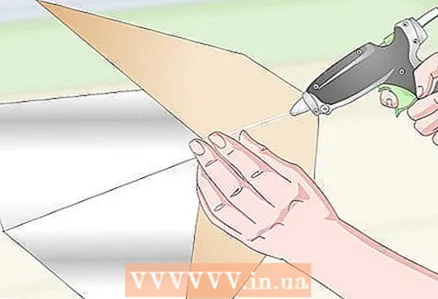 5 Connect the panels along the edges with a glue gun. Hold the panel with one corner side facing you. Run the glue gun along the corner edge and press the other panel against it at the appropriate angle. Make sure the foil is on the inside of the panel. Hold each panel still for 45-60 seconds to allow the adhesive to dry successfully.
 - When all four panels are glued together, apply another layer of hot glue to the inside of the seams.
- The panels may move slightly as the glue dries, so don't worry about perfect symmetry for now. Minor imperfections can be corrected by slightly bending the panels in the correct direction as you apply an extra layer of glue at the end.
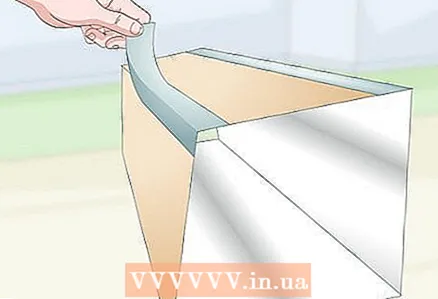 6 Cover the glued edges with tape. Apply long strips of duct tape along the outer edges. The tape will help to strengthen the structure and prevent the adhesive from melting if it gets hot while working with a bright light source.
 - Use black tape for a more professional-looking softbox.
- If you don't use the clip lamp for a long time, you don't have to worry about the glue melting.
 7 Cut out four smaller cardboard rectangles to make a nozzle for the light source. Velcro tape will be used for fixing. The dimensions of the rectangles depend on the dimensions of the light source. Cut four sides of the cardboard nozzle.
 - When using a clip-on lamp, align the sides of the attachment with the edges of the stand.
 8 Glue the rectangles to the smaller hole in the structure using hot glue. Hot glue the four elements to form the outer nozzle. Use sufficient adhesive and wait at least 20-30 minutes after each application to allow it to dry. Reinforce the outside seams with tape.
 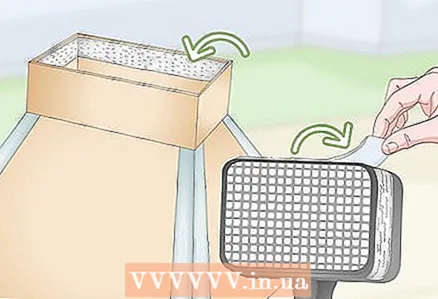 9 Place the Velcro strip inside the attachment and around the light source. The finished softbox will be attached to the light source using the Velcro tape, so place it around the perimeter on the inside of the nozzle and on the light source. Raise the light source to check the fixation.
 Advice: If the Velcro tape is not enough to secure your softbox, secure the attachment from the outside with an elastic band.
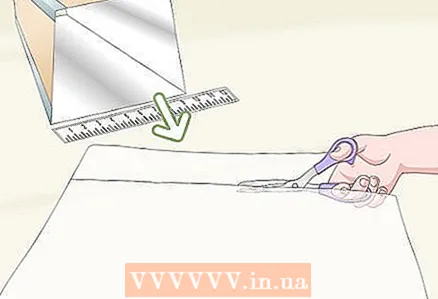 10 Measure the large opening from the front of the softbox and cut the white shower curtain to size. Measure all four sides with a tape measure. Transfer your measurements to a clean white polyethylene shower curtain with a 2.5 centimeter margin on each side. Using scissors, carefully cut a rectangle along the outline.
 - Use a white polyethylene curtain. With different materials and colors, your softbox will turn into a regular floor lamp.
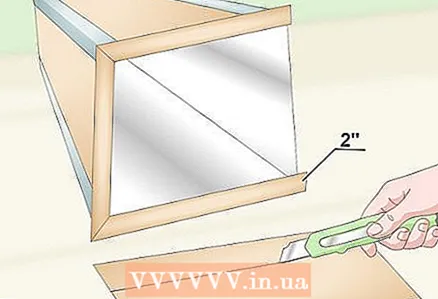 11 Cut and glue a 5 cm wide edge from each edge of the wide opening of your softbox. Use the measurements previously taken to cut 5 cm wide strips of cardboard, and each strip should be the same length as each side. Glue all strips perpendicular to the edges of the softbox to create an edge.
  12 Glue the edges of the curtain rectangle with tape and secure with stationery clamps. The tape should be glued along the entire length along each edge of the curtain so that the edges do not break over time. Attach the shutter to the softbox and secure to the edge with stationery clips. The curtain needs to be aligned with the edges of the softbox.
What do you need
Budget studio lighting option
- Foam board
- Clothespins
- Floor lamp
- Desk lamp
DIY light modifiers
- Drain funnel
- Transparent container
- Paper
- Umbrella
Homemade softbox
- Roulette
- Scissors
- Stationery knife
- Marker
- Scotch
- Glue stick
- Glue gun
- Glue sticks
- Cardboard
- Aluminium foil
- Velcro tape
- Shower curtain
- Stationery Clips


