Author:
Helen Garcia
Date Of Creation:
21 April 2021
Update Date:
1 July 2024
Content
- Steps
- Part 1 of 4: How to Prepare the Image
- Part 2 of 4: How to Use the Reconstruct Tool
- Part 3 of 4: How to use the Warp tool
- Part 4 of 4: How to use the Shrink tool
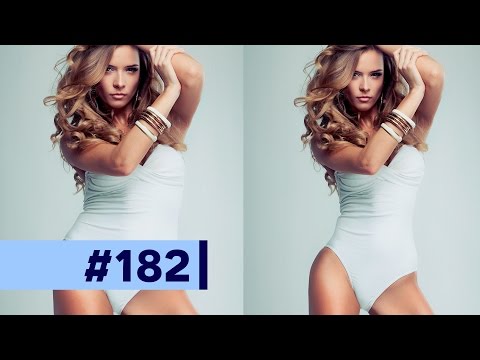
In this article, you will learn how to use the Liquify filter in Adobe Photoshop to slim down a shape.
Steps
Part 1 of 4: How to Prepare the Image
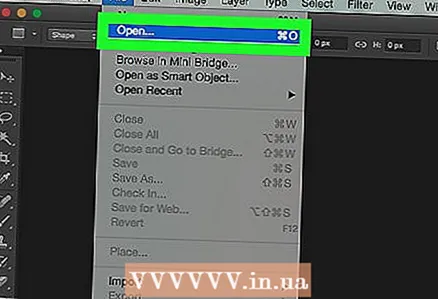 1 Open the image in Photoshop. To do this, double-click the blue Ps icon, click File> Open from the menu bar at the top of the screen, and then select an image.
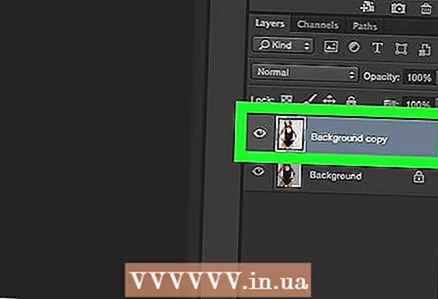
 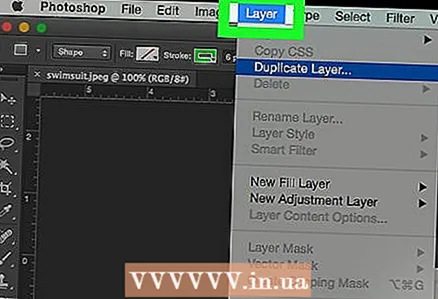 2 Click on Layers on the menu bar.
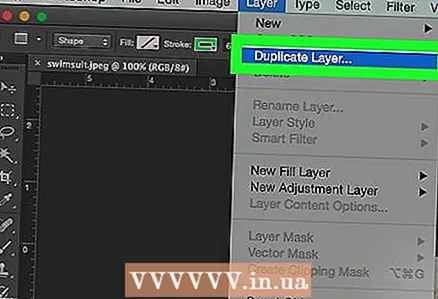 3 Click on Duplicate layer in the dropdown menu and then click OK.
- Give the new layer a name; otherwise, it will be named "[Source Layer Name] copy".
 4 Click on the eye icon next to the background layer. This icon is in the Layers panel on the right side of the screen.
 - The background layer will be invisible, but the original image will not be affected, so you can make another duplicate to try different effects.
Part 2 of 4: How to Use the Reconstruct Tool
 1 Click on the duplicate layer in the Layers panel.
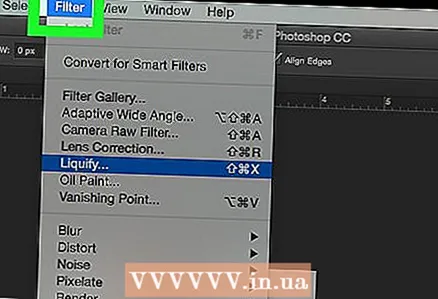 2 Click on Filters on the menu bar.
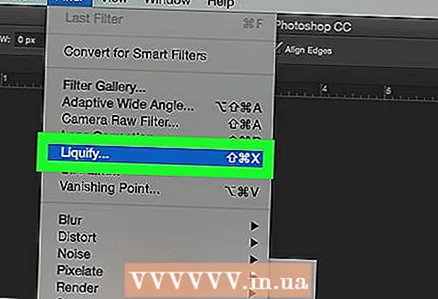 3 Click on Plastic.
- In Photoshop CS6 and earlier, select the Advanced check box in the left pane of the window.
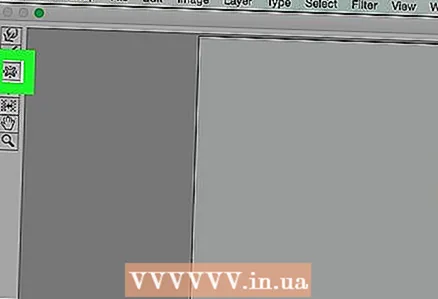
 4 Click on the Reconstruct tool. Its icon looks like a gradient rectangle brush and is in the upper left corner of the window.
 - Use the Brush Size and Brush Pressure options in the right pane of the window to adjust the size and sensitivity of the brush. A smaller brush size will allow for more subtle work.
- Use the "+" and "-" buttons in the lower left corner of the dialog box to increase or decrease the size of the image.
 5 Using the Reconstruct tool, drag along the areas of the image that you don't want to change. For example, if you want to reduce your waist, sweep along those areas that will not be affected.
 - Don't overdo it; otherwise, the image will become unrealistic.
Part 3 of 4: How to use the Warp tool
 1 Click on the Warp tool. Its icon looks like a downward-pointing finger and is in the upper-left corner of the window.
 - Use the Brush Size and Brush Pressure options in the right pane of the window to adjust the size and sensitivity of the brush. A smaller brush size will allow for more subtle work.
 2 Use the Warp tool to drag unwanted areas of the image to the mask lines. For example, gently drag the waist areas that you want to get rid of to the drawn mask lines.
 - You may need to go through this process several times to learn how to use the Warp tool. This tool changes the shape of the pixels it is being dragged over, so the image can be very distorted.
- Click Revert All in the right pane to undo your changes and start over.
Part 4 of 4: How to use the Shrink tool
 1 Click on the Shrink tool. Its icon looks like a square with indented sides and is in the upper-left corner of the window.
 - Use the Brush Size and Brush Pressure options in the right pane of the window to adjust the size and sensitivity of the brush. A smaller brush size will allow for more subtle work.
 2 Click or drag the Shrink tool over unnecessary areas of the image along the mask lines. For example, trace along the lines of the mask to get rid of unnecessary areas of the waist.
 - The Shrink tool is great for quickly shrinking an image, but it's easy to overdo it and get weird visuals.
- Click Revert All in the right pane to undo your changes and start over.
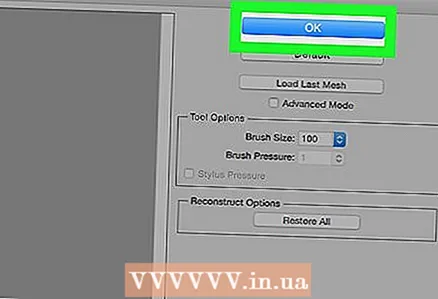 3 Click on OK on the right pane when done.
 4 Save the image. To do this, on the menu bar, click File> Save As. Give the file a name and click Save.


