Author:
Janice Evans
Date Of Creation:
25 July 2021
Update Date:
1 July 2024

Content
- Method 2 of 3: Classic Pillow with Zippered Pillowcase
- Method 3 of 3: Pillow with a pillowcase on the valve
- Tips
- What do you need
- Pillow-parallelepiped
- Classic pillow with zippered pillowcase
- Pillow with pillowcase on the valve
- You can find ready-made foam blanks for pillows or foam sheets in handicraft stores, as well as in fabric stores.
- In the work, you can use the base of the old parallelepiped pillow, if it has retained its shape and thickness. However, the old classic pillows will not work for you for this purpose.
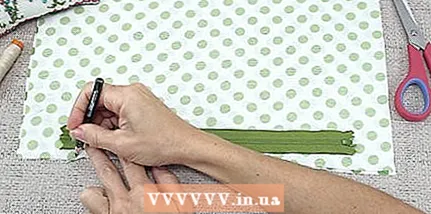
 2 From linen twill, cut two flaps for the top and bottom of the pillow. First, measure the length and width of the foam blank, and then add three centimeters to the measurements for the seam allowances. Trace the rectangular pieces on the twill linen fabric, then cut them out.
 - For example, if the size of the blank for the pillow is 60 cm x 35 cm, then the flaps should be 63 cm x 38 cm.
- If desired, you can slightly round the corners of the prepared flaps. This step is optional, but it will simplify further work on the pillow.
3 Cut a strip for the sides of the pillow from the same twill weave linen. Measure the length and width of your pillow blank. Add two measurements and multiply the sum by two. Add 3 cm to the result to get the total length of the fabric strip. And to find out the width of the strip, just measure the thickness of the blank for the pillow and also add 3 cm to it.For example, for a blank measuring 60 cm x 35 cm x 10 cm, the calculations will look like this: - 60 cm + 35 cm = 95 cm;
- 95 cm * 2 = 190 cm;
- 190 cm + 3 cm = 193 cm (strip length) and 10 cm + 3 cm = 13 cm (strip width).
4 Sew the ends of the fabric strip with a 1.5 cm seam allowance. Take a strip of fabric and fold it in half across, aligning the ends.Make sure the right side of the fabric is facing inward, and then use the sewing machine to sew a straight stitch along the aligned short ends of the strip, using a 1.5 cm (1/4 inch) allowance. - Bartacks at the beginning and end of the stitching will make the seams stronger. To bartack, you just need to reverse the sewing machine for 2-3 stitches.
- Select sewing thread as close to the color of the fabric as possible.
- To make the seam look tidier, press the seam allowances on both sides. Adjust the iron to suit the type of fabric you are using. The most common choice is usually "cotton".
5 Pin off the top of the pillow with the band sewn into the ring along the edges. When you sew the ends of the fabric strip, you will have a ring. It should be located around the perimeter of the upper part of the pillow. Place this ring on the top of the pillow and start cleaving these parts together with pins along the edges. - Make sure the right side of the fabric on both pieces is facing inward.
- Place the seam of the ring in the middle of one side of the rectangular piece of the pillow.
- If you have previously rounded the corners on the upper part of the pillow, make v-shaped notches about 1.3 cm deep on their allowances. This way, excess fabric in the allowances will be less confused.
6 Stitch the chipped parts together using a 1.5 cm allowance. Begin and end at the side seam of the fabric strip. When you get to the corners, stop the sewing machine, turn the fabric, and continue sewing. Do not overstitch the seam allowance or stop the sewing machine to cut the thread and start over. - Remember to bartack at the beginning and end of any stitch, and remove the pins from under the sewing machine foot as you progress.
- If you have rounded the corners of the top of the pillow, do not stop the sewing machine to turn the fabric, otherwise the corners will be too sharp. Instead, slowly sew here as smoothly as possible.
7 Repeat the entire process with the bottom piece of the cushion, but leave some space for the zipper. Pin the bottom piece of the cushion to the sidewall. Make sure the right side of the fabric on the parts is facing inward, and then sew on the parts. Leave a wide gap on one side so that you can later sew a zipper there. - If you previously made v-shaped notches on the corner allowances on the upper part of the pillow, make them on the lower part.
- The width of the open-ended gap will depend on the dimensions of the pillow blank and the dimensions of the zipper. Try to use a zipper that is 5-10 cm shorter than the side of your pillow.
8 Sew in the zipper by attaching the zipper foot to the sewing machine. Place the zipper in the opening in the stitching and line up the edges of the tape with the fabric cut on the bottom and side of the cushion. Make sure the front of the zipper is facing inward, then sew it in using the zipper foot. - Remember to tie off the bartacks and remove the pins.
- To make the result look cleaner, the stitch should be closer to the zipper teeth (with an allowance of about 1.5 cm from the edges of the fabric).
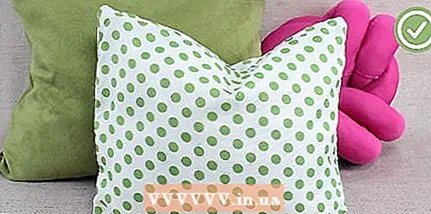
9 Turn the resulting pillowcase on the front side and insert the pillow blank into it. If necessary, first straighten the corners of the pillowcase with a knitting needle or a thin wooden stick. Then insert the foam blank into the pillowcase-cover and close the zipper. Method 2 of 3: Classic Pillow with Zippered Pillowcase
 1 Buy a pillow base of the size you want. Don't buy a foam base for a parallelepiped pillow. You need a base for a classic bed or sofa cushion. A decorative pillow with a side of 40 or 45 cm will look best, but no one forbids you to use a base of any other size.
 - This method of making a pillow is also suitable for round pillows.
- 2 Cut two pieces out of the fabric to fit the pillow base. First, measure the length and width of the pillow base, then use these measurements to draw two square or rectangular pieces onto the fabric. Cut them out with scissors.
- Take measurements on the front side of the pillow strictly from one seam to the other.
- This approach will allow you to sew a tight-fitting pillowcase. If you prefer to have more space on the pillowcase, add 3 cm to the measurements for seam allowances.
- Use a fabric that works best for your purpose. Plain twill weave is great for outdoor pillows. For home pillows, it is better to use special fabrics for home decor.
 3 Mark the length of your zipper along the bottom edge of one of the pieces. Take one of the pillowcase pieces and place it face up. Take a zipper (it should be 5-10 cm shorter than the corresponding side of the pillowcase) and place it face down on the bottom of the fabric. Use a sewing marker or pins to mark the fabric at the ends of the zipper, then set the zipper aside.
 - Don't push the zipper into place just yet. First you need to grind down the pillowcase details and iron the seams.
- It is best to use a paid invisible zipper, but it is permissible to take a regular one-piece zipper for clothes.
- 4 Stitch the two pieces of the pillowcase along the bottom (with the zipper) using a 1.5 cm (1 / 2``) seam allowance. Start by stitching from the left corner to the first mark. Cut the thread, then continue sewing from the second mark to the right corner. You will be left with a gap equal to the length of your zipper.
- Always bartack at the beginning and end of each stitch. To do this, reverse the sewing machine a few stitches.
- If you want, manually bait the area between the two marks. This will make it easier to iron the seams. Then you can easily remove the extra stitches.
- 5 Press the seams apart, then place the zipper face down on top and pin it in place. Unfold the two fastened pieces of the pillowcase into a long rectangle. Lay it with the wrong side of the fabric facing up. Iron the seam allowances, and then attach the zipper to them face down and strictly between the marks. Secure the zipper with pins.
- Do not forget that the allowances should be ironed in between the marks.
- Set the iron to the correct temperature for the fabric you are using. Most irons have clues like "cotton" or "linen".
- If you are going to sew in a hidden zipper, then the visible (back) part of the zipper should be facing you, and the keychain attached to it should be facing the fabric.
- 6 Sew in the zipper with a straight stitch using the sewing machine foot. Sew one side first and then the other. When the stitch reaches the slider, stop, raise the presser foot and move the slider to the other side. Then lower the presser foot again and continue sewing. Remove the pins as you work and remember to bartack.
- When using the zipper foot, there is no concept of an allowance, as the foot itself makes the necessary indent from the teeth.
- The zipper foot is similar to a regular foot, but it lacks one edge. It is in its place that the lightning teeth should be located.
- If you have previously swept the fabric around the zipper, use a seam ripper to remove excess stitches when you are finished sewing.
- 7 Open the zipper and sew the rest of the pillowcase to a 1/2-cm (1/2-inch) seam allowance. Align the two pieces of the pillowcase with the right side inward again. Sew the remaining three sides with a straight stitch with a 1.5 cm allowance. Bartack at the beginning and end of the stitching and be sure to remove the pins.
- When you reach a corner, stop the sewing machine, raise the foot, and turn the fabric. Lower the foot again and continue sewing.
- Do not overstitch the seam allowance or stop the sewing machine to cut the thread and start over.You will need to sew a single stitch by turning the fabric.
- For a more durable pillowcase, zigzag the seam allowances. This is especially important if you plan to wash your decorative pillowcase afterwards.
- 8 Cut off the allowances at the corners of the pillowcase and turn it right out. Cut the seam allowances at the corners of the pillowcase as close to the seam as possible. Then turn the garment right out through the open zipper.
- If necessary, use a knitting needle or a thin wooden stick to straighten the corners of the pillowcase.
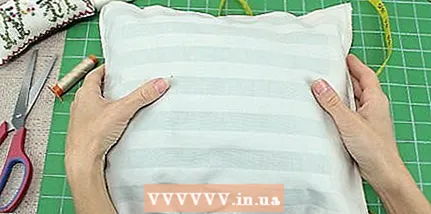
 9 Slide the base of the pillow into the pillowcase and close the zipper. If you cut fabric without taking into account seam allowances, be prepared for the pillowcase to fit snugly around the pillow. Once you are able to completely cram the base of the pillow into the pillowcase, close the zipper on it.
Method 3 of 3: Pillow with a pillowcase on the valve
 1 Buy a decorative pillow base. You can take a base of any size, but for home decor, the base of a pillow with a side of 40-45 cm is best. When you measure the base, take measurements from the front side from one side seam to the other.
 - This method works best for the classic cushions that are commonly found on sofas. But it can also be adapted for parallelepiped pillows.
- 2 Measure the length and width of the pillow base to calculate the size of the fabric to be cut. First, measure the height of the pillow and add 3 cm for the allowances. Then measure the width of the pillow. Multiply the measurement by two and add 15 cm to it to create a flap.
- When measuring the base of the pillow, take measurements from the front side from seam to seam.
- 3 Cut the fabric to measure. You can use almost any fabric to make a decorative pillowcase. If you will be using pillows at home, it is best to opt for home decor fabrics. Plain fabric with twill weave is better for outdoor pillows.
- Use fabric scissors to cut out the material. You will use a single piece of fabric to make the flap pillowcase.
- 4 Fold and iron the narrow sections of the flap twice for stitching. Place the fabric with the wrong side up. Fold both short edges of the fabric 1cm to the wrong side and iron. Fold the fabric an additional 1.5 cm the second time and iron it as well.
- Set the iron to the correct temperature for the fabric you are using.
- Alternatively, the fabric can be tucked 1 cm both times. This will make your hemming seams a little narrower.
- 5 Hem the folds with a straight stitch to sew hemming seams. Try to sew as close to the edge of the first (inner) fold as possible. Threads can be taken both in the tone of the fabric and in a contrasting color to add a special design idea to the product.
- In this case, you will not need tailor's pins, since the ironed cuffs themselves will adhere well to the fabric.
- 6 Fold the finished edges of the fabric towards the center and place them on top of each other with an overlap of 10 cm. Turn the fabric right side up. Fold the finished narrow sides of the fabric towards the center. Overlap the middle of the fabric about 10 cm. Secure the edges of the fabric with tailor's pins.
- Now the wider fabric should match the width of the future pillowcase. If necessary, increase or decrease the overlap to adjust the size of the product.
- 7 Sew the top and bottom of the pillowcase with a 1.5 cm (1 / 2``) seam allowance. Secure the raw fabric with tailor's pins. Run a straight stitch with a 1.5 cm (1/4 inch) allowance along the top and bottom edges of the pillowcase. Sew bartacks at the beginning and end of each stitch.
- Remove the pins from the fabric as you work to prevent them from getting caught in the presser foot and ruining the sewing machine.
- If the fabric you are using is very loose, zigzag over the seam allowances.
- To bartack, reverse the sewing machine a few stitches. This will make your pillowcase stronger and the seams will not come apart.
- 8 Cut off the allowances at the corners of the pillowcase and turn it right out. Cut off the allowances at the corners as close to the stitches as possible. Then turn the pillowcase right out through the flap formed by the fabric overlap.
- If necessary, straighten the corners of the pillowcase with a knitting needle or a thin wooden stick when turning the product onto your face.
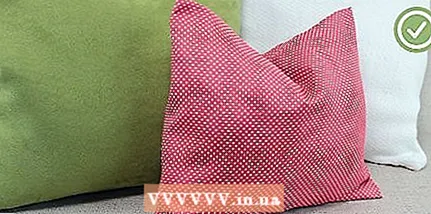 9 Slide the pillow base into the pillowcase through the flap. Place the pillow on the vertical flap side of the pillowcase. Pull the left edge of the flap over the left side of the cushion and the right edge over the right. Spread out the pillow inside the pillowcase and the edges of the flap to keep everything neat.
Tips
- For a more elegant decorative pillow of a classic shape (with a zipper or a flap), sew pompons or tassels to its corners.
- Sew 1–3 decorative buttons onto the flap pillowcase to create an imitation closure.
- Try embroidering some of the zippered pillowcases with thread or beading before stitching them together.
- If you live in a rainy area, spray your outdoor cushions with a water-repellent fabric spray.
- If in the future you plan to wash the pillowcases of your decorative pillows, wash, dry and iron the fabric you are going to cut before sewing.
- If you want to make your own classic pillow base, sew a cover for it as if you were sewing a pillowcase with a zipper, but do not use a zipper. Simply twist the cover through the hole, stuff it with polyester filler, and then sew up the hole with blind stitches.
What do you need
Pillow-parallelepiped
- Linen fabric with twill weave
- Foam blank for a pillow, 10 cm thick
- Sewing machine
- Tailor's pins
- Lightning
- Zipper foot
- Fabric scissors
- Sewing thread
- Hand saw or serrated knife
Classic pillow with zippered pillowcase
- The basis for a decorative pillow
- Textile
- Sewing machine
- Tailor's pins
- Lightning
- Zipper foot
- Fabric scissors
- Sewing thread
Pillow with pillowcase on the valve
- The basis for a decorative pillow
- Textile
- Sewing machine
- Tailor's pins
- Fabric scissors
- Sewing thread


