Author:
Janice Evans
Date Of Creation:
1 July 2021
Update Date:
1 July 2024

Content
- Steps
- Part 1 of 3: Preparation
- Part 2 of 3: Piercing
- Part 3 of 3: Caring for your puncture site
- Tips
- What do you need
A pinna curl puncture is a puncture of the upper part of the auricle cartilage. This is a rather painful procedure. If you have already made a decision and want to pierce the pinna curl, take the necessary precautions so as not to repeat this unpleasant procedure later. It is best to have your piercing done in a salon by a professional who will carry out the procedure quickly and without risk to your health. If you decide to do your homemade curl piercing, prepare and disinfect the work surface and tools you will be using. This is very important to do if you do not want to infect the puncture site. Tune in and get started. Create a new look for yourself!
Steps
Part 1 of 3: Preparation
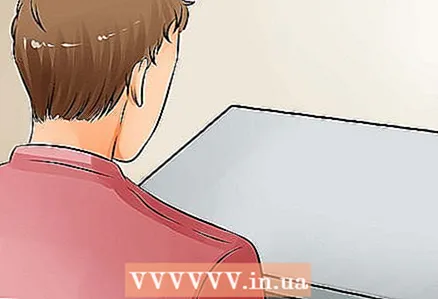
 1 Decide where you will get your piercing. In order to save money and time, many people decide to get their own piercing at home. However, this is not the best option. Better to use the help of a professional. If you pierce your ears at home, there is a high chance of infection at the piercing site. The piercing procedure must be performed in compliance with all sanitary and hygienic standards. Piercing parlors can ensure that the procedure is safe for you. In addition, piercing the curl of the auricle is a rather painful procedure, so it is better if someone else does it for you, not yourself.
 - If you decide to use the services of a professional, make sure that the sanitary and hygienic standards are observed in the salon you choose. In most salons, you can view an album of piercing photos. Review the photos to make sure that you want to do exactly the puncture of the pinna curl. Take your time and don't skimp on this. Choose a salon where you feel comfortable and safe.
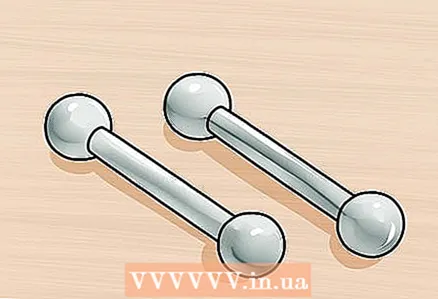 2 Choose a piercing earring. Prepare the earring before making the piercing. If you do not insert the earring into the puncture site right away, the hole can overgrow very quickly. In this case, you will have to wait until the inflammation subsides and then re-puncture. It is best to use a 16 or 17 gauge piercing barbell, about 10 mm (3/8 ") long.The puncture is usually accompanied by swelling, so this is the optimal barbell size.
  3 Get a piercing needle. If you decide to make your own piercing at home, get a piercing needle. Having a hollow center in the needle makes it easy to insert the earring after piercing. You can purchase a piercing needle online or at a store that sells similar tools.
 - Never use a needle that has been used by another person, as this can lead to infection.
- Your needle should be one gauge larger than your earring. Typically, an 18-gauge needle is used to pierce the pinna curl.
- You can purchase a ready-made kit that includes two piercing earrings and the necessary piercing tool. You can purchase this kit from a beauty store or online. Follow the manufacturer's instructions.
- Do not use needle earrings to pierce your ears. Some stores sell special ear-piercing needles for ear piercing. Do not use a needle earring to pierce the pinna curl. The thickness of the pierced cartilage is very large, so it will be difficult for you to make the necessary puncture with an earring-needle.
- Be careful. Many people are allergic to certain types of metals, mainly nickel and gold-plated jewelry. If you can afford it, get a silver or titanium piece.
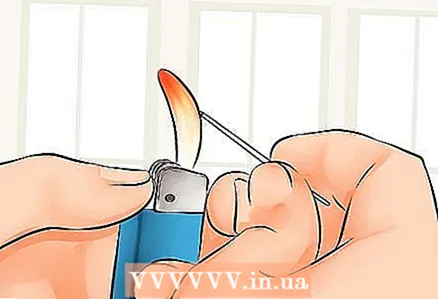 4 Sterilize the needle. Sterilizing the needle is an important step in this procedure. Failure to do this can lead to infection. This, in turn, is associated with other unpleasant actions - removing the piercing and treating the infection. In addition, you will have to wait for the inflammation to clear up completely before repeating the procedure. You can sterilize your needle in several ways. The needle must be sterile. If you use such a needle, there is no need to sterilize it. Most importantly, make sure it doesn't touch anything when you take it out of the package.
 - If you are using a needle that was not in a sterile bag, sterilize it over an open flame. Hold the needle over the fire until it gets hot.
- Wear sterile latex gloves when sterilizing instruments to reduce the risk of germs getting on the sterile instrument.
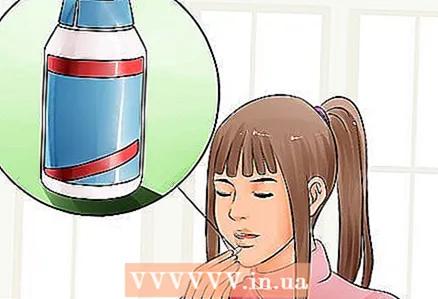
- Wipe the needle with a 10% alcohol solution or hydrogen peroxide. This will kill up to 99% of bacteria.
- You can also sterilize the needle by immersing it in boiling water. As soon as the water boils, dip the needle into it and hold it for 5 to 10 minutes. Boiling water will kill most of the germs that may be on the needle. Remove the needle with forceps. Handle the needle only with latex gloves. Be careful not to burn yourself, the needle will be very hot for the first few minutes.
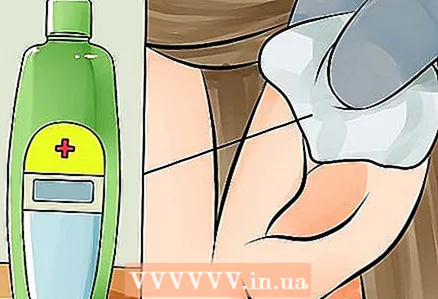 5 Treat your ear. Use wipes soaked in 70% isopropyl alcohol. Wipe your ear with the tissue several times. Then wipe it dry.
 - You can also use hydrogen peroxide or rubbing alcohol on the ear.
- Collect your hair. Hair can contain particles of dust, oil and bacteria. Therefore, make sure that your hair does not touch the area where you are going to pierce after you have treated your ear. If possible, tie your hair into a ponytail with an elastic band or use bobby pins for this purpose.
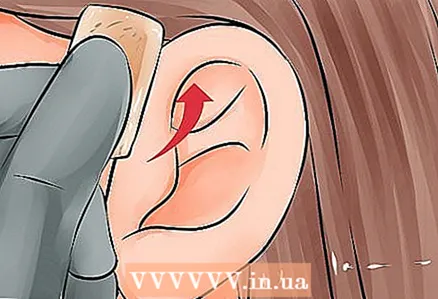
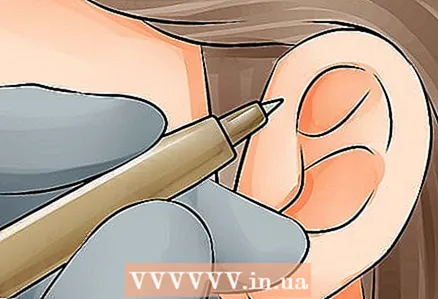 6 Mark the spot where you want to make the puncture. Take a non-toxic body marker and place a dot where you intend to puncture. If you are not sure if this is the required location, try again. You must choose the exact puncture site. Avoid piercing too close to or too far from the edge of the pinna curl. Place a dot directly in the center of the pinna curl.
 - Also, consider the presence of other jewelry on your ear.Jewelry should be evenly spaced and look aesthetically pleasing on your ear.
 7 Prepare a clean surface. During the procedure, you will need several needles, needle sterilization products, and earrings. Therefore, prepare a clean surface where you can put everything you need. For example, you can perform the procedure in the bathroom. Cover a paper or regular towel and place all the necessary tools on top of it after they have been properly cleaned.
Part 2 of 3: Piercing
 1 Find a small sturdy object that you can place under the curl of your ear. This must be done to avoid accidentally piercing the rest of your ear. You can use a bottle stopper or a small roll of toilet paper.
 - If possible, do not make your own puncture. Ask a friend to help you. This puncture is very difficult to do on your own, especially if you are looking in the mirror. If someone can help you, this will make the procedure easier.
 2 Consider your pain threshold. You can take an Advil tablet or other pain reliever before the procedure. Take the pill half an hour before the puncture. If you can tolerate pain, do not take pain relievers, as taking pain relievers can increase blood flow to the site of the intended puncture. This can lead to bleeding.
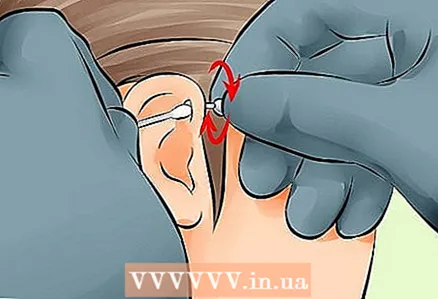
 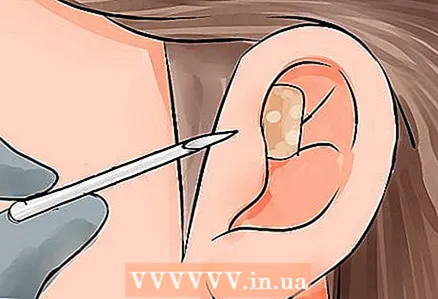 3 Position the needle precisely. The needle should be directed perpendicular to the curl of the auricle.
 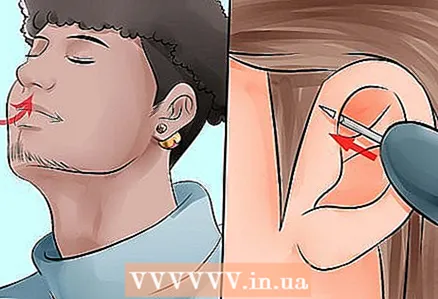 4 Take a deep breath and quickly pierce the curl of your ear. Do it abruptly. You will hear a crunch during the puncture. Don't worry, it should be so.
 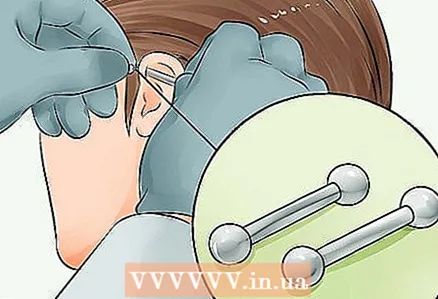 5 Insert the earring. After you have made a puncture, do not rush to take out the needle, insert a barbell into the hole. It is very important to do this as soon as possible before the swelling appears.
 - Most likely, the puncture site will bleed. Apply a cotton swab soaked in hydrogen peroxide or alcohol to the puncture site. Alternatively, you can use alcohol wipes. Do not use non-sterile wipes or cotton swabs, as this can lead to infection.
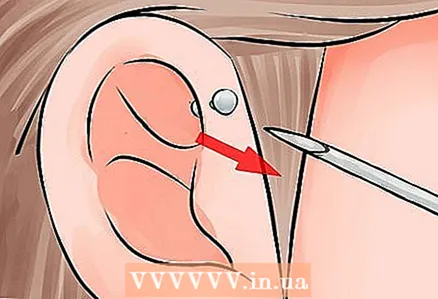 6 Remove the needle. Make sure the earring stays in place as you do this. Many people are in no hurry to do this, because it is a rather painful process. While holding the earring, slowly pull out the needle.
Part 3 of 3: Caring for your puncture site
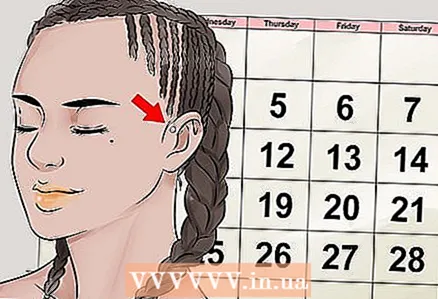 1 Do not remove the earring from your ear for 6 weeks. Do not remove the earring under any circumstances. You can only do this if you are experiencing severe discomfort. If you remove the earring early, the hole may become overgrown and you will have to re-pierce. After 6 weeks, you can remove the earring for a few minutes. Typically, it takes 4 months to 1 year for the piercing to heal after the piercing. In addition, the healing process largely depends on the individual characteristics of the person, blood flow to the puncture site, as well as the ability to care for the puncture site.
 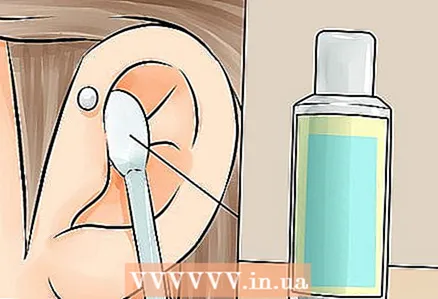 2 Wash the puncture site daily. Flush your ear with a solution of warm salt water. Get a bowl that is larger than your ear. Dip your ear into the bowl. Dissolve 1 teaspoon of sea salt in 1 cup of warm (not hot) water. Use sea salt rather than regular table salt. Salt solution is a very effective antibacterial agent that prevents the development of infection. Don't use Epsom salts; The chemical composition of Epsom salt (Epsom salt) is different from that of sea salt, and in fact, Epsom salt is not a salt per se.
 - Take a cotton swab or swab and dip it in warm saline. Wipe the puncture site with a moistened swab.
- Purchase an antiseptic solution specifically designed to care for your puncture site. You can get this solution from a drug store or health food store. Soak a cotton swab in the solution and gently rub the piercing with it.Remember to wipe both sides of your ear to prevent infection.
 3 Scroll the earring. When you wash the puncture site, twist the earring in your ear. This will widen the hole and prevent your earring from growing into your skin.
 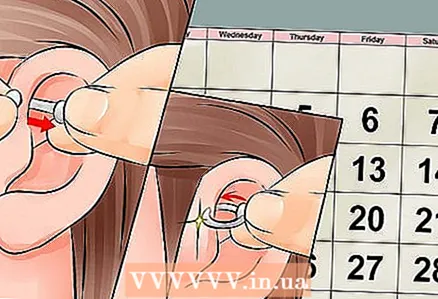 4 After six weeks, you can change the earring. After you remove the old earring, work the piercing area as described above and insert a new one. Although the piercing site has not yet completely healed, you can replace the earring at this stage.
  5 Consult your doctor. If you think you have brought an infection to your puncture site, talk to your doctor. The doctor may prescribe a drug for you that will allow you to remove the infection and relieve inflammation without removing the earring. However, delaying medical attention may result in you having to remove the earring from your ear.
Tips
- As a rule, painful sensations disappear after 6-8 weeks, the swelling subsides after 2-3 weeks.
What do you need
- Stainless steel bar (16 or 17 gauge)
- Hollow game 18 gauge
- Rubbing alcohol
- Cotton swabs
- Non-toxic body marker
- Saline or antiseptic solution.


