Author:
Carl Weaver
Date Of Creation:
27 February 2021
Update Date:
1 July 2024

Content
- Steps
- Method 1 of 2: How to make a simple folder with pockets
- Method 2 of 2: How to make a tight folder with pockets
- Tips
- Warnings
- What do you need
Folders are one of the most basic forms of organizing content, especially when you need to separate and organize multiple categories or projects. If you are tired of the same boring folders, or you want to add something of your own, you can easily make folders with your own hands from several sheets of paper or cardboard.
Steps
Method 1 of 2: How to make a simple folder with pockets
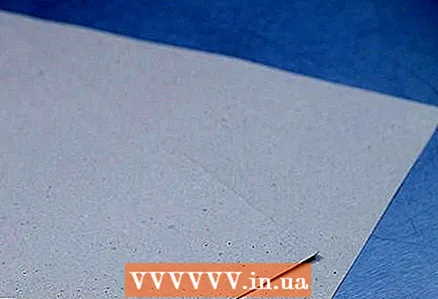 1 Take two sheets of cardboard, 28 x 43 cm. If you have larger sheets, you can trim them to your desired size.
  2 Fold the first sheet in half lengthwise. When folded, it should be approximately 14 x 43 cm in size.
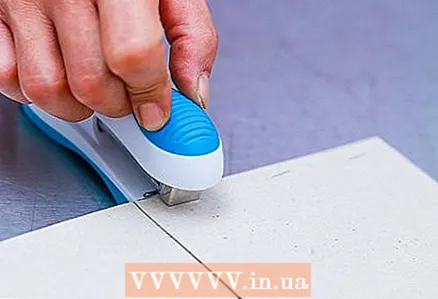
  3 Place the second sheet on the first. When doing this, trim the top and bottom edges so that they are flush.
 - The edge of the second sheet, which is on the inside, should fit snugly against the bend of the first sheet.
 4 Fold both sheets in half. That is, you need to bend across the long side so that the bend that turns out is 28 cm.
 - As a result, a large sheet will be 21.5 x 28 cm in size, and a small one will form pockets around it at the bottom.
 5 Clip the edges of the pockets together. After you folded the sheets in half, the center fold will be the base of the folder, and the first sheet you folded in step 1 will form the pockets. In order for both sheets to hold, you just need to staple the edges of the pockets with the edges of the main sheet.
 - You can also secure the bottom of the pockets by pinning them at the bottom.
- In such a folder there will be four working pockets: two inside and two outside.
Method 2 of 2: How to make a tight folder with pockets
 1 Take three sheets of cardboard, 21.5 x 28 cm. Generally speaking, the denser the material you use, the longer the folder will last. Thick cardboard is best, but you can use plain paper if needed.
 - The dimensions used here are for the folder that will store mostly lined paper. If you need to store documents on paper measuring 21.5 x 28 cm or more, then the sheets of cardboard for the folder should be slightly larger. However, the size of the cardboard does not affect the folder creation process.
- If you are forced to use regular paper, you can take six sheets instead of three and glue each two sheets together with glue stick.
 2 Place two sheets of cardboard flat against each other. If you are using cardboard with patterns on one side, they should be on the outside, as these will be the outside of the folder.
  3 Tape both sheets together on one side. Place the tape so that half of the tape lies along the 28 cm side of the first sheet, then tuck the other half over the edge of the second sheet.
 - Try to apply the tape so that wrinkles and air bubbles do not form.
- Both sheets should fit snugly and evenly against each other when you tape them together, otherwise the folder will not close symmetrically.
- To better hold the folder together, you can glue extra strips of tape on both sides, covering the edges of the first tape.
 4 Tape the inside of the bend. Once you have secured both sheets on the outside, open the folder and tape them together from the inside. This will secure the base of the folder, and the sticky side of the tape will be covered so that the contents of the folder will not stick to it.
  5 Cut the third piece of cardboard 5mm to make it narrower. You will need this in order to start making pockets. Cut 5mm along the long side of the sheet. At the end, you should have 21 x 28 cm cardboard.
  6 Cut the third sheet in half. You will be using it for both inner pockets of the folder, so you will need to cut it in half. Cut perpendicular to the previous cut. At the end, you should have two sheets of paper, approximately 14 x 21 cm.
  7 Tape the pockets. Take one of the small sheets and attach it to the inner bottom corner of the folder. The 21 cm side of the smaller sheet should be parallel to the 21.5 cm side of the folder. Once you have perfectly aligned the corners, tape the edges in the same way as in step 3.
 - Try not to wrinkle or air bubbles in the tape.
- Just as you secured the main seam, you will need to secure the pockets by gluing additional tapes to the edges of the first strip. This will extend the life of the folder a little.
- Repeat with the second pocket on the other side.
 8 Make the folder original. If you use plain cardboard, you can easily decorate the folder with stickers, drawings, or even pictures that relate to its contents.
Tips
- Try decorating the folder with cardboard clippings, stickers, photographs, or anything else that makes you think good.
- You can make folders your own creative project. Make a whole set of folders, each for a different category.
- Additionally, securing the folder with tape or staples will extend its life.
Warnings
- As with all paper products, try not to get the folder wet.
What do you need
- 3 sheets of cardboard 21.5 x 28 cm or 28 x 43 cm
- Scissors
- Ruler
- Scotch
- Glue stick
- Stapler with staples


