Author:
Sara Rhodes
Date Of Creation:
18 February 2021
Update Date:
28 June 2024
Content
- Steps
- Method 1 of 3: make a garland of autumn leaves
- Method 2 of 3: Making a garland of pumpkin and gourd
- Method 3 of 3: Make a garland of nuts and berries
- Tips
- What do you need
- garland of autumn leaves
- garland of pumpkin and gourd
- garland with nuts and berries
A garland of flowers will decorate your home and create a festive atmosphere at any time of the year, but in the fall, when the leaves fall and it's time to harvest, it will look special. In this article, you will learn how to make a garland of autumn leaves, small pumpkins and gourds, or nuts and berries.
Steps
Method 1 of 3: make a garland of autumn leaves
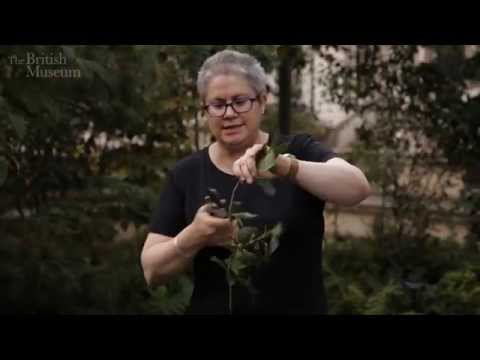
 1 Buy wire for your framing. The wire frame should be round and have flexible teeth that will serve as anchorage. They are ideal for making garlands of leaves, as small branches, bunches of flowers, etc. can be attached to the prongs. Wire frames can be found at craft stores.
  2 Collect autumn leaves. In order to find bright materials for creating a garland, you just need to go outside and look around. If you live in a city where there are few trees, go to your local nursery or Skilful Hands store - there you can find:
 - Bright autumn leaves. Choose leaves that represent autumn in your area, whether it's bright crimson maple, yellow birch or hickory leaves, or purple eucalyptus leaves.
- Evergreen leaves. Evergreen branches of fir, pine and other green trees will give your garland a wonderful scent.
- Wheat stalks or golden grasses. Autumn is harvest time, and the stalks of wheat and other wheat-colored plants will be a pleasant reminder of the changing seasons.
- Autumn flowers. Chrysanthemums are a great option, they can be found almost everywhere, they are especially beautiful in autumn: crimson, red-brown, orange and yellow.
- Other leaves in your area. Don't limit yourself to traditional fall plants; choose the ones you like. In some places in the fall, nettle appears in pink and doves, and somewhere its symbol is evergreens with dripping raindrops. If the plant means something to you, and you are sure that it will look good on the garland, bring it home.
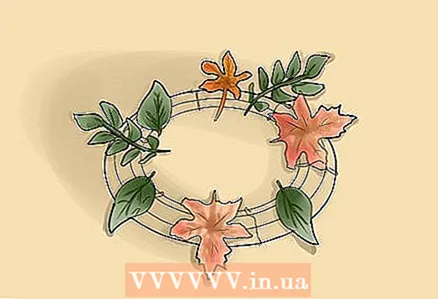 3 Garland design. Now that you've gathered everything you need in a row, it's time to think about design.Fold the materials in a circle to represent what your garland will look like. Take the following measures:
 - Try to keep the garland looking natural. Alternate leaves, flowers, grass, and branches out of order. Try mixing contrasting colors and textures; for example, stick a bunch of grass behind a bunch of red flowers to create color contrast.
- Give it a neat look. Alternate the leaves with flowers in a specific sequence or attach them three at a time: a bunch of maple leaves, a bunch of chrysanthemums, and a wheat stalk, for example.
- Create a color wheel. First, hold the red leaves together, then the orange ones, followed by the yellow and purple ones.
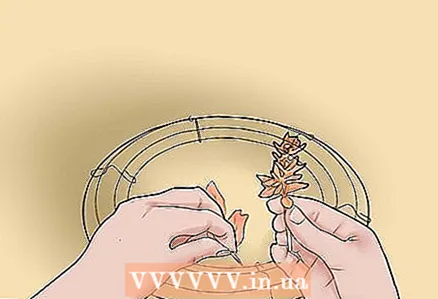 4 Collect the garland. Attach the stems of the plants to the wire frame. Use wire clips to secure the stems. Continue until your structure is attached to the base.
 - Hide the wire teeth behind foliage, or hide them under pinned areas.
- If you decide to make additional hooks for fastening, you can make them using a separate wire or rope; just screw or tie them to the frame.
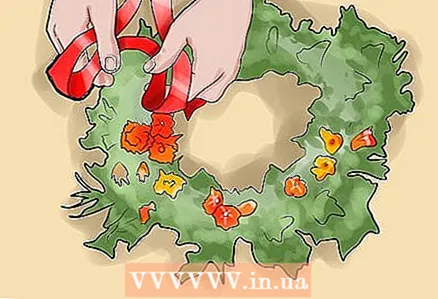 5 Final touches. Wrap the ribbon around the garland or tie it to an arc and connect to the bottom of the garland. You can add decorative fake birds, pine cones, nutshells, and other fall symbols to fill in the empty spaces between the foliage.
  6 Hang up a garland. Wire frames are often made with a hook or loop in the back for hanging. If you don't have a hook, make one yourself. Screw on a piece of wire or tie a piece of string to the frame. Hang the garland on the door or wall of your home.
Method 2 of 3: Making a garland of pumpkin and gourd
 1 Buy a sturdy wide wire that is a little over a meter long. Make sure the wire is flexible enough to bend into a circle and strong enough to hold its shape under the weight of small pumpkins and gourds.
  2 Collect small pumpkins and gourds. In the fall, deli and grocery stores are full of little orange pumpkins. Choose small, lightweight pumpkins and gourds for your garland.
 - Try to find fruits that are cool in color and size. Choose orange, yellow, brown, green and spotted gourds and gourds.
- If you want your garland to look stricter, use fruits that are the same color and size.
- If you want your garland to last longer, buy fake gourds and gourds from a craft store instead of fresh and perishable ones.
 3 Wire pumpkins and gourds. You can alternate fruits of different shapes, colors and sizes. Alternate pumpkins with gourds or place them in random order.
 - To pierce the pumpkin, attach a wire to one side of the pumpkin (two centimeters below the stem) and pass it horizontally through the fruit so that the end comes out on the other side.
- To put a gourd on the wire, attach the wire to the widest part of the fruit and thread it through it.
 4 Thread the ends of the wire through the hooks and connect them. Using your fingers or pliers, bend the ends of the wire into a C shape and hold them together.
 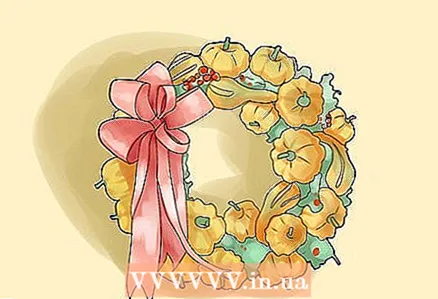 5 Last details. Tie an autumn ribbon to the wire frame, or add an evergreen twig for the final touch.
  6 Hang up a garland. Thread a piece of string or wire through the hole you made to hold the frame together. Hang the garland on a nail on your front door or on the wall of your house.
Method 3 of 3: Make a garland of nuts and berries
 1 Buy a wooden frame for your garland. Craft shops have wooden frames made from wood sawn into round shapes with a hole in the middle. If you can't find a wooden frame, you can use plastic or foam.
  2 Collect nuts and berries. If there are walnut trees near your home, you're in luck - just walk around the area with a paper bag and fill it with walnuts, pecans, and horse chestnuts.Look for nuts with intact shells and minimal dents or cracks. Pick red berries from shrubs and other plants that grow red, blue, and black in fall.
 - If there are no walnut trees nearby, you can use store-bought unhulled walnuts and pecans.
- If you want your garland to last longer than one season, use artificial berries from Skillful Hands.
 3 Heat the glue gun. With this tool, you can melt and securely attach the required products. Heat it over a newspaper to avoid staining anything.
  4 Glue the nuts to the frame. Start doing this in a circle, moving around the hole in the middle. After the first circle, glue the second. Continue gluing the nuts to the frame until you have covered the entire garland with them.
  5 Attach the berries. Apply some hot glue to the stem of the berries. Stick the berry between a few nuts and wait a few minutes for the glue to dry. Add twigs with berries until you are satisfied with the result.
  6 Hang up a garland. A garland of nuts will look great on a kitchen door. Hang it on a nail or lean it against the wall and enjoy a festive DIY fall garland.
Tips
- Craft stores have a variety of fall garland materials. Buy artificial leaves, flowers, birds, pine cones, etc.
What do you need
garland of autumn leaves
- Wire frame
- Leaves, flowers, branches of evergreen trees, stems of wheat or grass and other autumn leaves
- Ribbon and other details (optional)
garland of pumpkin and gourd
- Strong wide wire a little more than a meter long
- Small pumpkins and gourds
- Pieces of wire
- Ribbon and other details (optional)
garland with nuts and berries
- Frame made of wood or foam
- Nuts and berries, it doesn't matter if they are collected near the house or bought in a store
- Glue gun


