Author:
Marcus Baldwin
Date Of Creation:
21 June 2021
Update Date:
1 July 2024
Content
- Steps
- Method 1 of 3: White Tights Mask
- Method 2 of 3: Stretch Cloth Mask
- Method 3 of 3: Finished White Suit
- Tips
- What do you need
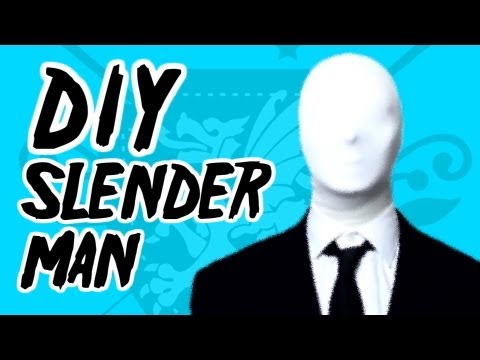
Slenderman is a fictional character originally created as an internet meme that continues to capture the imagination of many people. If you are going to a costume party and want to dress up as a Slender Man, you will definitely need a mask to complete the horrible faceless look.
Steps
Method 1 of 3: White Tights Mask
This method is quite simple, although it will not give the same effect as the others, especially if you pull the tights too tight, which will make your face shine through. Thick nylon tights work best. The good thing about this mask is that it is easier to breathe in and you can see through it.
 1 Buy white tights. They can usually be purchased at pharmacies, manufactured goods stores and online. Buy large and extra large tights so you have more material to work with.
  2 Put tights over your head. The mask should fit over the entire head, right down to the shirt, so you may need to tuck your head into one of the stockings to get the mask down to the collar.
 - Better put on a shirt before putting on your mask. This way you can check if you made the mask the right length.
 3 Ask a friend to tie the tights behind your head so that the waist fits comfortably on your head and neck.
 4 Tie the knot on your head as tightly as possible without harming the wearer. This is to prevent the knot from unraveling when you cut off the unwanted portion of the tights.
  5 Cut the stockings off the pantyhose. You can use them to cook something else, so put them in a box.
 - The knot should be as inconspicuous as possible - you can achieve this by sealing the knot with duct tape.
 6 Put on the rest of your costume. Ready!
Method 2 of 3: Stretch Cloth Mask
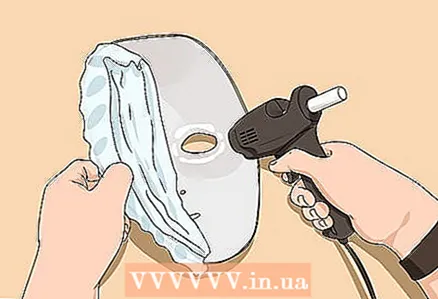
 1 Buy a white mask. Get a mask that you can find at a costume store that covers the entire face and has slits for the eyes, mouth, and nostrils. This mask will keep the fabric from touching your face, allowing you to breathe and see freely.
 - Put on the mask to see if it is comfortable. If it is not convenient for you, make the necessary changes before gluing the fabric to it, otherwise it will be harder to do later.
 2 Find a fabric that stretches well. You can use lycra and spandex, but if you are not sure which is the best to take, ask for advice from the vendor of fabrics, explaining what exactly you need such fabric for.
  3 Cut out a piece of fabric so that it is wider and longer than the mask itself. Attach the fabric to the mask by gluing it around the entire perimeter, overlapping the edges of the fabric against the back of the mask from top to bottom. A hot melt gun will make this process easier, but be careful not to melt the plastic if you have a plastic mask.
 - When gluing the fabric to the mask, keep it taut so that it does not bunch up. Make sure you stick everything smoothly - folds will ruin the look of the finished mask.
- Do not forget to glue the elastic band that will hold your mask on your head - it should stretch well.
 4 Make the back of the mask. This part should hide the exposed part of the head and attach to the front of the mask, thereby completing it.
 - Place the mask on a wider, longer piece of fabric.
- Outline the mask by drawing a wide oval or circle. The distance between the mask and the border of the circle or oval should be about 10 cm, lengthening slightly in the part that goes to the throat (the part that is wrapped in the shirt). The back of the fabric should be large enough for you to do this.
 5 Glue the back fabric to the mask. Attach the top edge of the back (the opposite side you made for the throat) to the mask behind the forehead.
 - Glue the sides of the mask all the way to the chin. The back is complete. You will wrap the remaining unsticked part at the base of your neck under the collar when you put on the mask.
 6 Make small slits for the eyes. This is not necessary if you can see through the fabric. Make slits only if you can't see anything because of the fabric. If you're worried about ruining the fabric with a cut, glue or sew on the edges.
  7 Make a part that covers the neck (bib).
- Cut a piece of white stretch fabric wide enough to tie around your neck and tuck under your collar. Glue this piece together in the form of an elastic tube.
 8 Cut one leg off the white tights. Secure the other two pieces with it for a better look.
  9 Clip all the pieces together. If you are going to put it on, just connect all the parts one by one:
 - Put on the front of the mask first. See that it is convenient for you.
- Then put on the part that goes around the neck. Slip around your neck and fold the edges under your shirt.
- And finally, a pantyhose leg. It should cover both the mask itself and the bib for a better look.
 10 Ready. Go outside and scare your friends.
Method 3 of 3: Finished White Suit
This method can be costly, hot, and too extravagant. On the positive side, this suit will be quite comfortable in cold weather.
 1 Buy a full white suit. Make sure the kit includes a head without slots for eyes and mouth.
  2 Put on your suit. Put on the Slenderman suit over the white suit. That's all, it remains only to put on a mask.
Tips
- Remember to eat and drink before putting on your mask. With a mask on your head, this will be quite difficult.
What do you need
Method one:
- Thick opaque white tights
- Duct tape
- Scissors
Method two:
- Mask (rubber or paper)
- Stretch white fabric (ask your dealer for advice)
- Hot glue gun
- Sharp scissors
- White tights
Method three:
- Full white suit


