Author:
Helen Garcia
Date Of Creation:
13 April 2021
Update Date:
11 May 2024

Content
- Method 2 of 3: How to Create a Fake Wound Using Vaseline
- Method 3 of 3: How to Create a Fake Wound Using Theatrical Makeup and Latex
- Tips
- Warnings
- Make sure the glue you are using will not harm your skin. You will have to apply the adhesive directly to your skin.
- Use a foundation that matches your skin tone. If you apply makeup on a regular basis, use the foundation you usually use, as it will most likely match your skin tone.
- You can also use a liquid foundation that is slightly different from your skin tone to make the wound look more realistic and enhance the visual effect.
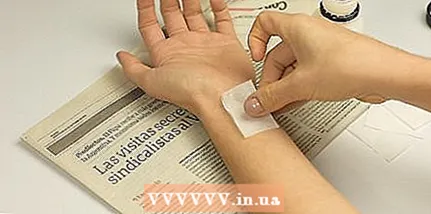
- Cover your work area with newspaper and protect your clothing so you don't accidentally get it dirty when you make a fake wound.

 2 Tear the toilet paper apart. Take toilet paper and tear it apart. The size of each piece should be slightly larger than the chosen location to create the wound.
 - If you want to make a wound in your arm, you may only need half of one piece of toilet paper.

- To create large wounds, you will need 2–3 pieces of toilet paper.

- You can use tissue paper or toilet paper such as the Kleenex brand. It is best to use plain, plain paper with no pattern.
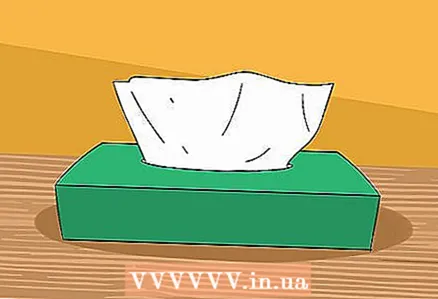
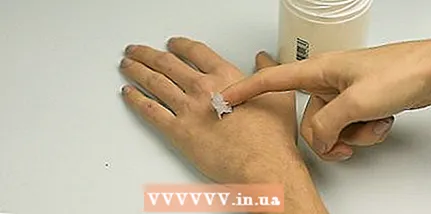
- After you prepare the toilet paper or napkins, you need to tear off another piece that will match the first. You will need two identical strips of paper. You will glue two layers of paper over the area of your skin where you want to make the wound.
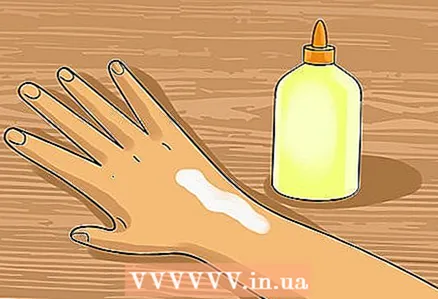
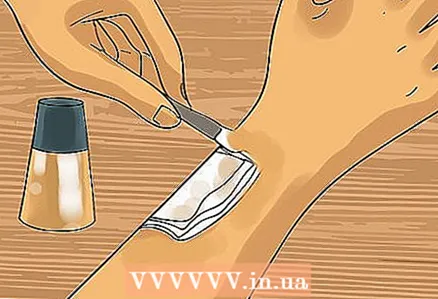
3 Apply a small amount of glue to the area where you want to make the wound. Pour some glue into a container, and then using a brush, apply it evenly on the skin. - If you want to make a zombie bite or cut your arm, you don't need a lot of glue. However, if you plan on making a wound, you will need to use more glue.
- Use enough glue to keep the toilet paper firmly on your skin.
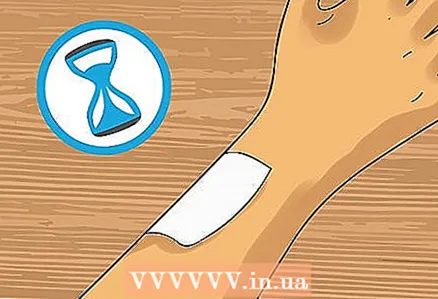
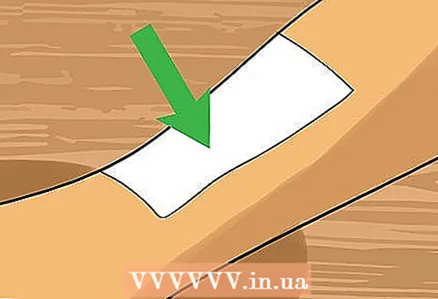
4 Apply toilet paper or tissue paper to the glue-smeared area of your skin. Press the paper firmly against your skin. - Wait about a minute for the glue to dry. Repeat the process when the first layer of paper is firmly attached.
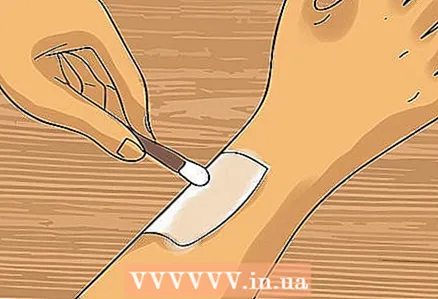
- Using a paintbrush, apply another layer of glue on top of the paper. Cover the entire surface with glue, and then glue another layer of paper.
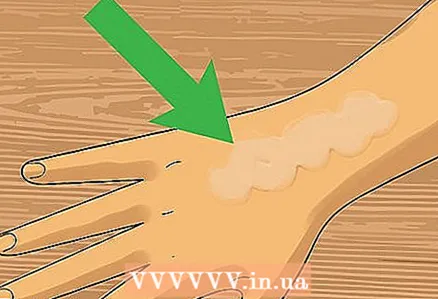
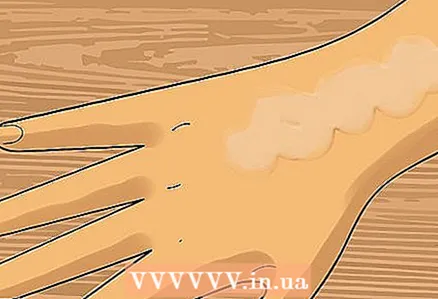
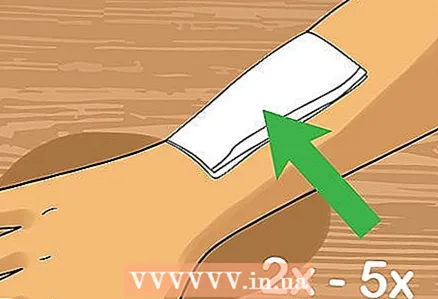
- You can use two layers of paper to create a realistic wound. However, if you add more layers, you will be able to make a deeper wound. If you want to create a deep cut or wound, add three to five layers.
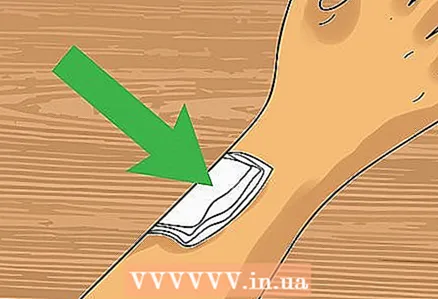
5 Glue the edges carefully so that the wound is even. After both layers are dry, glue the edges carefully to make the wound look realistic. - The edges of the wound treated with glue will look realistic after using cosmetic products.
- A fake wound made from paper without the use of cosmetics will not look realistic.
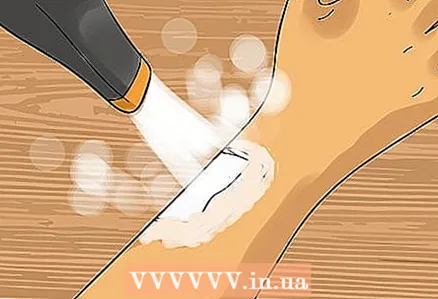
- If you have a hair dryer, use it to help the glue dry faster.
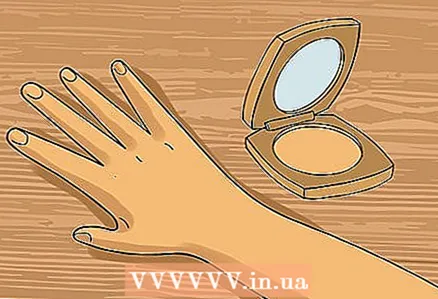
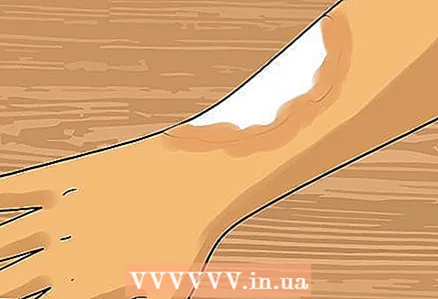
6 Apply liquid foundation to the paper to match your skin tone. To make the wound look more realistic, apply liquid foundation to the paper. - Pay special attention to the area where the wound meets the skin. Apply foundation evenly, not only to the fake wound, but also to the skin next to it. This prevents others from seeing the boundary between the wound and the skin.
- Use a foundation that matches your skin tone. Don't worry if the foundation is slightly different from your skin tone. This will give the color of the wound the best shade.
- Use a flat brush to apply the foundation, which blends the cosmetic easily over the targeted area of the skin.
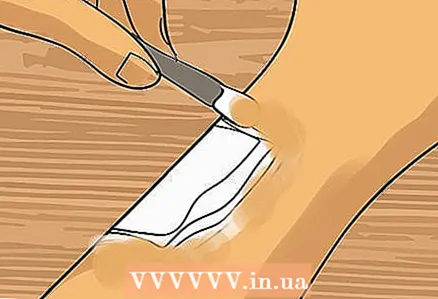
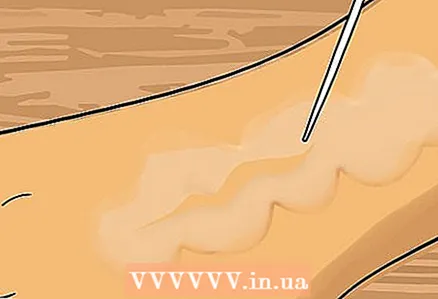
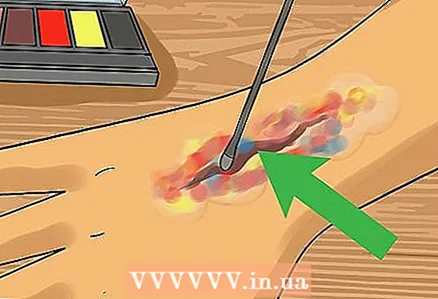
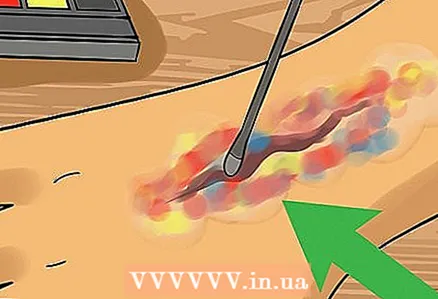
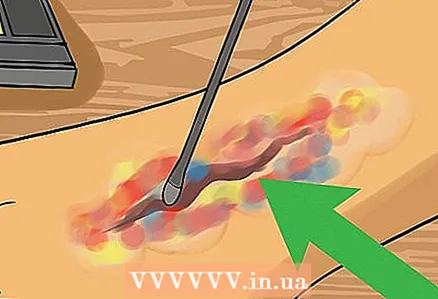
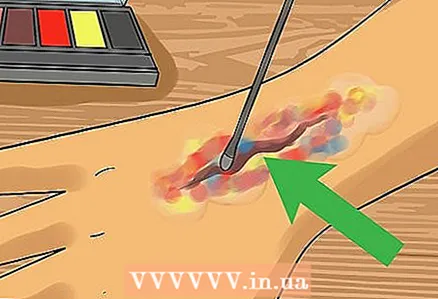
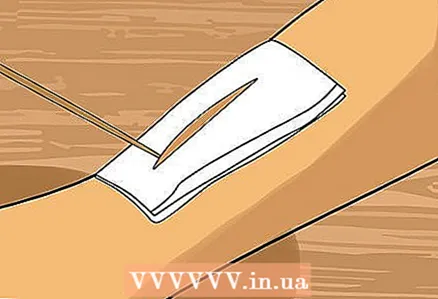
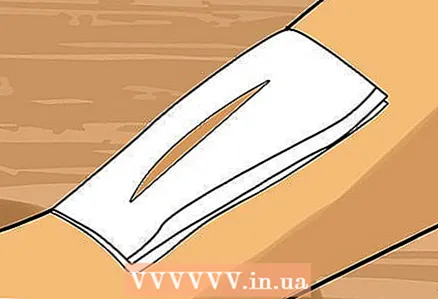
7 Cut or tear the paper to create the appearance of an open wound. After applying foundation, take a pair of scissors or tweezers and cut or tear the paper to create the appearance of an open wound. - Make a straight cut if you want a deep wound or a round wound, such as a zombie bite.
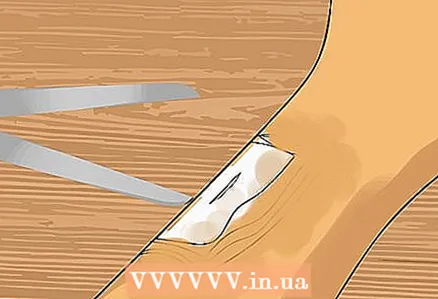
- Be very careful when making an incision so as not to cut your skin. Better to make a small cut so that you have a hole in the paper. Once you've made the hole, tear off the rest with your hands.
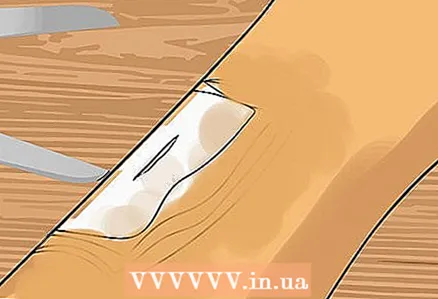
- Do not remove torn paper from an artificial wound. This allows you to create the appearance of crusts that tend to appear on the surface of the wound. You will get a deep wound.

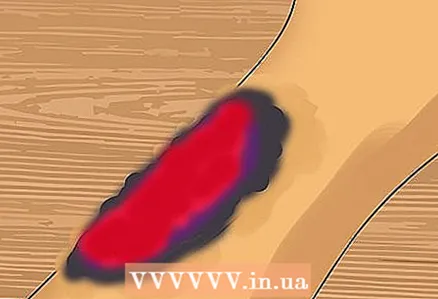
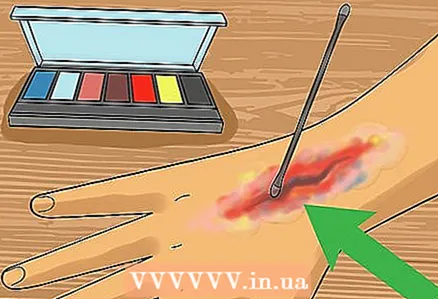
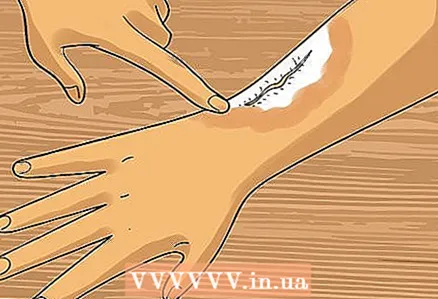
8 Apply cosmetics. Take eyeshadow in red, purple, gray, or black and apply to your skin. - Use a brush to apply eyeshadow directly to the skin at the incision site.
- Also apply the eyeshadow to the paper and the skin around it.
- Eyeshadow in dark colors creates a bruised look.
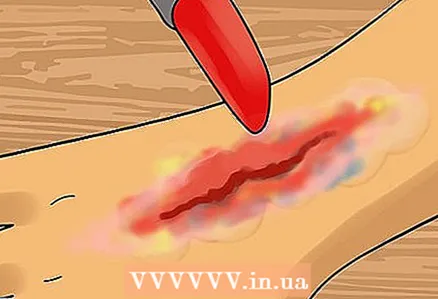
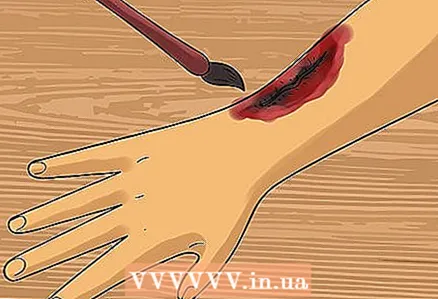
9 Apply artificial blood on the wound. After you have made the wound and achieved the desired shade, add fake blood. - To make your wound look more realistic, apply artificial blood to the skin and paper. Then take a brush and blend the fake blood evenly over the paper and skin.
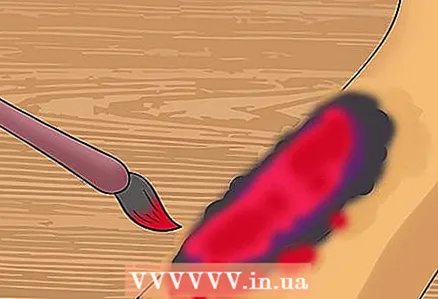
- After bleeding the blood, add more to create the effect of a bleeding wound.
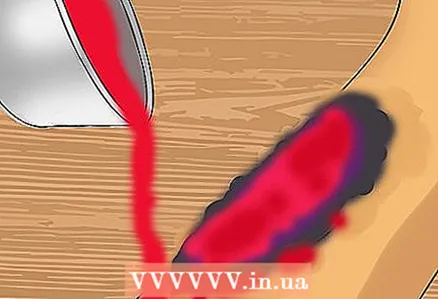
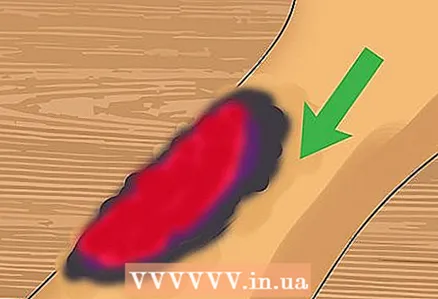
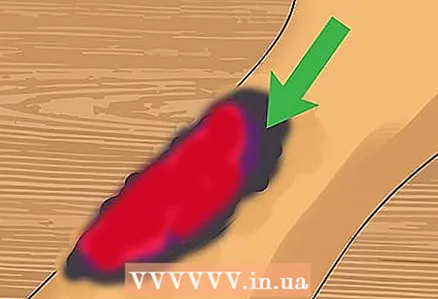
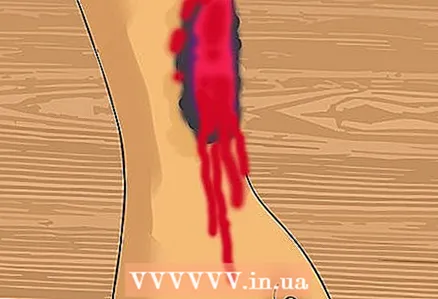
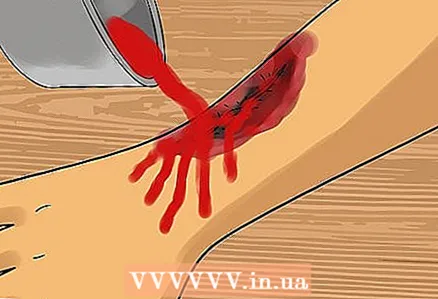
- To make the drops of blood appear more realistic, apply a few drops to the wound and let them drain off. For example, if you made a wound on your arm, apply blood to the top of the wound and then lower your arm to drain the blood downward.
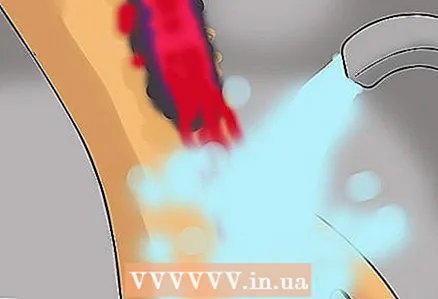
- To remove a fake wound, simply rinse the area with water.
Method 2 of 3: How to Create a Fake Wound Using Vaseline
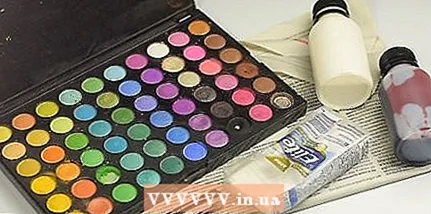
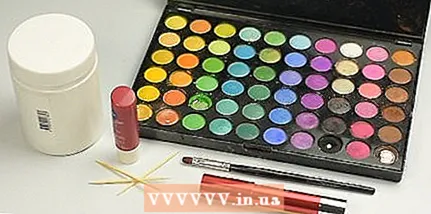 1 Get everything you need ready. For this method, you will need the following things: petroleum jelly, eyeshadow, lip gloss or lipstick, a makeup brush, and a toothpick.
 - Prepare the following shades of eyeshadow: navy blue, cyan, light brown, dark brown, red, deep pink / peach and yellow.
- Lip gloss or dark red lipstick is great for creating fake blood. Lip gloss will give your wound a fresher and weaker look compared to lipstick. Lipstick is great for making dried blood.
- Artificial blood can be applied in the final step, when you add the final touches.
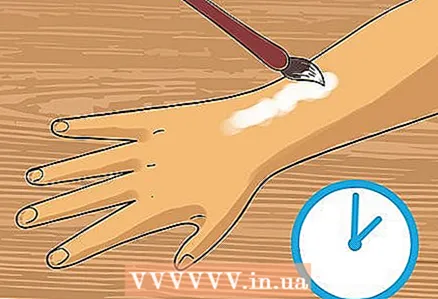
 2 Apply a layer of Vaseline to the area of your skin where you want to create a wound. The thicker the layer of petroleum jelly, the more swollen the area with the wound will be.
 - Smooth the edges of the wound so that there are no clumps of petroleum jelly on them. This will make the wound look more natural.
- This method is best used to create small wounds on the arms and hands.
- Smooth the edges of the wound so that there are no clumps of petroleum jelly on them. This will make the wound look more natural.
- 3 Draw a line across the Vaseline layer to create an open wound. Use a toothpick for this purpose.
- If you want your wound to look like you hurt something, make the line jagged, but thin enough.

- If you want to make a large cut or deep wound, draw a longer and wider line.
- If you want your wound to look like you hurt something, make the line jagged, but thin enough.
- 4 Apply eyeshadow to the wound. Wait for the petroleum jelly to dry a little before applying the eyeshadow. Then, using an applicator or brush, apply the eyeshadow to the wound.
- Apply eyeshadow in dark shades of brown or gray to the center of the wound to accentuate its depth.
- Use a light pink / peach tone around the edges of the wound so that the edges are not much different from the skin color.
- Apply a red eye shadow between pink / peach and brown to give the wound a fresh look.
- You can also apply blue and / or yellow eyeshadow around the wound to show that you have been hit hard.Shades of blues, yellows, greens, and purples will help you create a bruise.
- Blend the eyeshadow well. Due to this, clear boundaries will not be visible along the edges of the wound.
- Apply eyeshadow in dark shades of brown or gray to the center of the wound to accentuate its depth.
- 5 Use lip gloss or red lipstick and fake blood to complete the wound. Apply gloss or lipstick to the center of the wound for a fresh look.
- Lipstick, unlike lip gloss, will dry out your wound.
- Place a few drops of artificial blood in the center of the wound and wait for it to spread. Your wound is ready.

- Lipstick, unlike lip gloss, will dry out your wound.
Method 3 of 3: How to Create a Fake Wound Using Theatrical Makeup and Latex
 1 Get everything you need ready. Theatrical makeup and latex are designed to create a realistic look that can be used on stage. However, stage make-up and latex can also be used to create a look when going to a party or just for fun. You will need:
 - Liquid latex. Purchase latex, which is used for stage make-up.
- Brushes.
- Fake blood.
- Paper napkins or toilet paper. Use plain, plain napkins.
- Eyeshadow for dark shades.
- Also cover your work surface with newspaper to avoid staining the table with fake blood or liquid latex.
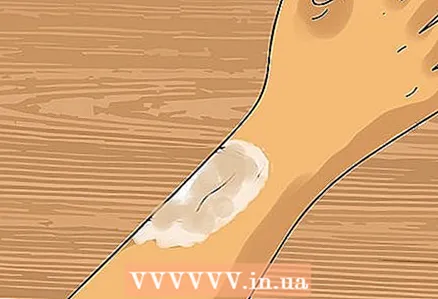
- 2 Apply liquid latex. Shake the latex bottle well before opening. Then, using a brush, apply the latex to the area of your skin where you want to make the wound.
- Liquid latex is difficult to apply and can get pretty dirty. So take your time. Apply latex evenly to your skin. Although liquid latex dries quickly, try to apply it in such a way that you get an even, smooth layer.
- Liquid latex is difficult to apply and can get pretty dirty. So take your time. Apply latex evenly to your skin. Although liquid latex dries quickly, try to apply it in such a way that you get an even, smooth layer.
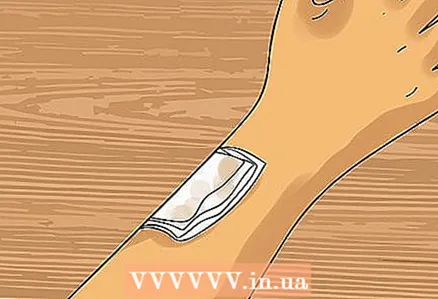
 3 Place a paper towel over the latex. Liquid latex dries very quickly, so work on a small area of skin. Place the tissue on the latex.
 - The napkin will stick tightly to the latex. Tear off the edges that won't stick.
- The napkin will stick tightly to the latex. Tear off the edges that won't stick.
- 4 Apply at least one more coat. Repeat the whole process again. Apply a layer of latex to a paper towel and then add another layer of paper.
- You can leave two layers as this is enough to create a wound. However, if you want to make a deeper wound, you will need three to five layers to create it.
- You can leave two layers as this is enough to create a wound. However, if you want to make a deeper wound, you will need three to five layers to create it.
- 5 Make an open wound. Once the layers are dry, make a cut or simply tear the paper and latex to create a hole.
- You can use a toothpick or tweezers to make a hole. You can cut or tear the paper to create a hole.
- The paper and latex will delaminate, giving you the effect of an open, crusty wound.
- You can use a toothpick or tweezers to make a hole. You can cut or tear the paper to create a hole.
- 6 Apply liquid foundation. After you have made an open wound, apply liquid foundation over the layers of tissues and latex.
- Apply your foundation so that you don't see the line between your skin and the latex and wipes layers.
- Smooth out the applied foundation with your finger.
- Apply your foundation so that you don't see the line between your skin and the latex and wipes layers.
- 7 Apply powder, eyeshadow, and fake blood to create a bleeding wound effect. Apply eyeshadow and red powder with a brush to the wound.
- Using a brush, paint the wound and skin around it with darker colors towards the center and lighter colors around the edges.
- Add a few drops of blood. Take artificial blood and apply a few drops to and around the wound. Make the blood flow.
- Using a brush, paint the wound and skin around it with darker colors towards the center and lighter colors around the edges.
Tips
- Make fake blood using red food coloring and corn syrup.
- Use darker shades if you want to make a sore or realistic wound.
- Add some red and brown blush to create a zombie bite.
- Make fake blood using red food coloring, cornstarch, and water.
Warnings
- Make sure you are not allergic to the ingredients you are using, such as latex, before starting the process of creating a wound.
- If you decide to use a knife, needle, or something else sharp to create a cut, then be extremely careful. If you are making a fake cut on a child, do not use objects that could injure him.
- Red food coloring can leave permanent stains on clothing and temporary stains on the skin.


