Author:
Marcus Baldwin
Date Of Creation:
17 June 2021
Update Date:
24 June 2024

Content
If you want to draw interesting patterns on your nails, the dot drawing tool is a must-have tool in the arsenal of a beautiful manicure lover. Despite the fact that you can buy a ready-made tool, you can very simply and cheaply (if not free) make it yourself from scrap materials.
Steps
 1 Use invisibility. It can be found in almost any store and in all sizes. Unfold it, dip one tip into the varnish and paint whatever you want.
 - If paint peels off at the tip, take another invisibility, since it is with this part that neat dots are drawn.
 2 Use a sewing pin. Be careful not to shake your hand and draw.
 - Take a scrap of paper and nail polish to check what dots you get. Make sure you draw a neat dot before you apply the nail polish. Once you've dipped the head of the hairpin into the varnish, press it against the paper to remove excess varnish and make sure you get the look you want.
- You can use pins with different sizes of heads and draw a variety of dots, from small to large.
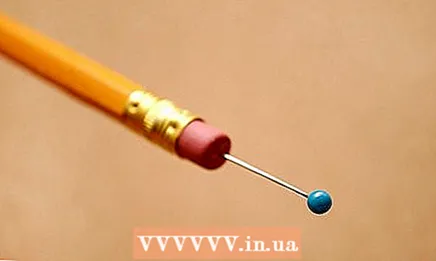 3 Upgrade a regular pin. Although you can hold the pin with your hand and draw dots with the head, pinning it to the eraser on the pencil will make the pin more comfortable and stable. You may need to use a little force if the pin does not fit easily into the elastic.
 - Place the pin on a flat surface with the tip up. Hold it by the head so you can pin a pencil eraser on it.
- In your other hand, take a pencil (holding the pin on a flat surface) with the rubber band down and press it into the point of the pin.
- Press in until at least half of the pin enters the elastic.
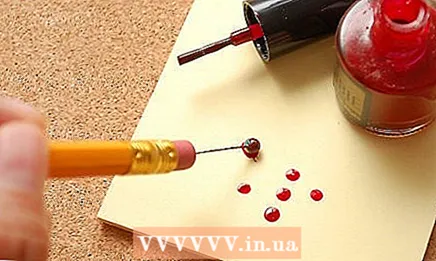 4 Dip the head of the pin in nail polish. Once you're ready to use your tool, dip the pin in your favorite nail polish.
 - Press the head of the nail polish pin against the paper, then mark a dot on the nail. Make dots on the paper until they look the way you want.
 5 Make a point tool with a paint or makeup brush. Just apply the dots with the back end of the brush!
  6 Use a ballpoint pen. It will be good if you find one that has run out of ink, but even if you don't, a regular one will work too. Dip the tip into the nail polish and go!
  7 Use toothpicks. As you guessed, such dots will be small. But if you apply the toothpick long enough and use enough polish, the dot will get bigger.
  8 When the base coat is dry, use a patch with holes. This will create a neat little dots pattern.
 - Apply the patch to the nail and paint it with the color you want to make the dots with. Once it's dry, remove the patch.
Tips
- Keep several tools with different head sizes on hand.
- At the end of each treatment, or if you want to make dots of different colors, wipe the nail polish off the tip of the hairpin with nail polish remover.
- Save your manicure for longer by covering the finished dry design with one or two coats of clear polish.
- Dip your hands in milk for 15 minutes before nailing.
What do you need
- Invisible
- Safety pins (and a pencil with an elastic band at the end)
- Toothpicks
- Brushes
- Waste paper
- Nail polish
- Patch with holes


