Author:
Helen Garcia
Date Of Creation:
22 April 2021
Update Date:
26 June 2024

Content
You can buy a hidden camera detector online or in a store, but you can save a lot of money by assembling it yourself. This weekend project is for kids, their parents and jack of all trades.
Steps
 1 Prepare materials and tools according to the list at the bottom of the page.
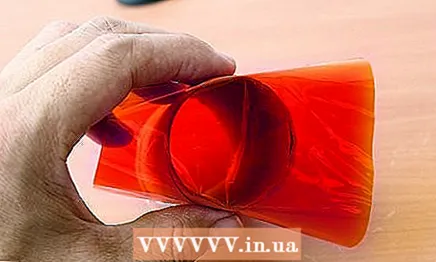
- 2 Cut two pieces from the red bag:
- Cut one piece of plastic to fit your flashlight lens.

- Cut the second piece of plastic 2-3 cm larger than the sleeve from the toilet paper roll.
- Cut one piece of plastic to fit your flashlight lens.
 3 Disassemble the flashlight and insert a piece of clear plastic as shown in the illustration. Collect the flashlight.
 - 4 Cut a few 12.7mm wide pieces of plastic from the remaining piece.
- Cut the bushing in half and make two 2.5 cm slots as shown in the illustration.

- Tape the plastic around the edge of one half, put the other half on the plastic, wind both halves with tape.

- Cut the bushing in half and make two 2.5 cm slots as shown in the illustration.
 5 Tie the resulting tube to the flashlight. If you want the detector to last longer, use a different tube material and store the toy in a bag or case.
  6 Look through the tube. You will see a flare from a hidden camera lens. The detector works best with the lights off and the curtains closed.
Tips
- It is not necessary for the camera to be on to detect lens flare, but looking directly at the camera through the detector is better, and the “straighter” the better.
- At online auctions, camera detectors cost up to $ 29.99, this version is noticeably cheaper.
What do you need
- Transparent vinyl bag in red. Both green and any transparent plastic (for example, a cover for a notebook) will do.
- Torch
- Scotch
- Scissors
- Toilet roll core


