Author:
Ellen Moore
Date Of Creation:
16 January 2021
Update Date:
29 June 2024
Content
1 Take six sheets of paper. You can use plain white paper (or cardboard) and mark the color of the flag with crayons, pencils, markers or paints. Alternatively, you can use paper in the same shade as the original flag color. For example, if you are making a UK flag, use blue paper. If you are making the Canadian flag, use red paper. 2 Roll two sheets of paper into tubes. You will be able to make a flagpole. Make sure to roll the paper tightly. For reliability, you can use adhesive tape. If you don't want to use paper, use a wooden stick to make a flagpole. 3 Glue the tubes together to make one long tube. Take two rolls of paper and insert the two ends of the tubes one into one - you will get a long tube. Secure it with duct tape.
 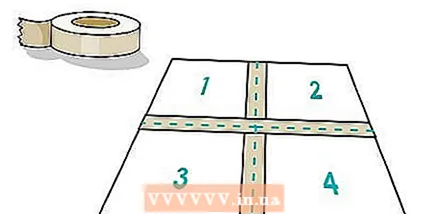 4 Take the remaining four sheets of paper and make a rectangle out of them. Spread four straight sheets of paper on the table and arrange them so that you get a rectangle. Use masking tape (you can later paint it the color you want) to glue four sheets of paper together. Glue both sides of the sheet together to secure them securely. 5 Glue the resulting rectangle to a long stick. Use regular duct tape to glue the paper rectangle to the straw. Make sure you do everything neatly so that your creation doesn't fall apart when you start waving at it. 6 Decorate your crafted flag. You can paint the flag in the color of any country or sports team. Use your favorite painting techniques or regular watercolors; glue stickers, glitter or write slogans on one / both sides of the flag. You can also make shapes (for example, the moon and stars) from additional sheets of colored paper and stick them on the flag. e
 Method 2 of 3: Fabric Flag
 1 Take a piece of nylon or cotton fabric. Choose a fabric that matches your desired flag shade. If you are making the US flag, you can choose the usual white color. To make a large flag, use a 5 x 3 foot piece of fabric. If you want to make a small flag, a small piece of fabric (like a pillowcase) will suffice.
 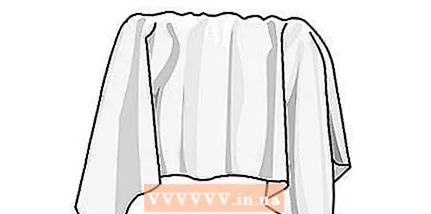 2 You will also need to procure other pieces of fabric in the colors you wish to use for your flag. It doesn't matter what kind of fabric you use for the flag. You can use nylon, cotton, felt, silk, polyester, velor - whatever you can find on the farm! Old things or a tablecloth are best for this.
 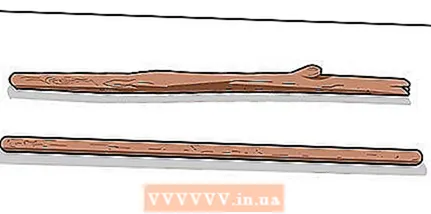 3 Select a flagpole. Any material will do for a homemade flag. You can use a tree branch or an old broomstick. The material for the flagpole must be durable and long.
 - 4 Make a pocket for the flagpole. Before attaching the flag to the handle, you need to make a pocket in which the flagpole will fit. To do this, spread the flag on the table and place the flagpole along the vertical small edge of the material on the right side.
- Roll the fabric over the flagpole so that there is space between the two. Attach the fabric in place.
- Pull out the flagpole. You can then use a sewing machine or fabric glue to hold the used material in place.
- Sew or glue the top ends of the pocket to prevent the flagpole from falling out. The flag will be placed at the very top of the flagpole.
- 5 Decorate your flag. It's time to have some fun! Use markers, rulers, and stencils to draw pattern designs on colored fabric. Drawings can be cut with sharp scissors.Once the decorations are ready, glue them to the flag using fabric glue.
- For example, if you are making a US flag, you will need to cut a small rectangle from a piece of blue cloth, seven long stripes of equal width from red cloth, and fifty five-pointed stars from white cloth.
- If you want to make an inscription on the flag, for example, “Go!”, You need to draw three-dimensional letters in the graffiti style and cut them out of pieces of white, black or colored fabric.
- 6 Fasten the flag. Once you finish decorating, you need to stretch the flagpole into the pocket. If the flagpole is not secured well, you can glue it on or make a couple of small stitches to secure the bottom of the flag. Now you can wave the flag as much as you want!
Method 3 of 3: Garland of flags
 1 Collect fabric samples or newspaper clippings. The beauty of flags is their ease of manufacture, so you can use materials as you see fit. Try to choose different beautiful patterns and bright colors so that everyone will notice your garland! If you have flags of at least five different colors, that's enough.
 - 2 Cut out the flags. Before you start doing this, you need to decide how large each triangle will be. Remember that the triangles should be isosceles: with long side edges and a short base.
- Once you have the dimensions, make a stencil for the flag and use it to cut out the rest of the triangles. The number of triangles depends on the length of the garland.
- If you wish, you can cut out the triangles with a scissors for carving teeth. You will end up with zig-zag edges instead of the usual straight lines!
- 3 Attach flags to the ribbon. This process depends on the material you used to make the flags. If you used paper, you can punch 3-4 holes in each flag and simply pull a ribbon, string, or string through them. If you used fabric, you can sew the top corner of the flags with tape or tape (this process takes a long time), or you can use a bubble of fabric glue to attach the flags to the tape. The second option is much easier.
 4 Hang up a garland. Hang the flags on the wall by tying the ends of the tape to nails driven into the wall or securing them with thumbtacks. Flags will perfectly decorate a wall above a fireplace or bed, a picnic or barbecue area, a classroom, a nursery, as well as any room where a party is planned.
Tips
- To keep the flag upright, glue the flagpole to the shoebox.
What do you need
- Paper
- Webbing tape
- Dyes
- Stencil
- Shoe box (optional)
- Colored fabric
- Wooden stick
- Fabric glue or sewing machine
- Sharp scissors
- Ribbon, ribbon or lace


