Author:
Gregory Harris
Date Of Creation:
13 August 2021
Update Date:
20 June 2024

Content
- Steps
- Method 1 of 4: Making a pattern
- Method 2 of 4: Cutting the Fez
- Method 3 of 4: Making a tassel
- Method 4 of 4: Sewing a fez
- What do you need
A fez is a small cylindrical headdress with a tassel that hangs down from above. Although not currently used as headwear for everyday wear, they can be a great addition to a variety of fancy dress costumes. And, most importantly, the simplest fez, with a certain amount of patience, can be sewn on your own right at home from the minimum amount of materials.
Steps
Method 1 of 4: Making a pattern
 1 Print or draw a fez pattern. With some effort, you can draw a fez pattern yourself, but if you find it difficult to calculate the appropriate parameters or you decide not to waste your nerves once more, you can always find ready-made free patterns on the Internet and use them.
 - Print the pattern on plain printer paper.
- You can search the net for a suitable pattern. Do a related search on Pinterest or other similar sites.
 2 Measure your head. Take a measuring tape to measure the circumference of your head. Attach the starting end of the measuring tape just below the end of the curve of the skull, about 5-7.5 cm above the ear. Wrap a measuring tape around your head, keeping it as parallel to the floor as possible.
 - Note that this measurement must be accurate enough for the fez to fit snugly on your head. But at the same time, it should also be remembered that the measurement should not be too tight, otherwise the fez will not stay on the head at all.
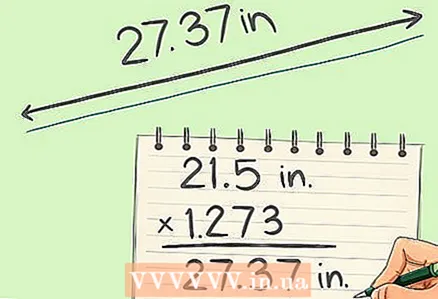 3 Cut off a piece of string. Knowing the circumference of your head, multiply your measurement by 1.273.For example, if the circumference of your head is 54.5 cm, multiply this value by 1.273, and you get 69.4 cm. The part of the pattern you will need to draw is part of a large, even circle. If you imagine this circle in the form of a pizza, then the necessary detail will be a crust from one of its slice. Since it is necessary to use only a part of the circle for the pattern, you do not need to draw the entire circle, but you just need to find out the radius of this circle. This is exactly what you did when you multiplied the measure by 1.273. In the example above, the radius was 69.4 cm. Next, you need to cut a piece of string to the length of the radius. In the same example, you will need 69.4 cm of string.
 - Be sure to use a string that won't stretch.
- If you don't have twine or string on hand, you can use a narrow ribbon to work with.
 4 Secure the pattern paper with tape. Before starting to draw a pattern, be sure to tape the paper to the table or to the cutting surface so that it does not move as you work. One piece of tape from each end of the paper should be sufficient.
 - It is best to immediately attach the paper to the cutting surface. This will help you immediately be ready to cut out the pattern when you finish drawing it on the fixed paper.
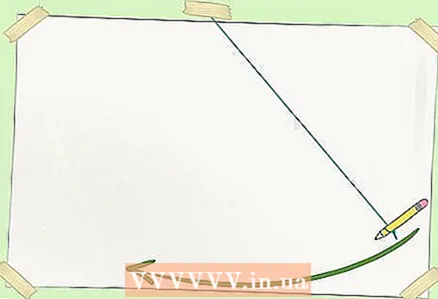 5 Draw an arched piece. This arc will represent the sidewalls of the fez, so its length should be equal to the circumference of your head plus an additional 1.2 cm for the allowance. Take the piece of string you cut off earlier and place one end of it against the table, keeping the piece perpendicular to the edge of the paper. At the other end of the string, tie a loop and insert a pen or pencil into it. The piece of string should extend at a slight angle from the end pressed against the table to the handle. Stretch the string and slide the pen over the paper like a pendulum, letting the string guide you. You will have a homemade compass analog that will draw the correct arc to match the size of your head. Do the same for the top edge of the fez, drawing a second arc 12.5 cm higher than the first.
 - Be sure to keep the string taut as you draw the arc, otherwise the line may become uneven.
- Keep the handle vertically while working. Tilting the handle will give you a distorted arc.
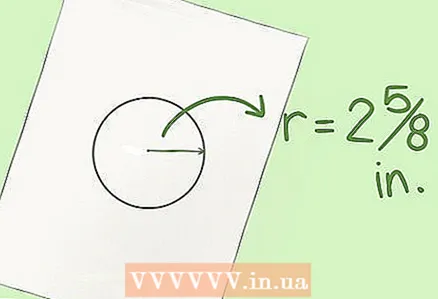 6 Draw a circle. Draw an even circle, 6.7 cm in diameter, on a piece of plain printer paper. The best way to do this is with a pair of compasses, available from an office supply store. Cut out the circle you have drawn.
 - This piece of the pattern will be used as the top of the fez.
Method 2 of 4: Cutting the Fez
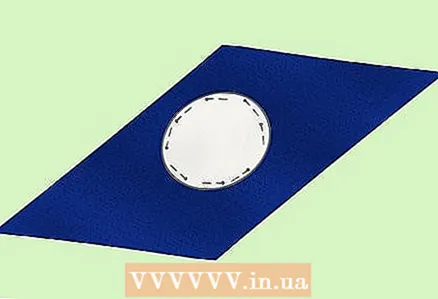 1 Pin the pattern to the felt. Place the main piece of the fez pattern on a large piece of felt. Make sure the felt and pattern are as flat as possible, then secure the pattern to the felt using straight tailor's pins through the paper and fabric. Repeat the same for the round piece of the pattern on another piece of felt.
 - Use as many pins as necessary to securely attach the pattern to the felt, but keep in mind that the pins wrinkle and bend the paper, so too many of them can slightly distort the outline of the piece you cut out of the felt.
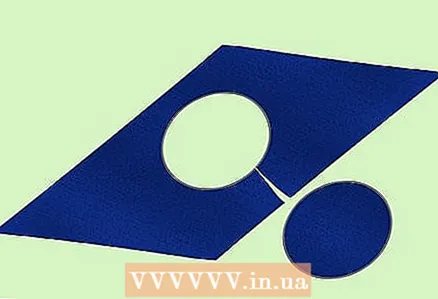 2 Cut out the details of the fez along the contours of the pattern. Use a sharp tailor's scissors to cut out felt details along the outline of the pinned patterns.
 - Keep the scissors in one place, but rotate the felt itself as you cut. This will help you make smoother cuts.
- When cutting out parts, make sure that the scissors are tangent to the contours of the pattern. This will prevent you from sliding to the side, making the part too narrow or too wide.
- Remember that these details will form the outside of the fez itself.
 3 Cut out another set of felt pieces. Remove the patterns from the outer pieces of the felt and pin them (the main piece and the top piece) onto another piece of felt. Also carve out the details.
 - This kit will become the inner layer of the fez.
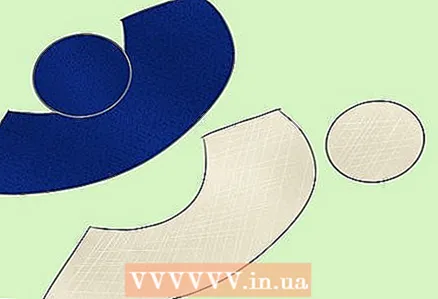 4 Repeat cutting on the cushioning material. Interlining is a technical fabric that is used to seal the base fabric of a garment so that it holds its shape better. Peel off the patterns from the second set of felt pieces and attach them to the dense interlining. You can find it at fabric and craft stores. Pin the pattern, and then cut out the details along it.
 - You will need to use an interlining as this will give the headdress its density and keep it in shape. Without it, the fez will likely fold under its own weight when you sew the pieces together. For best results, use a heavy-duty cushioning material.
Method 3 of 4: Making a tassel
 1 Wrap the floss loops around your hand. Extend your non-dominant hand in front of you by sliding your fingers together. With your main hand, start winding the floss thread around the fingers of your non-main hand and make 20-30 turns.
 - The finished tassel will be four times thicker than the original hand wrapped. Keep this in mind as you work.
- If you find it difficult to use your own fingers as a base for winding, or if you want to make a larger brush, wind the floss around a piece of sturdy cardboard cut to the size you need. Please note that the tassel will be about half the width of the cardboard used.
 2 Tie up the winding. Carefully remove the thread from your hand. Tightly thread both layers of the winding several times right in the middle. Tie the ends of the thread together with a tight knot.
 - Note that you need to tighten the thread with extreme precision. If you do not do this strictly in the center, then the brush may turn out to be skewed.
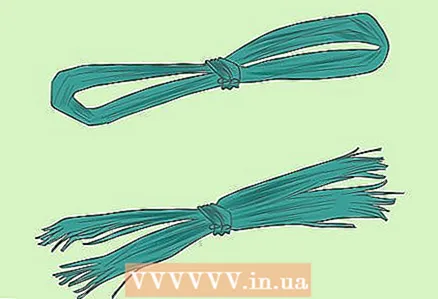 3 Cut the winding loops. Take a sharp pair of scissors and cut the winding loops on either side of the knot. Spread the threads of the tassel so that they all hang down under the knot that holds them.
 - At the end of this step, the general outlines of the brush will already begin to emerge.
- If the ends of the threads are uneven in length, carefully trim them with scissors to make them even.
 4 Tie off the top of the tassel. Cut off a separate thread of the floss. Wrap it around the top of the tassel just below the knot, pulling the threads of the tassel together at this point.
 - You will need thread about three to four times the length of the tassel itself.
- In this case, the thread will need to be wrapped around the brush twelve times or more.
- When you're done tying the threads, tie a small knot at the bottom. Leave the ends of the threads hanging from the knot along with the rest of the threads in the tassel, just cut them to the desired length.
 5 Make a loop on the tassel. At this time, the tassel should still have two severed ends of the floss exiting from the central knot. Tie them together as close to the ends as possible, forming a loop.
 - Trim off excess threads sticking out of the last knot to make it less visible.
- Set the brush aside until it's time to attach it to the fez.
Method 4 of 4: Sewing a fez
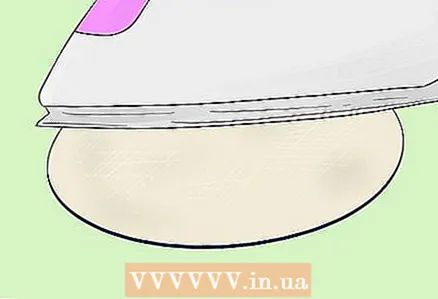 1 Using an iron, glue the cushioning material to the outside felt of the fez. First, lay out the main felt piece in front of you. Note that the side of the part facing you will be the wrong side. Most of the fez will be sewn on the wrong side to hide the seams. Place an interlining piece over a felt piece and pin together. Do the same for the upper fez details.
 - Make sure the shiny side of the interlining is facing the felt. Typically, the adhesive side of the interlining fabric shines due to the adhesive applied to it.
- Set the iron to a low heat setting and use a thin ironing cloth when ironing the parts. Do not place the iron directly on the fabric or iron it at high temperatures, as both can burn the felt.
- Initially iron the parts in between the pins. When the interlining fabric adheres securely enough, remove the pins and iron the fabric in these places to also glue it together.
- When finished, let the parts cool down.
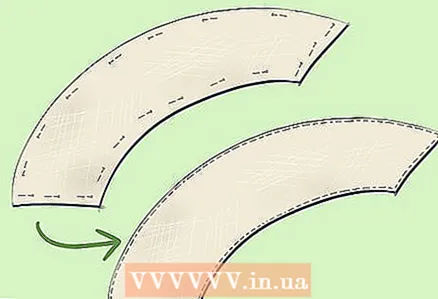 2 Pin and sew the two main felt pieces together. At this point, you will have one outer and one inner main felt piece. Lay the outer part of the bezel in front of you on the work surface with the cushioning fabric down and face up. Place the inner part of the fez on top of it and align the edges. Pin together with straight tailor's pins, then sew along both curved edges of the fabric, 6 mm (1/4 inch) from each edge. An allowance is the area of fabric that remains between the cut and the seam that connects the two layers of fabric together.
 - Do not sew straight edges of parts.
- When finished, turn the stitched parts right out over one of the unstitched edges. The interlining will now hide inside the sewn felt so that it faces out.
 3 Pin and sew the top two pieces of the fez. As with the main features of the fez, you should have two upper parts on your hands: one outer part with glued interlining and one inner part. Place the outer top on a work surface with the interlining cloth facing down. Place the inner part on top and align the edges as evenly as possible. Chip off the pieces, then sew around the edge, leaving a 6mm allowance.
 - Leave a small 1 inch (2.5 cm) gap in the stitching when trimming. Remember that you are stitching from the inside to hide the seams. Having a small hole in the circular stitching will allow you to turn the piece right out when the sewing job is done. Do not overstitch the entire circle!
- Once sewing is complete, turn the circle out to the right side through the open hole. The interlining fabric will hide inside.
- Close the hole through which the part was turned out. First, gently tuck in the open sections of fabric that are sticking out at this point. Then sew the hole.
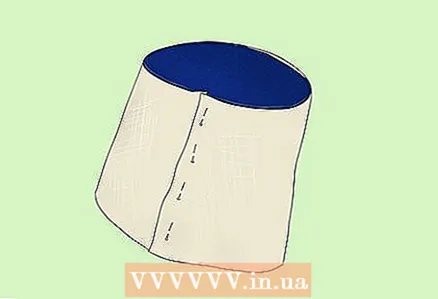 4 Align the edges of the main part. You are now ready to grab the main part of the fez and sew the edges to give it a cylindrical shape. Lay out the main part of the fez on the work surface so that its outside is facing you. Fold the piece in half, aligning the two straight edges. Align the edges and pin together.
 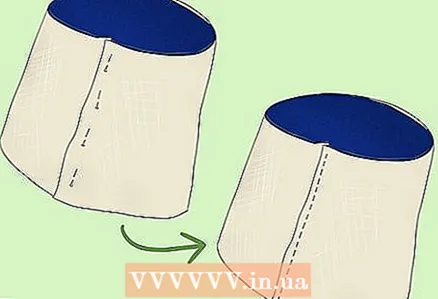 5 Place a seam around the edge. Sew the chipped sides of the part 9 mm back from the edge. When you have finished sewing, remove the pins.
  6 Attach the top to the fez. Attach the round fez piece to the smaller of the two round holes on the base piece. At this point, the fez should still remain on its seamy side. Pin the pieces together and then create a 6mm circular seam that joins the top to the main piece.
 - When chipping off pieces, be sure to do it from the wrong side.
- It is not so easy to lay a line in this place. When stitching on the sewing machine, the round piece should face downward and the cylindrical piece should face upward into the air.
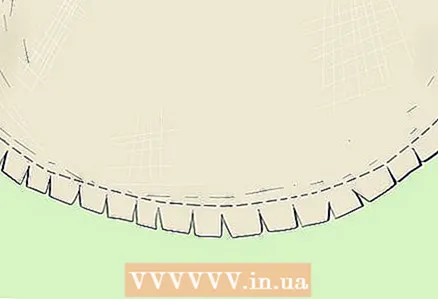 7 Undercut the top circular seam. Make small notches from the inside around the perimeter of the round seam allowance at the top of the fez. Use sharp scissors to keep your cuts neat. These notches will prevent the top seam from sticking out when you put on the finished fez.
 - The cuts should go to the stitch line, but not cross it.
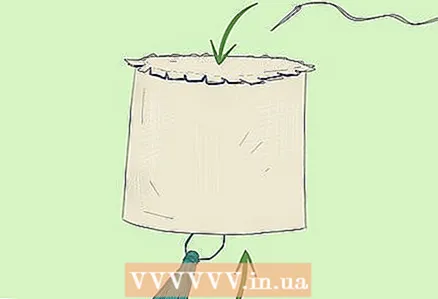 8 Sew on a tassel. Thread a regular sewing needle with standard general purpose thread.Withdraw the needle from the inside of the fez to the outside, exactly in the center. Pass the needle through the loop of the tassel and push it back into the fez. Tie the ends of the thread into a knot from the inside of the fez.
 - The connecting thread can be as long or short as needed for the desired hanging brush position.
- Notice that as you continue to work, the fez should remain on the seamy side. The knot of the fastening thread should be facing you, and the tassel itself should be hidden inside the inside out fez.
 9 Now you can admire your work. Turn the fez to the right side. Straighten the edges and tassel, and then try on the hat. This step completes the fez making process.
 - Please note that the fez must be held on the head without assistance. However, if it slips off, you can fix it with invisibility.
What do you need
- Tape measure
- 23 cm felt color A
- 23 cm felt color B
- 23 cm thick interlining
- Threads to match the fabric
- Plain paper
- Mouline thread (for making a brush)
- Sharp fabric scissors
- Pencil
- Straight Tailor's Pins
- Sewing machine
- Sewing needle


