Author:
Eric Farmer
Date Of Creation:
11 March 2021
Update Date:
1 July 2024

Content
Ranunculus (garden buttercup, Asian buttercup) belongs to a group of several hundred plants that unite plants of the buttercup family. Due to their brightly colored flowers, these plants are often sold both in bouquets and as a popular garden plant. Many varieties with bright flowers and multi-layered rose-shaped petals can be planted at home. Most buttercup species grow to about 15 inches in height. To grow a beautiful buttercup, you need to know how to plant them and how to care for them after planting.
Steps
Method 1 of 2: Planting buttercups
 1 Choose a place to plant buttercups based on your climate. Buttercups prefer to grow in the sun, but if you live in very hot climates, they will tolerate light shade. Buttercup cannot withstand severe frosts, so if you grow them in cooler climates, it is recommended to store the tubers (bulbs) indoors during the winter.
 - Storing buttercup tubers is described in this article in Step 6 of Method 2.
 2 Find an area with well-drained soil to plant buttercups. When choosing a place for buttercups, in addition to the illumination of the site, you must also take into account the properties of the soil. Buttercups need well-drained soil; they prefer rich, sandy soil. Try not to plant buttercups where puddles stagnate after rain. Also, avoid planting buttercups in heavy clay soils.
 - You can tell if your soil is predominantly clayey by squeezing a handful of dirt in the palm of your hand. If it clumps together, it is heavy clay soil. You can improve soil drainage by mixing it with a lot of substances such as plant fibers (bark or grass cuttings) or well-rotted manure. These soil additives will help your buttercups grow.
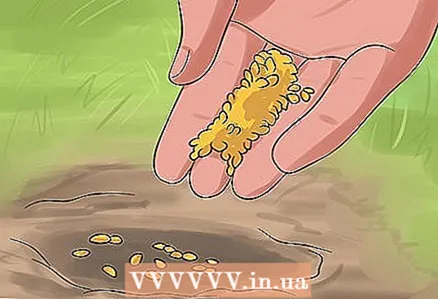
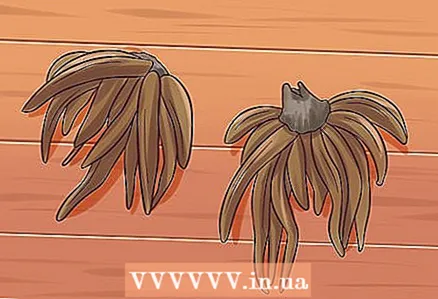 3 Plant buttercup tubers (bulbs). It is best to grow buttercups from tubers or bulbs. Tubers are like roots; buttercup tubers look like spiders, pincers, or a bunch of bananas. Their strange appearance is beneficial when planting. Plant the tuber with the "claws" or "spider legs" down. Plant tubers:
 - You should plant the smaller varieties about 2 inches deep, 5 inches apart.
- Larger varieties, such as the Telocote buttercup, should be planted 12 inches apart.
- No need to soak tubers before planting. For maximum effect, it is best to plant buttercups in groups of up to 12. Planting is usually done in the spring, after the end of the last frost.
- After planting, water the tubers and the soil around them. Watering will help the soil to shrink.
 4 Be aware that you can usually tell the number of flowers by looking at the bulb or tuber. The size of the bulb indicates the number of flowers that the plant will produce.
 - 'Jumbos' is the largest, about 3 inches in diameter, producing 30-40 flowers.
- Smaller tubers, about 2 inches in diameter, can produce about a dozen flowers.
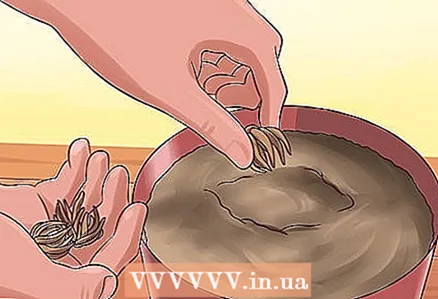
 5 If you can't buy tubers, try growing buttercups from seeds. Buttercups can be grown from seeds.It is best to sow buttercup seeds indoors in September as they prefer cooler temperatures. Plant buttercup seeds:
 - Sow or place the seeds in a pre-moistened compost that has a low specific gravity and is suitable for sowing seeds.
- Do not cover seeds with soil. Keep the soil moist and do not expose to direct sunlight.
- Keep the seeds at about 70 ° F and a little cooler at night. The seeds should germinate or grow into small plants in about two to three weeks.
- Wait until the young plants have about half a dozen leaves before they can be transplanted into larger pots. Protect these young plants from frost and move them outdoors next spring if desired.
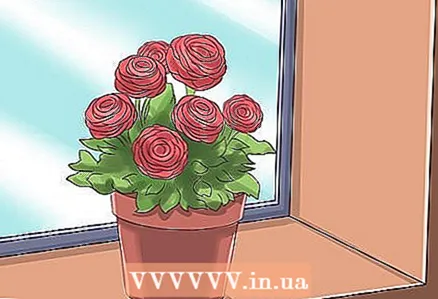
 6 You can plant buttercups in a container. When planting buttercup tubers in a container, fill it about three-quarters with soil. Arrange the tubers so they are about 10 inches apart and fill the container with soil so that the tubers are covered with a layer of soil about two inches thick.
 - Remember that containerized plants dehydrate faster than outdoor plants, so be sure to water throughout the growing season. Watering is described in Step 2 of Method 2.
- It should be borne in mind that buttercups tend to develop a large root system, so don't plant them too thickly or too much in a container.
 7 Keep buttercups away from animals as their flowers are poisonous. All buttercups are poisonous to livestock and can also be toxic to pets and humans. Plants taste unpleasant and cause blisters in the mouth. Usually, animals avoid eating them, unless there is nothing else to eat. Therefore, it is good if there are deer in your area, but it is bad if you have pets.
 - Plant buttercups in an area where pets and livestock cannot access them. For example, in a fenced flower garden or in a container (container planting was covered in Step 6, the previous step in this section).
Method 2 of 2: Caring for buttercups
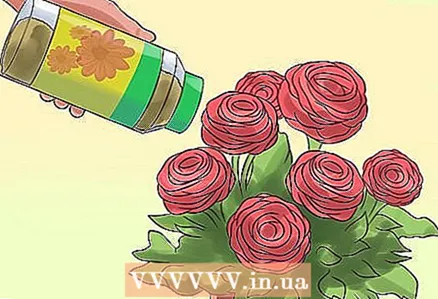 1 Feed your plants with fertilizer approximately every 14 days. During an active growing season (usually spring and summer) try to support the plants by feeding them every two weeks (every 14 days). Start feeding as soon as the first buds appear on the plant.
 - The usual water-soluble plant food or the dressing that you rake into the soil works great. It stimulates the formation of flowers. You can buy plant food at your local gardening store.
 2 Water the buttercups. You should water the buttercup tubers immediately after planting, as described above. Continue watering the planted plants every 10 to 14 days. When the first leaves appear on them, water once a week.
 - Continue watering the plants once a week until fall. In the fall, buttercups will begin to die off, fall into a dormant period, and they will not need to be watered. The rest period is described in more detail in Step 5 of this section.
 3 Protect buttercups from pests. Unfortunately, buttercups can fall prey to pests such as slugs and aphids. But, fortunately, there are tools and measures that deter these pests.
 - To combat slugs, use a remedy for pests of garden cabbage in pellets, which are scattered around the buttercup. You can buy these pellets at garden stores.
- If the buttercup is attacked by aphids, use a standard aphid spray or insecticidal soap.
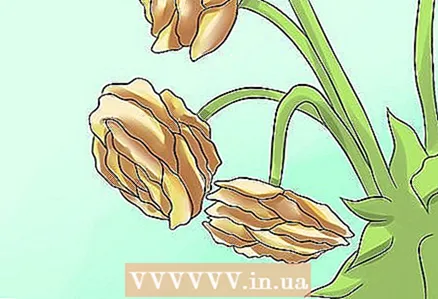
 4 Remove dried flower heads with sharp garden shears. As with many flowering plants, it is advisable to remove the faded flower heads as soon as they wither (dry out and die off). This not only makes the plant look more flavorful, but also stimulates the formation of other flowers, reduces the amount of energy that the plant spends on forming seeds, and ultimately helps it save energy.
 - Use sharp scissors to cut off the faded flower heads as soon as they start to look sloppy. Try to cut the flower at the base of the stem, which is in the midst of the leaves.
 5 Let the top of the plant die off for the winter. Once the flowering season is over in the fall, allow the foliage to die off. Foliage dieback means the plant goes into a dormant period until the start of the next growing season. For the plant to grow in the next season:
 - Refrain from cutting off dried shoots before the first frost. You should not water the plant during the dormant period; it is better not to water buttercups in winter.
 6 If your area is very cold, store the buttercups indoors during the winter. Buttercup will tolerate light frosts if left in the ground for a reasonably mild winter. If in your area there are regularly severe frosts in winter, then the buttercup tubers should be dug up and stored in a cool, dark place in winter, for example, in a garden shed.
 - It is better not to bring tubers into a heated room, for example, into a house, since in such conditions they are prone to rotting.
 7 Many gardeners use the buttercup as an annual plant. Due to the difficulty of growing a buttercup as a perennial plant (a plant that blooms year after year), many gardeners use them as an annual plant (flowering for only one year). But if you are still determined to see your flower again next year, dig up its tubers for the winter, as described in the previous step.
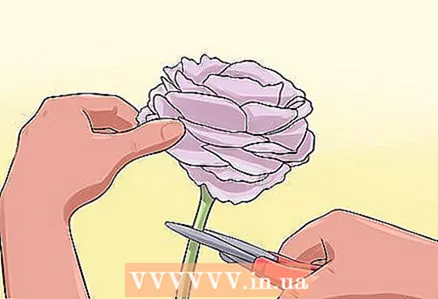
  8 Save cut flowers. Buttercup cut flowers are beautiful, and if you take action, they can still live long enough. To prolong the life of buttercup flowers, cut them early in the morning as soon as the buds begin to open.
 - Use a sharp blade to keep the cut clean and even. Cut off the stem at the base of the plant, almost at the root collar, among the leaves. In this case, the ends of the cut stems will not stick out.
Tips
- When choosing varieties of buttercups, consider what kind of garden you want to create. Buttercups come in a wide variety of varieties with different colors of flowers, different sizes, so there is plenty to choose from.
== Sources and Links ==
- ↑ http://www.gardenguides.com/77651-care-ranunculus.html
- ↑ http://www.gardenguides.com/77651-care-ranunculus.html
- ↑ http://www.easytogrowbulbs.com/g-21-ranunculus-planting-guide.aspx
- ↑ http://www.gardenguides.com/77651-care-ranunculus.html
- ↑ http://www.easytogrowbulbs.com/g-21-ranunculus-planting-guide.aspx


