Author:
William Ramirez
Date Of Creation:
23 September 2021
Update Date:
1 July 2024

Content
If you have never bought a brand new bowling ball before, you will be surprised to find that new bowling balls often do not have holes. It is extremely important for serious bowling players that the position of the holes in the ball fits as closely as possible to their palm and provides a comfortable grip. In addition, the location of the holes and their depth affect the behavior of the ball itself. Usually, the drilling of holes in a new ball is trusted by professionals, and in most cases this is justified. However, you can do it yourself!
Steps
Part 1 of 2: Preparing to drill
 1 Choose a ball. Choose the bowling ball that's right for you based on its weight and the material it is made from.
 - Bowling balls are made from plastic (the cheapest), urethane, reactive resin, or several materials at the same time. Each material has its own coefficient of friction, density and throwing behavior.
- If you have the opportunity, experiment with different types of balls and weights before choosing the one that suits you. By drilling holes in the ball, you will finally secure it to yourself.
 2 Select the location of the holes. The degree of control and the power of the throw depends on their configuration. The choice of hole locations is determined by your strengths and weaknesses as a bowling player.
 - For a traditional grip, the holes should be deep enough for your toes, including your thumb, to enter all the way to the second knuckle. This grip is the easiest and most common. It is recommended for beginners as well as low-skill players.
- When gripping with the fingertips, only the upper phalanges of the fingers are immersed in the holes, so this type of grip requires a shallower hole depth. This is an advanced grip that requires more skill, but it allows for better ball control, spinning and throwing power.
- For half-grip with fingertips, the holes are drilled so that the fingers enter them approximately to the middle of the second phalanx.This grip is intermediate between the previous two: it provides better ball control than the standard grip and is easier to learn than fingertip grip.
- There are other types of grips, such as Sarge-Easter, but the three grips listed above are the most common.
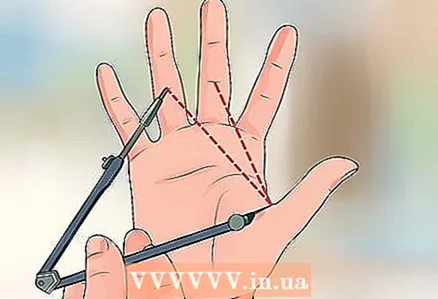 3 Measure the span between your toes. Measure from the base of your thumb to the bending points of the other two fingers that will hold the ball (some prefer using your index and middle fingers, others with your middle and ring).
 - With a traditional grip, this means that you need to measure the distance from the base of the thumb to the second joints of the corresponding fingers. When gripping with the fingertips, the distance to the first joints of those fingers is measured.
- The use of adjustable balls is highly recommended as they make this procedure much easier. In adjustable balls, you can change both the location of the holes and their depth. These balls are available from manufacturers, major sporting goods stores, and possibly a bowling alley you visit.
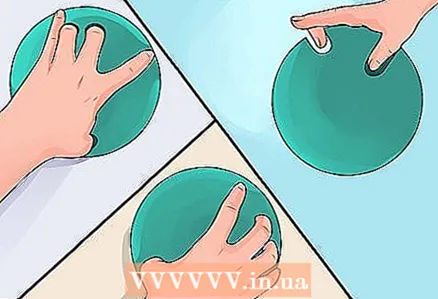
- If you cannot use the adjustable ball to determine the exact grip parameters, simply place your fingers on the ball that has not yet been drilled and circle them in the most comfortable position. This method is less accurate, but it also allows the location of the holes to be determined.
- You can also measure the span between your toes with a compass or caliper. In this case, you need to put your fingers together and put your thumb to the side; after measuring the appropriate distance, subtract approximately 3 mm (1/8 ") from it, and 6 mm (1/4") for the fingertip grip.
- To determine the depth of the holes in the absence of an adjustable ball, measure the distance from your fingertips to the phalanx along which they enter the holes.
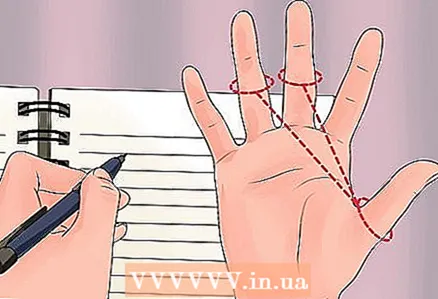 4 Record your measurements. Record the measured hole depths and the distance between them.
 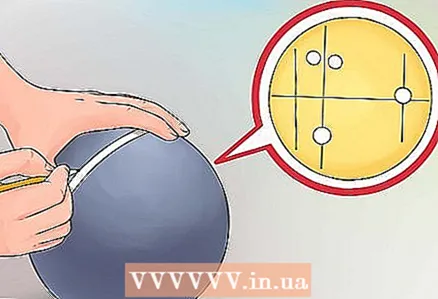 5 Determine the angle. The hole angle is extremely important as it provides a comfortable grip and effective ball throwing. If, for example, the holes are pushed forward, your fingers will linger in the ball as you throw it, and it will rise.
 - You must determine this parameter yourself, guided by considerations of convenience, as well as assessing your strengths and weaknesses as a bowling player.
Part 2 of 2: Drilling holes
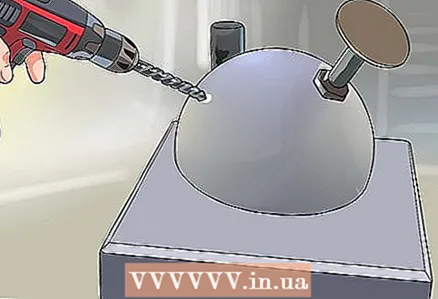
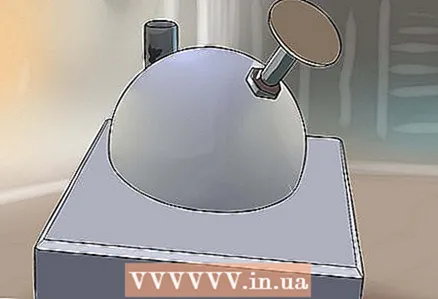 1 Secure the ball securely. Hold the ball in a vise to keep it stationary while drilling the holes.
 - If the ball does not remain stationary while drilling, the holes will become uneven, making it difficult to play.
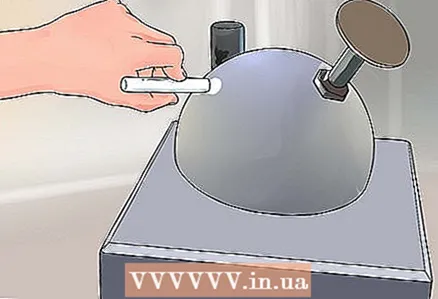 2 Mark the ball. Mark the location of the holes with an erasable marker or chalk, placing marks in the center of the places for the holes. Do this based on the measurements you made earlier.
 - When casting, bowling balls are suspended on a small rod, after removing which a hole remains, which is subsequently filled. This is the so-called "pin". Do not drill holes where the pin is located, as this could void the ball's warranty and adversely affect its properties. Make sure the nearest hole is at least 1 inch (2.5 cm) from the post.
- The location of the pin is easy to determine. As a rule, its color differs from the rest of the ball surface.
- Experienced craftsmen use a pin to determine the properties of the ball's core, which allows you to find the best place to drill the holes, depending on the ball characteristics you need. The pin location is specific to the ball model and can be found in the documentation that came with the ball.
- Check the markings on the ball several times before drilling. Once the holes have been drilled, you cannot change anything.
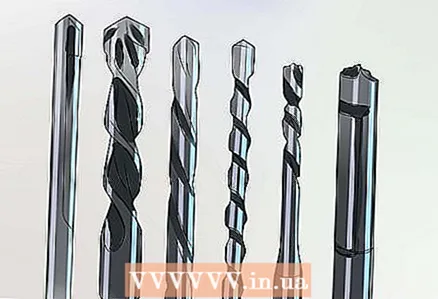 3 Pick up drills. Determine the diameter of the drills required to drill the thumb and finger holes.
 - This is easy to do if you used an adjustable ball when measuring, as it also allows you to measure the thickness of your fingers. If you do not have access to such a ball, use a set of drills of various diameters to drill holes in a piece of wood and determine which diameter is suitable for the corresponding finger.
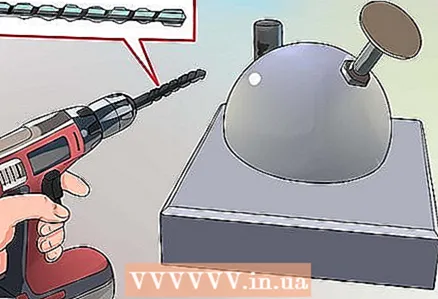 4 Install the first drill. Get ready to drill the thumb hole with the right drill bit.
 - The use of a special bowling ball drill is highly recommended. Other drills can damage the ball.
 5 Drill a hole for your thumb. Drill slowly and at a suitable angle, constantly checking the depth of the hole to avoid making it too deep.
 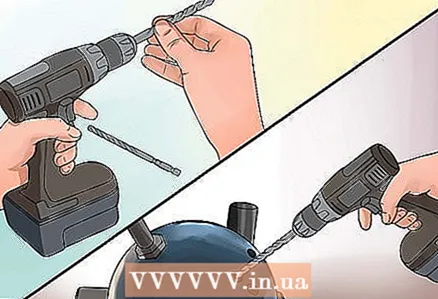 6 Change the drill bit and drill the holes for the rest of the fingers. Replace the drill bit and punch holes for the other two fingers. As before, constantly check the depth of the holes.
 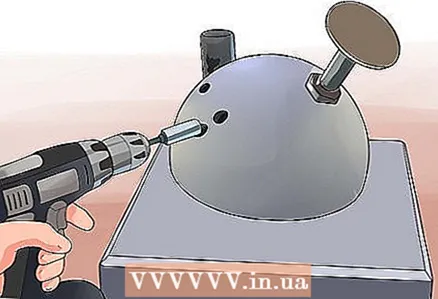 7 Wipe the holes with sandpaper. After drilling the holes, wipe the inner surfaces of them with sandpaper, making sure that your fingers sink comfortably in and out of them.
Tips
- A ball with the right holes can bring you victory. Avid bowling players have a range of balls with different hole patterns and choose the one best suited to the conditions of the game.
Warnings
- Do not drill a bowling ball without first familiarizing yourself with the safety rules for working with electrical appliances and the drill in particular. Bowling balls are usually drilled by professionals.
- Improper drilling of holes or the use of unsuitable tools can void the ball's warranty and even completely ruin the ball. Keep this in mind when drilling holes.


