Author:
Marcus Baldwin
Date Of Creation:
16 June 2021
Update Date:
24 June 2024
Content
1 Heat milk, sugar and salt in a medium saucepan. On a cutting board, using a paring knife, carefully scrape off the beans from the vanilla pod. Add these seeds to milk along with the peeled pod. Remove the pan from heat, cover and leave the mixture for at least an hour.- You can tell the quality of a vanilla bean simply by smelling it. You should be able to smell the vanilla. Be careful: the fullness of the vanilla pod does not mean that the pod is more flavorful. It just might mean it has a high moisture content.
- If the pod smells of smoke, it means that the pod was not dried properly, most likely it was quickly cooked over a fire. In this case, the vanilla is most likely not of high quality.
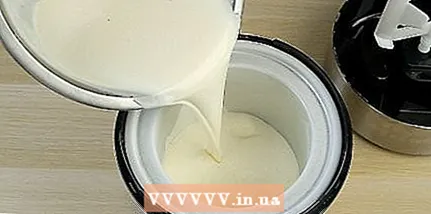
 2 Cool the cream. You need to chill the heavy cream in an ice bath. You can make an ice bath by filling a large bowl halfway with ice water. Place the smaller bowl in the larger one, then pour the cream into the smaller bowl. Leave the cream in a bowl until chilled. 3 Make a cream. In a large, clean bowl, beat the egg yolks until combined. Take the vanilla-infused milk and reheat it again. Once it has warmed up, gradually pour the milk into a bowl of egg yolks. Stir constantly. When the milk is completely mixed with the yolks, pour the mixture back into the saucepan.
 - Place the saucepan over low heat and stir the cream constantly. Be sure to use a spoon or spatula across the bottom of the pot to prevent the mixture from sticking. When the cream covers the back of the spoon or spatula with a thin layer, it is ready.
- If you want to make the cream thicker, you can add more egg yolks. Maximum, you can add three yolks.
4 Mix the cream with heavy cream. Pour the cream mixture through a strainer into the cream in an ice bath. Remove the strainer and stir the mixture thoroughly. When the mixture is completely cooled, add the vanilla essence, cover the bowl and refrigerate. Leave it on for a few hours or, if possible, overnight. - There are three main types of vanilla essence: bourbon, Tahitian and Mexican. Each type of essence has a slightly different smell. Vanilla essence of bourbon from Madagascar and it has a strong, pronounced aroma. Tahitian essence is vegetable. At the same time, the real Mexican essence has a creamy taste and a strong aroma.
- Always use alcohol-based vanilla essence. Alcohol, even if it burns out during preparation, enhances the flavor of the vanilla essence.
- For a lighter cream, you can substitute a mixture of milk and cream for the heavy cream. Just pay attention to the fact that your ice cream will be softer as a result.
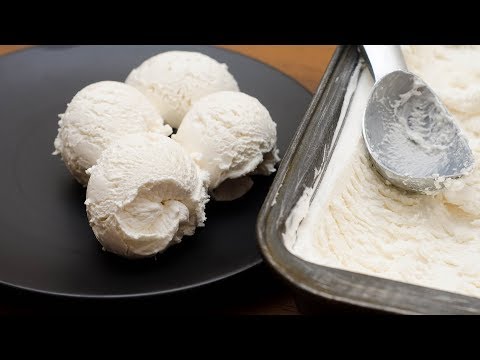
 5 Take the ice cream out of the refrigerator. Remove the vanilla peas and transfer your mixture to an ice cream maker. From now on, you can follow the manufacturer's instructions to figure out how to freeze the resulting ice cream specifically with your machine. 6 Serve or save your ice cream. Serve homemade vanilla ice cream straight from the ice cream maker, or store it in an airtight container in the freezer for a firmer ice cream.
 - Vanilla ice cream pairs perfectly with homemade fruit tart or warm chocolate cake.
- It can also be served on its own as a delicious dessert, sprinkled with chocolate, caramel or chopped nuts.
Method 2 of 2: Without using an ice cream maker
- 1 Prepare your ice cream mix. Heat milk, sugar and salt in a medium saucepan.On a cutting board, using a paring knife, carefully scrape off the beans from the vanilla pod. Add these seeds to milk along with the peeled pod. Remove the pan from heat, cover and leave for at least an hour.
- Then you need to cool the cream in an ice bath. You can make an ice bath by half filling a large bowl with ice water. Place the smaller bowl in the larger one, and then pour the cream into the smaller bowl. Leave the cream in a bowl until chilled.
- In a large, clean bowl, beat the egg yolks until combined. Take the vanilla-infused milk and reheat it again. When it warms up, gradually pour the milk into the bowl of egg yolks, adding a little milk and stirring constantly. When the milk is completely mixed with the yolks, pour the mixture back into the saucepan.
- Place the saucepan over low heat and stir the cream constantly. Be sure to use a spoon or spatula across the bottom of the pot to prevent the mixture from sticking. When the cream starts to cover the back of the spoon or spatula with a thin layer, it will mean that it is ready. Add the cream to the cream and then pour the vanilla essence into it.
- Place the prepared mixture in an airtight container and refrigerate until completely cooled, ideally overnight.
- 2 Take the ice cream mixture out of the refrigerator. Stir the mixture vigorously with a silicone spatula. Transfer the ice cream to a cold-resistant bowl or container (if not already there). Cover tightly with plastic wrap or an airtight lid and place in the freezer.
 3 After the mixture has been in the freezer for 45 minutes, test it. When the sides of the mixture begin to freeze, remove the mixture from the freezer and mix well with a mixer. Make sure you break all the ice pieces, as this will give your ice cream a tenderness. Cover and place in the freezer again for two or three hours, stirring every 30 minutes until the mixture is frozen.
 - You can also use a spatula, whisk, or hand blender to stir the ice cream. However, using these devices will require a lot of physical exertion from you. Using a mixer is the best solution for making soft and soft ice cream.
- If you don't have an ice cream maker, stirring the ice cream while freezing is critical to making it properly. If you just leave the ice cream mixture in the freezer until freezing, you will end up with a hard chunk of frozen lumpy dairy product that will be difficult to remove from the dishes.
- Stirring the ice cream while it freezes prevents ice crystals from forming and results in a soft, creamy ice cream.
- 4 After two hours, remove the ice cream from the freezer and beat again with a mixer. The mixture should be thick, but still too soft to clump. It should be almost like soft ice cream.
- If the ice cream is not thick enough, put it back in the freezer to freeze it again before stirring it again.
- If the ice cream has thickened enough, you can stir it and add additional ingredients at this stage, such as pieces of chocolate or biscuits.
- 5 Place the mixture in a plastic, airtight container. Leave at least an inch of free space under the lid. Cover with plastic wrap and place in the freezer. Let the ice cream freeze until it is firm.
- Serve vanilla ice cream on its own or with warm fruit tart or chocolate cake.
Tips
- Remember, the higher the fat percentage of your ice cream, the more creamy it will be, regardless of the method of whipping. Use heavy cream instead of a mixture of cream and milk for the most creamy ice cream.
- You can reuse vanilla beans by washing and drying them after use.Then place them in a jar of sugar or jam for a nice, light vanilla flavor.
- If you plan on making homemade ice cream regularly, consider buying an ice cream maker. It will allow you to make more delicate, creamy ice cream than can be made by hand. By the way, ice cream makers can be relatively inexpensive.
Warnings
- If you are using Mexican vanilla essence, beware of the cheapest options, which can usually contain a toxic ingredient called coumarin. This ingredient is banned for use in many countries. Use the more expensive Mexican vanilla essences, which guarantee higher quality.
What do you need
- Ice cream maker (optional)
- Large saucepan
- Vegetable peeling knife
- Small, medium, large bowl
- Ice
- Silicone spatula
- Sealed container
- Hand mixer, whisk or hand blender
- Safe freezer dish or container


