Author:
Ellen Moore
Date Of Creation:
16 January 2021
Update Date:
1 July 2024

Content
- Steps
- Part 1 of 3: Preliminary Steps
- Part 2 of 3: Wall with Timber Frame
- Part 3 of 3: Wall without timber frame
- What do you need
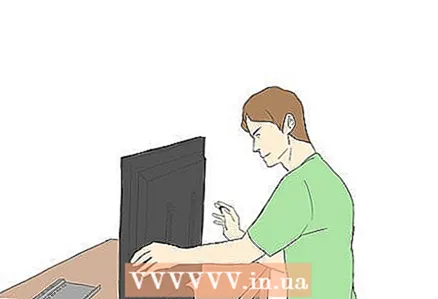
If you recently bought a flat-screen TV, then you probably can't wait to watch a football match or a new romantic comedy on it. While some people prefer to place flat-panel TVs on special stands, you can hang them on the wall. It is recommended that you follow the advice of the TV manufacturer (as sometimes people get injured when improperly hung TVs fall), and this article provides an overview of the process along with some helpful tips.
Steps
Part 1 of 3: Preliminary Steps
 1 Check the contents of the box against the list in the instructions for the TV and carefully examine each component for defects. Some brackets may be bent, holes are not punched (or partially punched), and there may be other defects that you will only find when you pick up the component.
 - Sometimes the wall mount comes with the wrong size bolts / screws. Therefore, be prepared for the fact that you will have to replace some parts with parts of a larger / smaller diameter or larger / smaller length.
 2 Assemble the bracket before drilling holes for it. Screw the fasteners to the back of the TV. Follow the instructions during assembly and make changes if necessary.
  3 Consider a wall mounting location that best suits your needs. Do not limit your imagination to the current setting in the room - you may want to change it. Check with your family members.
  4 Think about the required cables - power and video. You can also connect other devices to the TV, for example, a computer, game console, DVD player. Also, think about the devices you will want to connect to your TV in the future. Your family will love it when you connect a surround sound speaker to your TV.
 - You can hide cables directly in the wall or use special plastic boxes.
- Sketch your home theater plan on paper and think about what you will do in case something goes wrong. You will need stands, or shelves, or nightstands for your connected devices, and possibly storage for your CD / DVDs. Share the plan with your family members.
 5 Determine the construction of the wall. While the walls may look the same, they are actually built with different materials (and different methods). It is possible that your wall includes a wooden frame (a lattice of wooden vertical bars and horizontal posts). You need to check what your wall is made of in order to properly hang your TV on it. If the wall includes a timber frame, skip to the next section. If there is no timber frame in the wall, skip to the third section.
Part 2 of 3: Wall with Timber Frame
 1 Find a wooden frame in the wall using the discontinuity detector. Some detectors find the edges of the frame, others find the middle. It is important to know what type of detector you have.
 - Some walls include a metal frame. To test which frame your wall includes (metal or wood), drill a small hole in an inconspicuous spot on the wall.
 2 Using a jitter detector, make sure the frame is aligned so that you can attach the TV bracket to it. You need to find two vertical posts or two horizontal bars that are close enough to each other.
 - Once you find these bars / posts, double-check them (are they wooden?) Using a hammer and a small nail.
- Mark the bars / posts by drawing corresponding lines directly on the wall.
 3 Screw the fasteners to the back of the TV. Before drilling holes in the wall, make sure the TV mounts fit the bracket (all wall mounts come with TV mounts).
 - Start by placing the TV screen-side down on a soft surface such as a blanket or pillow.
- On the back of the TV, you will see three or four threaded holes.
- Put the fasteners on the holes found and screw the bolts into them (the fasteners should be parallel to each other).
- Fasten the bolts with a screwdriver.
 4 Measure the wall and determine where you want to hang the TV. Choose a suitable spot and mark it around the corners of the TV (ask someone to hold the TV against the wall, and then step away from it and check if the TV is positioned correctly). Next, mark on the wall where the bracket is attached, using a tape measure, measuring the distance from the edge of the TV to its fasteners.
 - Make sure that the places (holes) of the bracket attachment line up with the lines that mark the location of the bars / posts.
 5 Now drill the upper holes in the wall to attach the bracket to. After you have drilled the first hole, use a spirit level to make sure that the second hole is aligned with the first hole. Mark the second hole, then check the mark again with a spirit level.
 - If you don't want your TV to hang crooked, be sure to use a building level.
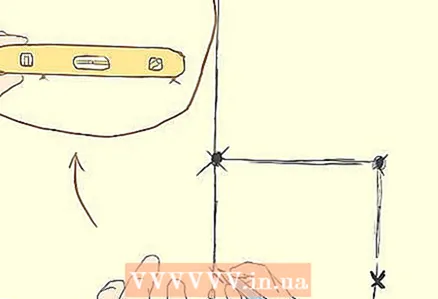 6 Drill the bottom holes in the wall to attach the bracket to. The bottom holes should be located directly below the top two holes (on the corresponding vertical lines). Mark the bottom holes, and then check for correct markings with a builder's spirit (the bottom holes should also be on the same horizontal line).
  7 Attach the bracket to the wall using the drilled holes. The TV will hang from the bracket, so make sure it is firmly (and not crooked) attached to the wall.
 - If you apply force when driving the screws into the wall, then everything is in order - you have hit a wooden frame. If the screw is screwed in very easily, then you have not hit the wooden post / block; in this case, drill a hole elsewhere. It is very important to securely attach the bracket as it has to support the significant weight of the TV.
 8 Place the TV on the bracket. The tops of the fasteners you attached to the TV are hooks. Use these hooks to secure the TV to the bracket.
 - At the bottom of the fasteners there are two bolts, tightening which you will fix the TV on the bracket.
 9 Double check your work. Move away from the wall and make sure the TV hangs evenly, then check that all screws and bolts are tight. If the TV looks like it is hanging crooked, check its horizontal alignment with a builder's spirit level. If the building level shows that the TV hangs evenly, find out which horizontal line in the room makes you feel that the TV hangs crookedly. You can outweigh the TV by adjusting for what you see and what the building level shows. Remember that it doesn't really matter what the building level shows, but how your eyes perceive it.
Part 3 of 3: Wall without timber frame
 1 Screw the fasteners to the back of the TV. Before drilling holes in the wall, make sure the TV mounts fit the bracket (all wall mounts come with TV mounts).
 - Start by placing the TV screen-side down on a soft surface such as a blanket or pillow.
- On the back of the TV, you will see three or four threaded holes.
- Put the fasteners on the holes found and screw the bolts into them (the fasteners should be parallel to each other).
- Fasten the bolts with a screwdriver.
 2 Measure the wall and determine where you want to hang the TV. Choose a suitable place and mark it at the corners of the TV. Next, mark on the wall where the bracket is attached, using a tape measure, measuring the distance from the edge of the TV to its fasteners.
  3 Attach the mount (bracket) to the wall. Using a pencil, mark the future holes. Remove the mount - marks for future holes should remain on the wall.
  4 Now drill the upper holes in the wall to attach the bracket to. After you have drilled the first hole, use a spirit level to make sure that the second hole is aligned with the first hole. Mark the second hole, then check the mark again with a spirit level.
 - If you don't want your TV to hang crooked, be sure to use a building level.
 5 Drill the bottom holes in the wall to attach the bracket to. The bottom holes should be located directly below the top two holes (on the corresponding vertical lines). Mark the bottom holes, and then check for correct markings with a builder's spirit (the bottom holes should also be on the same horizontal line).
 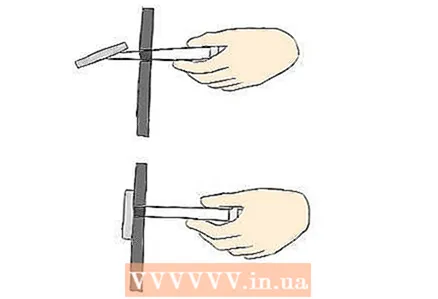 6 Insert dowels into the drilled holes. The size of the dowel must match the size of the hole and screw. Insert the dowel parallel to the floor and press until it goes into the hole (the dowel should go into the hole with some effort). It is very important not to bend the dowels when inserting them into the drilled holes.
 - Make sure you insert wall plugs into all (four) drilled holes.
 7 Drive in the dowels with a hammer until they stop. (Depending on the design, some dowels need to be screwed in, not hammered in.) Take your time; avoid powerful blows so as not to "crush" the dowel. For reliability, the dowel can be greased with glue (for example, PVA) before being inserted into the hole, or the hole can be filled with quick-setting cement mortar or plaster of paris.
 - Now you need to cut off a piece of the dowel that remains outside (protrudes from the wall).
- To check the correct insertion of the dowels and their reliability by hand, screw them into the screw (to a shallow depth) and make sure that the dowel sits firmly in the wall (and does not "dangle" in it).
 8 After you have aligned the dowels with the wall surface and checked their reliability, attach the bracket to the wall by inserting a screw into each dowel and tightening them to the limit.
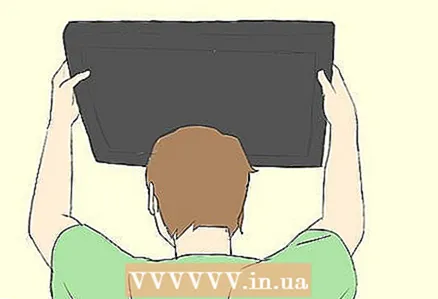 9 Place the TV on the bracket. The tops of the fasteners you attached to the TV are hooks. Use these hooks to secure the TV to the bracket.
  10 Double check your work. Move away from the wall and make sure the TV hangs evenly, then check that all screws and bolts are tight. If the TV looks like it is hanging crooked, check its horizontal alignment with a builder's spirit level. If the building level shows that the TV hangs evenly, find out which horizontal line in the room makes you feel that the TV hangs crookedly. You can outweigh the TV by adjusting for what you see and what the building level shows. Remember that it doesn't really matter what the building level shows, but how your eyes perceive it.
What do you need
- Fasteners
- Drill
- Screwdriver
- Discontinuity detector
- Dowels and screws
- Building level
- Roulette
- A hammer


