Author:
William Ramirez
Date Of Creation:
22 September 2021
Update Date:
1 July 2024
Content
- Steps
- Part 1 of 2: Choosing a location
- Part 2 of 2: Marking the Wall and Securing the Target
- Tips
- Warnings
- What do you need
Darts is a popular sports game and an interesting hobby for many people around the world. At the same time, in order to organize the place for the game in any suitable place, you should remember just a few important points. Although there are different types of darts targets, to create the conditions for the game, first of all, you need to make sure that you have enough space for it, protect the walls and floors, and also accurately mark and recheck the point for secure attachment of the target and the location of the throw line.
Steps
Part 1 of 2: Choosing a location
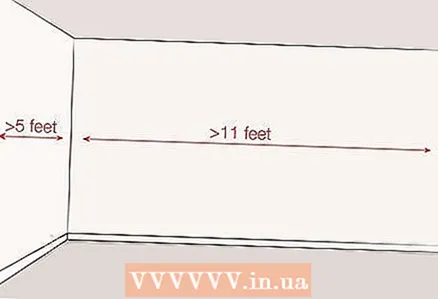 1 Evaluate the space you intend to play in to make sure it is open enough. Find an open space that is not cluttered by furniture or other obstructions. Roughly, you will need an area about 1.5 m wide and 3.5 m long. In this area, you should not be disturbed by furniture or other objects. Try to keep this space completely clear so that you can easily pick up the darts after throwing.
 - Remember that you will also need space for game watchers and other players. A place for a scoreboard should be left near the target so that it can be seen by all those who follow the game.
 2 Prepare the floor covering. Since it all depends on your budget, you may not be able to create custom dart floors. Keep in mind, however, that some materials can damage the darts, while others will wear out quickly from frequent play. It is best to use a dedicated dart carpet that is used to cover the floor to protect it while also marking the distance from the target to the line of throw.
 - Remember that dart tips break easily and become blunt on concrete, stone and tiles.
- Wooden floors are easily damaged by darts, especially in the area closest to the target.
- Darts also leave a lot of holes in linoleum and vinyl flooring.
- Regular carpets are easy to wear and tear in an area where people often walk from the line of the throw to the target and back.
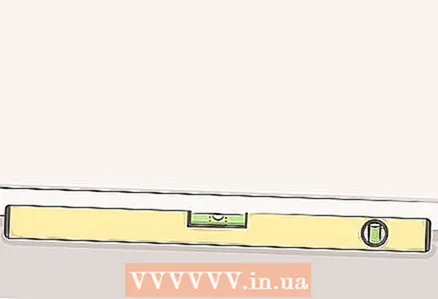 3 Make sure the floors are level. You may not have checked the floors when you checked into your home, so it should be done now.In some cases, the floors may have a slight slope or some unevenness that has developed over time. If you decide to use the carpet for playing darts, you can smooth out any unevenness underneath with cardboard or additional pieces of carpet.
 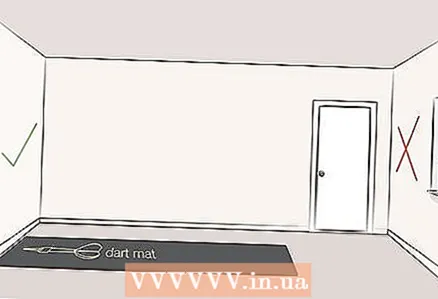 4 Strategically position the target so that both players and spectators remain in a safe area. Place the target in a safe, isolated location. It should be located away from doorways, busy areas where people often walk, and brittle objects. You cannot create a risk of injury for people passing by, and also constantly have to interrupt the game due to the fact that people are physically unable to bypass the playing area in another way. If there are any brittle or valuable objects nearby that could be damaged during the game, think again about where it would be more appropriate to place the target.
 - The flight of darts can be unpredictable, and darts can ricochet in any direction, so do not position the dart near windows or where random unsuspecting passers-by may get hurt.
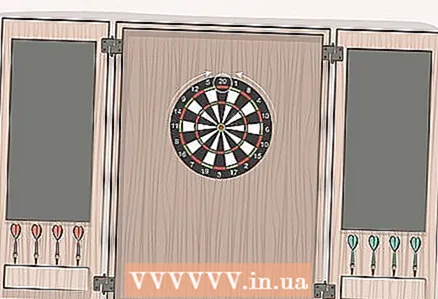
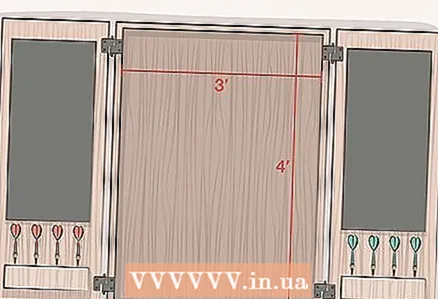 5 Protect the walls. Depending on the experience of the players, darts may not always hit the target. Use protective panels to keep walls and surroundings safe. If time permits and the means at your disposal, you can surround the target with a protective covering or cabinet.
 - Beginners tend to miss below the target, so it is wise to create a protective wall covering 0.9m wide by 1.2m high and fix the target centered at the top of the target.
- If you don’t have the time or funds to fully cover the playing area with protective panels, you can simply clip a piece of regular foam, plywood or cork board behind the target.
- Full-fledged dart cabinets, as well as special protective materials, can usually be found in specialized sports stores.
Part 2 of 2: Marking the Wall and Securing the Target
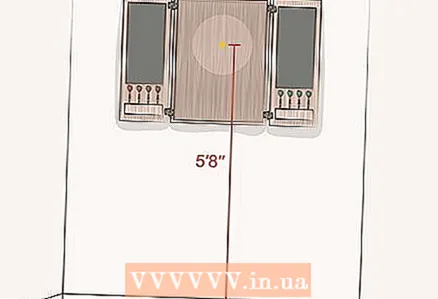 1 Measure the target's bullseye and mark the wall. Official rules dictate that the center of the target's bullseye is exactly 173cm from the floor. Quality targets are suspended from the center, while others can be mounted at the top. If your target has a top mount, measure the distance from the mounting hole to the center of the target and add it to 173 cm to know exactly where to hang the target.
 - If your target is already attached to the protective board or cabinet, measure the vertical distance from the center point of the bull's-eye to the top mounting holes of the board (cabinet) and add 173 cm to it. The target itself should be located in the middle of the protective board or cabinet.
 2 Center the mounting disc on the back of the target. With the back of the target facing you and place the mounting disc in the center of the target. Screw the screw into the center hole of the disc, and then screw the screws into the three remaining holes. In most cases, there are three additional holes on the mounting disc to securely attach this part to the target. In a simplified version of fastening, a screw is simply screwed into the center of the target, and three support brackets are fixed around the perimeter so that the target does not swing on the wall.
 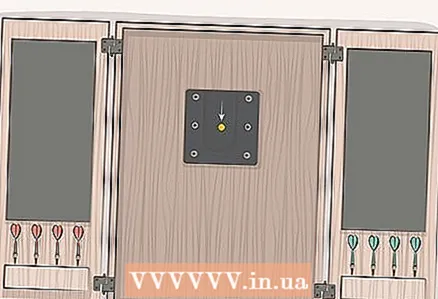 3 Attach the mounting disc bracket to the wall. Remember that you must position the bracket so that the center of the hanging target is exactly 173 cm above the floor. The bracket should have a U-shaped notch on top for the mounting disc (or screw) located on the target itself. Align the center hole of the bracket with the wall mark for the center of the target and screw in the screw. You will remove this screw later, as it is only needed to level the rest of the bracket's mounting holes.
 - Level the bracket and secure it to the wall with four screws, then remove the screw from the center hole in the bracket.
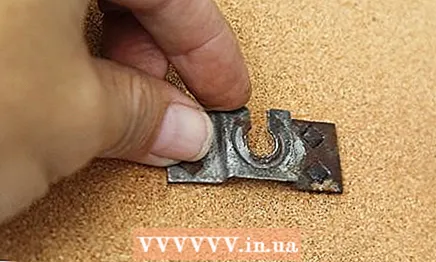
- Level the bracket and secure it to the wall with four screws, then remove the screw from the center hole in the bracket.
 4 Slide the target mounting disc into the bracket by lifting the target a little higher. When placing the target on the bracket, align its position so that the 20-point sector is located at the top. Make sure the target mounting disc fits correctly into the wall bracket.
 - When you align the target correctly by attaching it to the wall-mounted bracket, all you have to do is lower the target so that the mounting disc (or screw) locks into the recess in the bracket.
- Please note that the target should hang flush with the wall without any tilt, as paintings usually hang.
 5 Prepare your shooting area. You should prepare a dart-throwing area that is 0.9m wide and 2.37m long for standard targets and 2.44m for electronic targets. You can mark the line of the throw with a tape, a wooden or metal strip, or buy a special floor sticker.
 - Make sure the line of throw is parallel to the plane of the target. To do this, measure the distance from both ends of the line of throw to the center of the target's bullseye (it must be the same), and also make sure that the perpendicular length from the line of throw to the outside plane of the target is the correct distance.
Tips
- The horizontal perpendicular from the outer plane of the target to the line of throw should be 2.37m (if you want to measure the oblique perpendicular from the center of the target's bullseye to the line of throw, it should be 2.93m).
- If you are just starting out with darts, buy yourself a variety of darts (of different weights) to see which ones are more comfortable for you to work with.
- Remember that the target should hang so that the center of its apple is located at a height of 173 cm.
- If you are using an electronic dart target, the distance from the outside of the target to the line of throw should be 2.44 m (horizontal) or 2.97 m diagonally from the center of the bullseye.
Warnings
- Do not hang darts on the door, as a suddenly open door can not only interfere with the game, but also cause serious injury to unsuspecting visitors and passers-by.
What do you need
- Dart target
- Dart
- Cork board
- Nails, screws, fasteners


