Author:
Sara Rhodes
Date Of Creation:
12 February 2021
Update Date:
1 July 2024

Content
- Steps
- Method 1 of 3: Tape attachment
- Method 2 of 3: Hinge attachment
- Method 3 of 3: Attaching with Grip Rails
- Tips
- Warnings
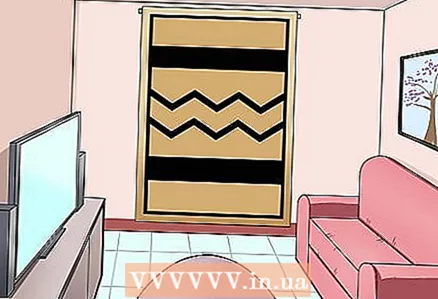
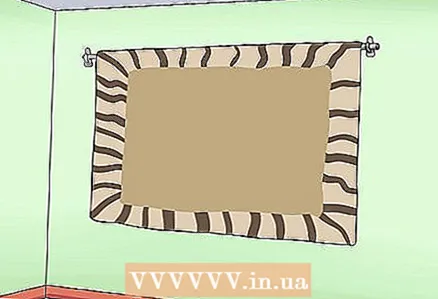
Decorative rugs are a great addition to any decor. Carpets can be used in many ways, and you don't have to lay them on the floor. A wall-mounted rug can be the centerpiece of a room and add a touch of charm to it.
Steps
Method 1 of 3: Tape attachment
 1 Decide which side is at the top and which is at the bottom. Regardless of how you hang the carpet, it is important to understand which side to turn it up and down. Sometimes the pattern is such that it doesn't matter, but other times the location is very important.
 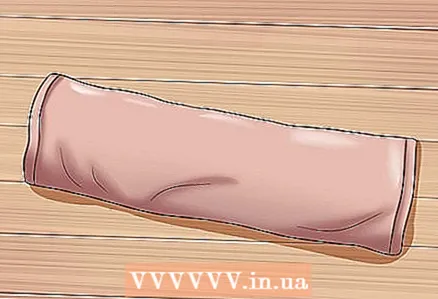 2 Prepare the rug for sewing tape from the back. The tape is a long, thin piece of fabric that holds the bar that hangs the carpet on the wall. Use a thick fabric: durable cotton, linen, twill.
 - This method of fastening allows you to evenly distribute the weight of the carpet and securely fix the carpet to the wall. It is best to hang heavy carpets this way, but this method is also suitable for smaller and lighter carpets.
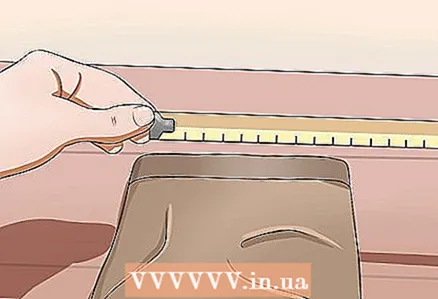 3 Measure the fabric by placing it against the back of the rug. The tape should stretch almost the entire length of the rug. Leave enough space around the edges of the carpet for the plank.
 - How much space to leave will depend on the size of the carpet. Leave at least 2.5–5 cm.
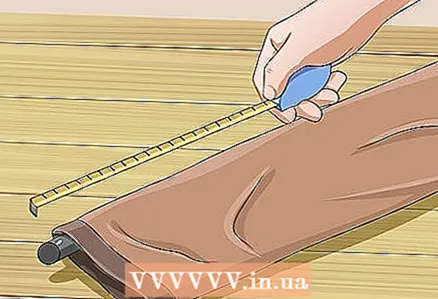 4 Measure the width of the fabric by placing it against a piece of wood or metal. Place the placket along the back of the rug, cover it with tape on top, and adjust the width. Mark stitching lines on each side of the tape with pins or a pen.
 - Make sure the bar can slide in and out freely, otherwise you won't be able to fit it into the tape.
- The tape should not be too wide. It should fit snugly around the bar.
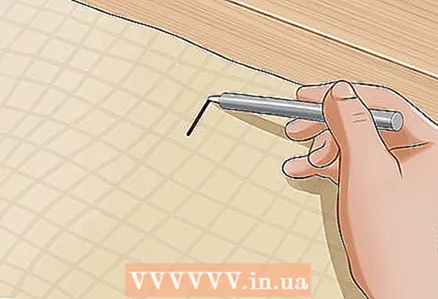
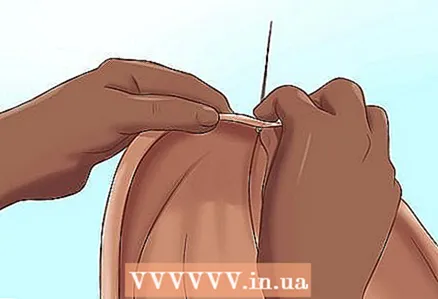 5 Sew the tape to the back of the carpet by hand. Try to grab no more than two rows of threads with each stitch to keep the tape securely on the carpet. The warp threads are stretched vertically, so they are made from a stronger and coarser fiber than the transverse ones. The warp threads are always taut in an upright position.
 - Sew on the tape with a sturdy cotton thread used to cut the button holes.
- Try to sew the tape straight. Small deviations from the horizontal line will not ruin the whole work, but if there are several curved sides, the carpet will hang unevenly. It can also damage the carpet fabric.
- You can sew one ribbon along the top of the entire rug, or sew several shorter ribbons one after the other (in this case, you should try to make them lie flat and close to each other).
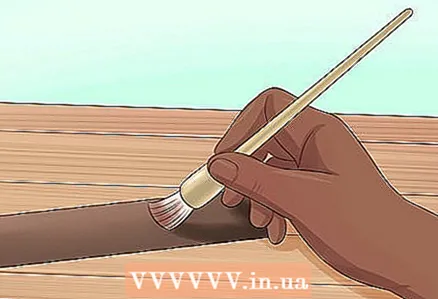 6 Paint the bar. Before you insert the strip into the sewn tape, you should paint it. This will prevent the plank from damaging the tape or carpet with acid and rust.
 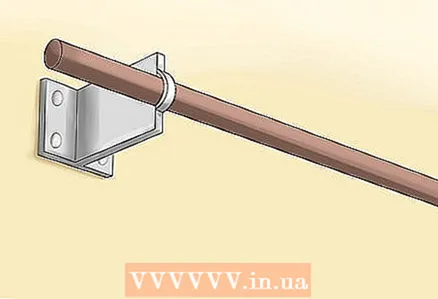 7 Attach the plank mounts to the wall. The strips are usually sold complete with fasteners - dowels and screws. Drill holes in the wall and insert the screws there.
 - Decide where the carpet will hang. Since you will need to drill into the wall, it is important to make sure that you don’t change your mind and do not want to change the place, otherwise you will have to drill extra holes.
- Measure the length of the plank from the back of the carpet. The bar will need to be fastened on both sides.
- Use a centimeter to measure the distance on the wall to match the length of the carpet. Mark the holes. Before drilling the holes, use a spirit level to check that you have drawn the points evenly.
- If you have a heavy carpet, you will need a secure fit. It is best to hang such carpets on load-bearing walls and use more than two brackets. You can determine which wall is the load-bearing wall using the apartment's passport.
 8 Hang up the rug. The rug should hang easily from the hooks and fit neatly onto the wall. If you are hanging the rug on a load-bearing wall, you may need to sew on some tapes to mask the attachment points, as these attachments will not only be around the edges of the plank.
Method 2 of 3: Hinge attachment
 1 Decide which side of the carpet will hang up. The placement of the loops depends on the location of the carpet. Decide which edge of the carpet will be on top.
 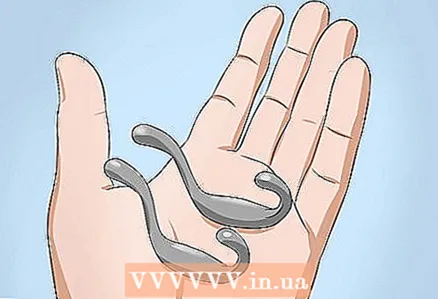 2 Make fabric loops. Use a durable fabric such as sturdy cotton, linen, or fabric with slanted ribs. Cut the fabric into rectangles. The resulting pieces should be two-thirds wider than the bar.
 - To determine the required length of the buttonholes, wrap the fabric around the placket. Press the fabric firmly with your fingers. There should be about 3-5 centimeters between the top of the loop and the place where the bar ends.
- Fold the pieces of fabric vertically three times.
 3 Fold the pieces of fabric in half horizontally and sew the edges. This fabric will become the loops that will slide over the placket, and the placket should fit easily into them. At this point, the loop will sit loosely on the bar.
 - Now that the placket is in the buttonholes, press the fabric firmly against it. Draw a line on the hinges with a pen or marker.
 4 Mark the loop spots at the back of the rug. Loops will need to be sewn at these points. Place them close to each other, otherwise the mount will come out unreliable.
 - Secure the loops with pins so you can sew them to the carpet later.
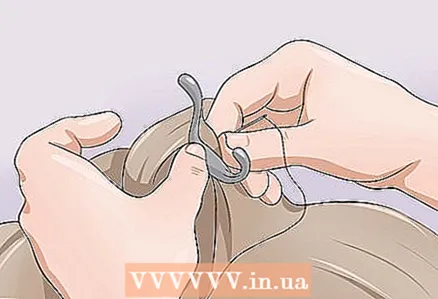 5 Sew on the loops by hand. Be careful not to show the thread on the right side of the carpet.
 - The buttonhole should be towards the top and the sewn edge should be towards the inside of the rug. When the rug is hanging on the wall, the hinges should not bend over.
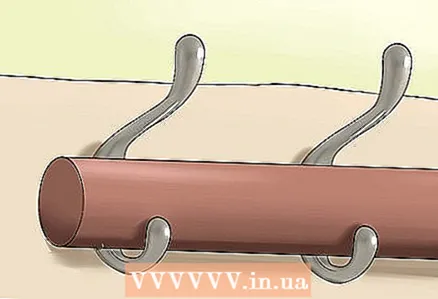 6 Insert the placket into the hinges. Slip the resulting loops onto the bar one by one. The plank should be free to fit into the hinges, although the hinges can fit quite tightly.
 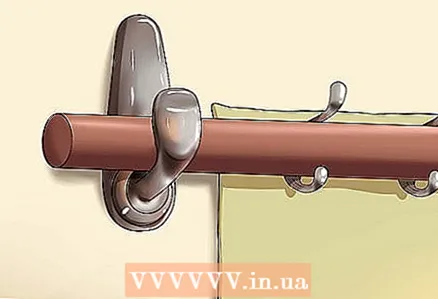 7 Fasten the plank bolts to the wall. Most planks are sold complete with brackets that are fixed to the wall with a few screws. Determine a spot for the carpet on the wall before drilling the walls.
 - Measure the length of the placket on the back of the carpet. The bar must be attached at both ends.
- Mark the mounting locations on the wall. Measure the previously obtained distance with a centimeter and mark it on the wall. Make sure the holes are straight before drilling.
- If the strip is attached with screws, drill holes for them.
 8 Hang up the rug. The bar should fit straight into the mountings.
 - If you want to secure the bottom of the carpet, make loops for the bottom and secure in the same way.

Peter Salerno
Art Fastening Specialist Peter Salerno is the owner of Hook it Up Installation in Chicago, which has been professionally engaged in hanging art and other objects for more than 10 years. He has over 20 years of experience in fixing art and other objects in residential and commercial premises, healthcare facilities and hotels. Peter Salerno
Art fixing specialistGive the carpet time to hang before securing the bottom. Peter Salerno, owner of Hook It Up Installation, says: “If you hang carpet on the wall, it will stretch over time. If you secure the bottom, it will start to bubble and look saggy, but if you leave it loose, there will be room for it to reach. If over time you find that the carpet will no longer stretch, you can use a couple of nails or adhesive strips on the bottom to keep it against the wall. "
Method 3 of 3: Attaching with Grip Rails
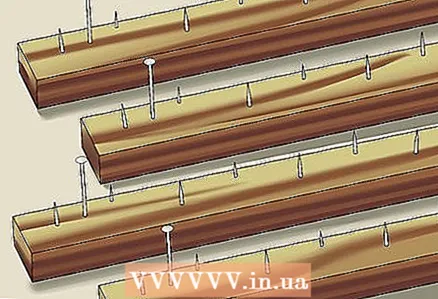 1 Prepare four gripper strips. Each of the slats must match the length of the side of the carpet. Use a centimeter to measure the length of each side, then cut the slats to the desired length using a small saw or wood scissors.
 - Gripper strips are commonly used to secure carpets. They are thin, sharp-edged strips. These slats keep the rug in place.
- Cover the slats with clear varnish or paint and let dry. This will prevent the acid from the wood from damaging the back of the carpet as it hangs on the wall.
- You can buy slats at almost any building materials store.
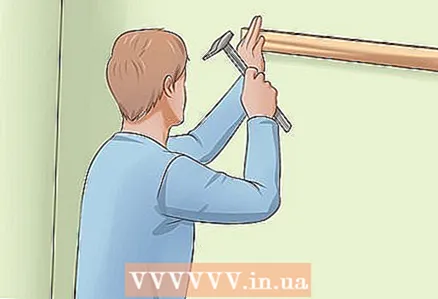 2 Attach the slats to the wall. Using a spirit level, check to see if you are evenly applying the batten, press it against the top of the carpet and hammer in nails if you have a drywall wall, or drill a hole if the wall is concrete. Do this with all staffs, carefully measuring all distances.
 - If you are hanging a heavy carpet, it is best to choose a load-bearing wall. You can find a load-bearing wall according to the scheme in the apartment's passport.
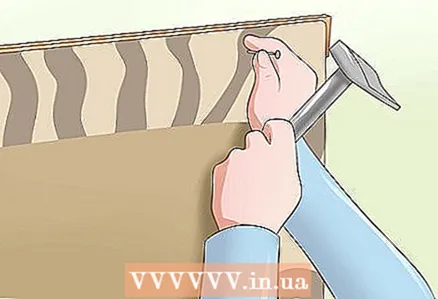 3 Nail the rug to the batten. Place the edge of the carpet on the top strip and press down firmly. Use special nails to nail the edges of the carpet, and then fix the middle with the third nail. Drive a nail into the carpet and batten. Drive nails into all edges, starting at the corners, and nail the bottom plank last.
 - Special carpet nails are functional and beautiful. They allow you to reliably attach the carpet to the rail and often have a very interesting design.
Tips
- Carpet nails should be driven in at a slight angle to hold the carpet more securely. This is especially important if the carpet is heavy.
- Ask someone to help you measure and hang your carpet.
Warnings
- Be careful when handling gripper rails.They only protrude an inch, but you can cut yourself with them.


