Author:
Sara Rhodes
Date Of Creation:
11 February 2021
Update Date:
1 July 2024

Content
- Steps
- Method 1 of 3: Create a Standard Dockable Catapult
- Method 2 of 3: How to make a twisted catapult
- Method 3 of 3: How to Make an Advanced Twisted Catapult
- Tips
- Warnings
Since ancient times, catapults have been used as military weapons for throwing stones and other projectiles in the fortress of enemies. However, today, catapults can mostly be seen in offices where candy is launched or in science classrooms where ping-pong balls are launched. If you want to learn how to make your own catapult, you've come to the right place. This article will teach you how to make three different kinds of standard catapults using inexpensive office supplies and household items.
Steps
Method 1 of 3: Create a Standard Dockable Catapult
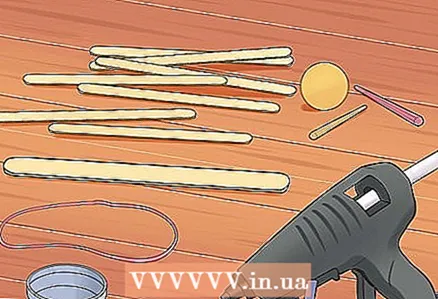
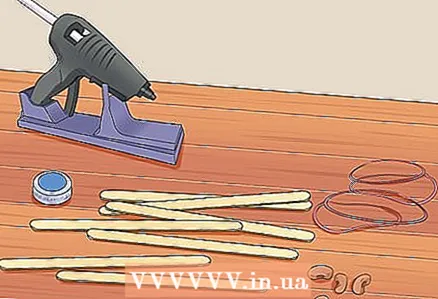 1 Collect your supplies. This standard catapult uses voltage to throw its load and can be made from a couple of simple items that can be purchased from cheap craft stores for $ 5. You may already have a couple of things in your home somewhere!
 - 7 construction sticks. You can use both standard size 4.5 sticks and large size 6 sticks for this project.
- 4-5 elastic bands.
- 1 bottle cap.
- Hot glue gun or glue stick.
- Ammo: small marshmallows, beans, or an eraser are great options!
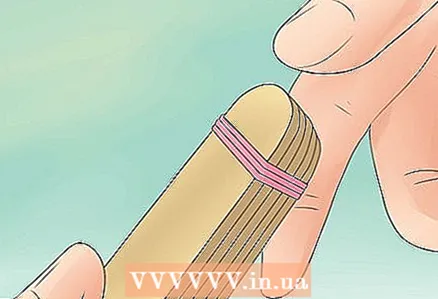
 2 Make 2 piles of sticks. This forms the body of your catapult. Place 5 sticks and secure the pile with an elastic band at both ends. Lay in 2 more and secure at one end only, leaving the other end open.
 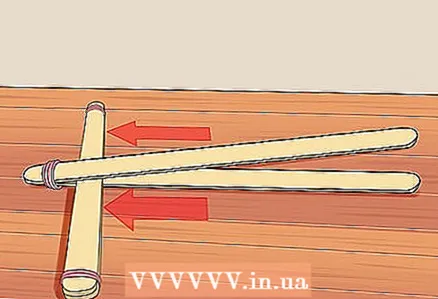 3 Put the two piles together. Place them perpendicular to each other and slide a large pile between two small sticks. Slide it as close as possible to the elastic that holds the sticks. Secure both piles together with a rubber band wrapped around them in a criss-cross shape.
 - Consider adding a second rubber band to make sure the connection is secure.
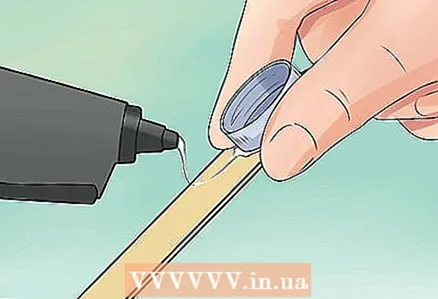
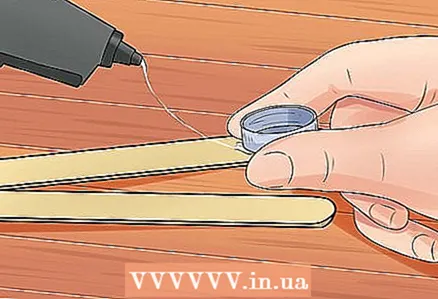 4 Attach the cover to the catapult. Add a little hot glue to the end of the spring arm and press the lid against it, holding it there for a couple of seconds until the glue cools.
 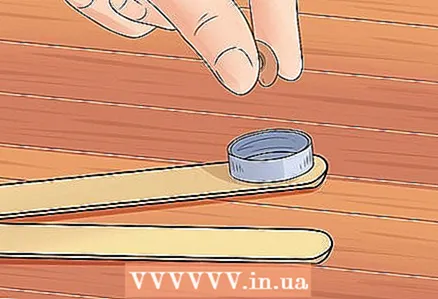 5 Get ready to launch! Load your ammo of choice into the cover. Hold the catapult structure firmly to the table with one hand. Lower the lever with your other hand and release!
Method 2 of 3: How to make a twisted catapult
 1 Collect your supplies. This catapult uses the same basic items as the Method 1 catapult, but uses torsional force to launch the projectile. This catapult is just as quick to build and is a lot of fun shooting with it!
 - 10 standard construction sticks.
- 4-5 elastic bands
- 1 bottle cap
- Hot glue gun or glue stick
- Ammo: Small marshmallows, beans, or an eraser are great options!
 2 Make one pile of sticks. This will make the fulcrum of your catapult. Fold 5 sticks together and secure with elastic bands on both sides.
 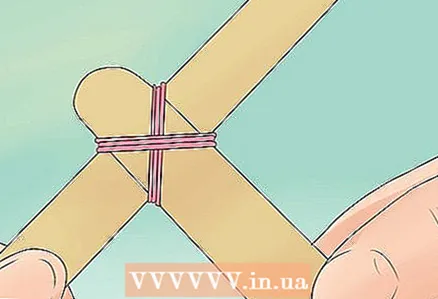 3 Add a throwing lever to the catapult. Align one stick perpendicular to the pile and center it, leaving 1/3 hanging over the pile. Attach the throwing lever to the pile with two cross-to-cross elastic bands.
 - The more secure the mounts, the more your charge will catapult.
 4 Make the base of the catapult. Position the catapult so that the pile of sticks is on the table and the throwing lever is facing up.
 - Make small dabs of hot glue to each end of the pile and attach a stick to each end.
- Add a little more glue to each stick you added and use the extra sticks to join the ends together to create a rectangular base.
 5 Reinforce the throwing arm. This step is optional, but it will give stability and strength to the catapult lever.
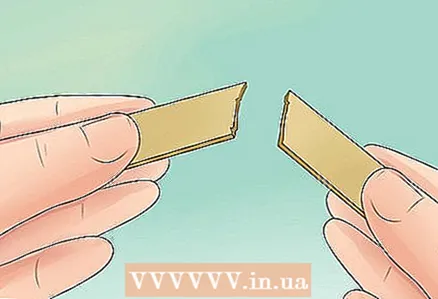
 - Cut or break off a small 2-inch piece of stick.
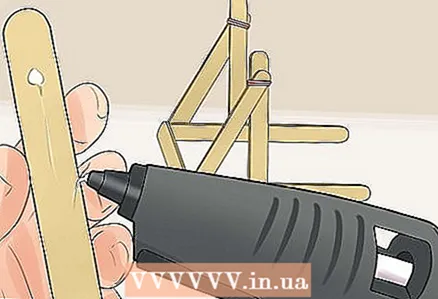
- Spread a little hot glue on the middle of the support beam, which is parallel to the support point, and attach a piece of stick.
- Tie the throwing lever with a rubber band and pull the end from under the base, then secure the broken piece you just made.
 6 Attach the cover to the catapult. Add a little hot glue to the end of the throwing arm and press the lid against it, holding it there for a couple of seconds, until the glue cools.
 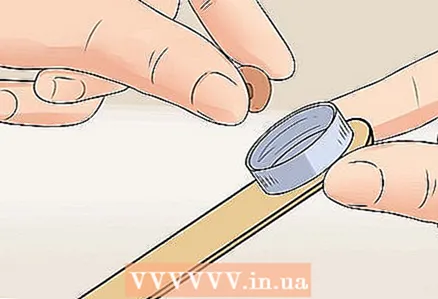 7 Get ready to launch! Load your ammo of choice into the cover. Hold the catapult structure firmly to the table with one hand. Lower the lever with your other hand and release! This catapult must have a greater throwing distance and greater accuracy than the conventional stick catapult in Method 1.
Method 3 of 3: How to Make an Advanced Twisted Catapult
 1 Collect your supplies. The design engineering of this catapult is used to give children engineering skills. You will get a more complex twisted catapult than in the previous methods, but you only need a couple of additional materials.
 - 10 standard construction sticks
- 1 large construction stick
- 1 drinking straw
- Wooden dowel 15 cm long, small enough to fit through a tube
- 1 elastic band
- Glue gun or glue stick
- 1 milk bottle cap or large bottle cap
- Ammunition! Ping pong balls or grapes are great for this project.
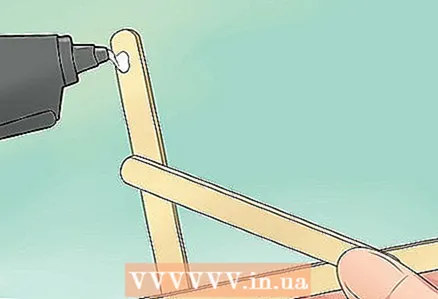 2 Make two catapult stands. This will maintain a fulcrum that will support the throwing arm. Apply a little glue 1/2 of the top of the stick and attach another stick to it at about a 30 degree angle. Make a second stance that will mirror the first.
 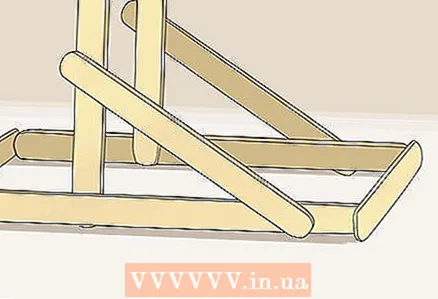 3 Make a base to hold the racks. Place glue on each lower leg of the first post and attach the other connecting them so that the vertical section of the post connects to the end of the base. Repeat the process for the second rack. Then use hot glue to attach an extra stick to the front of each rack.
 - The base should now form a rectangle with one end open and two posts sticking out parallel to each other.
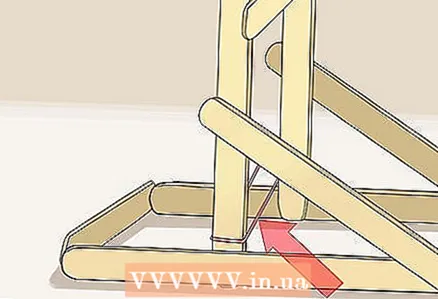 4 Add support to the catapult. Cut a piece from a 5 cm long tube and squeeze a dowel through it. Use hot glue to attach the dowel tightly to the wedge at the top of each post.
 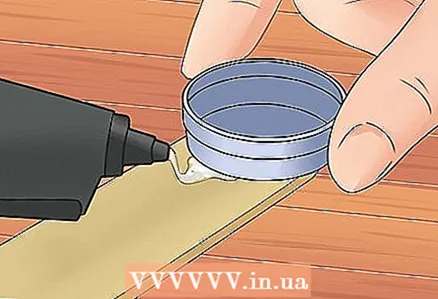 5 Make a throwing lever. First, loop with a rubber band around the stick that connects the two posts. Then glue a large stick to the tube so that half sticks out from under the tube. Finally, attach the other end of the elastic near the bottom of the large stick.
 - The throwing arm should swing freely around the dowel on the tubing, and the elastic will tension the arm as you pull it back.
- To make a strong lever bond, use a pencil or other tool to press the gum firmly into the hot glue and hold it for a couple of seconds until the glue cools. Do not use your fingers, you may burn yourself!
 6 Add the final touches. Your catapult is almost ready, but a couple more steps will make it stronger and easier to use!
 - Attach the milk lid to the free end of the arm with a little glue.
- Attach an additional stick horizontally to connect the sloped sides of the two posts for added stability.
- Add extra sticks to the bottom of the catapult to keep the car stable when firing as needed.
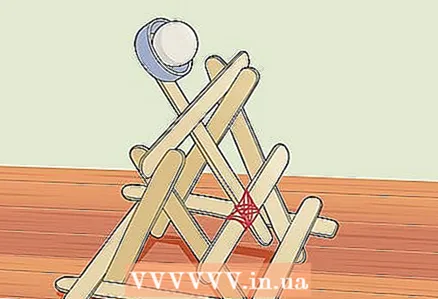 7 Shoot your catapult! Load ping pong balls or grapes into the milk lid. Pull the lever and release!
Tips
- Experiment with different designs for your catapult. Use different configurations of standard and large sticks.
- A plastic spoon can be used in place of the bottle cap for any of these projects to hold the shells.
- If your catapult is not strong enough for you, try using additional rubber bands on the support rod.
- Play games with your catapult! Place cups or paper targets on your table or floor and shoot projectiles at them.
- A catapult building competition can give you hours of inexpensive home fun. Divide the children into building groups and compete to see whose catapult fires next.
Warnings
- Even toy catapults can be dangerous. Never shoot rocks or other sharp objects with your catapult. Never target animals or people.
- Be careful when using glue. Protect all work surfaces and remember, while the glue is liquid, it is hot and can burn you.


