Author:
Eric Farmer
Date Of Creation:
12 March 2021
Update Date:
1 July 2024
Content
- Steps
- Part 1 of 2: Inspecting and Removing Old Knives
- Part 2 of 2: Installing new knives
- Related wikiHows
If you notice that there is uncut grass in places where you have already mowed, it simply means that your lawnmower is not cutting it properly. The blades will wear out over time and need to be replaced periodically to keep your mower running efficiently. You will keep your lawn healthier by mowing less often with a lawnmower with sharp, clean blades. Changing knives is a fairly easy and quick task if done correctly. Start at point 1 for more information.
Steps
Part 1 of 2: Inspecting and Removing Old Knives
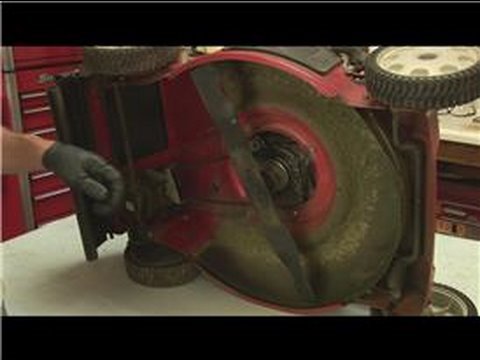
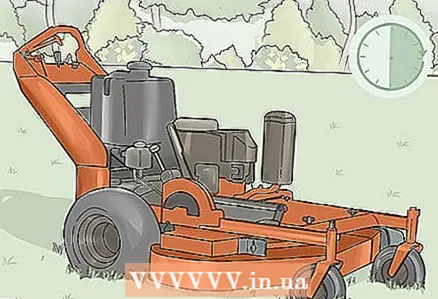
 1 Lift the mower deck to access the knives. It is very important to inspect the carburetor and oil compartment carefully to ensure that you do not spill oil on the engine, grass and yourself when tilting the windrower in this manner. Generally, the safest way is to tilt the mower towards the handle and support it with some weight or have someone else hold it. This does not apply to all mowers, so take a look yourself or check the owner's manual.
 - It is also best to do this when there is no gas in the mower. Wait until you run out of fuel, or drain it using pump hoses. These hoses are usually sold at any hardware or auto store. This will prevent fuel from leaking onto the mower body.
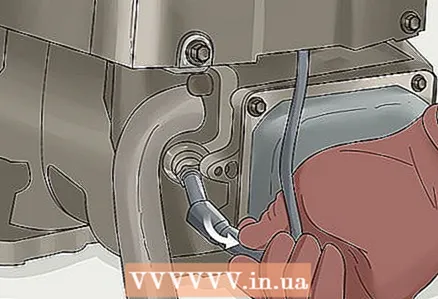 2 Disconnect the spark plug. It is better to stay on the safe side if oil or gasoline from a spark plug suddenly catches fire due to a short circuit or electrical discharge. If you have lifted the mower correctly, this should not be a problem, but it is still best to be on the safe side.
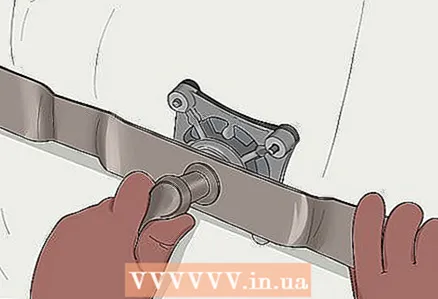
 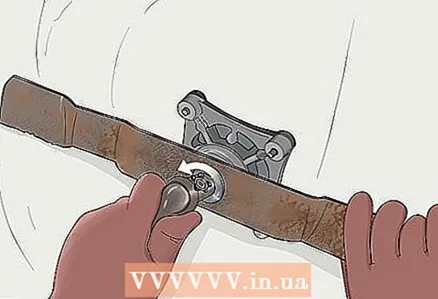 3 Unscrew the knife securing bolt. Use an appropriately sized socket wrench to loosen the bolt while holding the knife with your other hand to prevent it from turning. Be careful not to lose the washers and bolts that used to screw the knife, as you will reuse them.
 - Before removing the knife, pay attention to its position. You will need to install the new knife in the same way. Usually, the sharp edge is pointed and rotated counterclockwise. Again, this may not apply to all types of lawn mowers, so carefully watch how the old knives stood and install new ones accordingly.
Part 2 of 2: Installing new knives
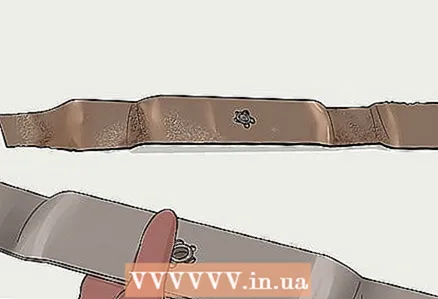 1 Buy spare blades. Replacement knife sets (pre-weighed and with spare nuts) are usually inexpensive and can be purchased at most hardware stores. If your knives are practically worn out, it is not a bad idea to buy such a set.
 - Some mowers have two separate short blades attached to the bottom cover, while newer press mowers have one long blade that resembles a rail. Tilt the mower back to inspect the blades, or talk to a shop assistant about the right blade for your mower. You can also look in the user manual if you have one.
- Also, you can sharpen your old knives if they are in good condition. If old knives are cracked or chipped, buy new ones.
 2 Install the new knife in the appropriate direction. Line up the knives in the same order as they were before and install the washers and bolts (you can use both old and new). If you have an instruction manual, look there for the force with which you need to tighten the nuts. If not, be careful not to overtighten or deform the blade as it can vibrate while the mower is running.
 - Most knives are either specific sizes or universal. Before installing, make sure that the new blade is the same length as the old blade and that the clearance to the mower deck is the same. Tighten the new knives carefully as they are sharper than the old ones.
- It is a great idea to wear thick work gloves for this job to keep your hands safe from injury. It is also advisable to use a piece of wood to wedge the knives as you screw them in. You can insert this block of wood between the knife blade and the mower deck to prevent the knives from spinning.
 3 Check knives for readiness. Make sure they are installed correctly and do not wobble from side to side. Remove jacks or other supports that you used to support the deck and wait 30-60 minutes for the oil to drain into the engine (to avoid damaging it). Check the oil level before starting the engine.
 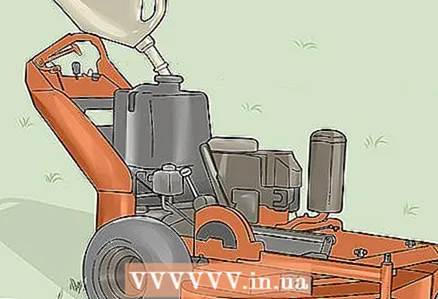 4 Fill the mower tank with fuel and do a preliminary inspection before starting. Check the air filter (so it is free of oil) and connect the spark plug.
 - After a quick inspection, you can start the mower and start mowing more efficiently with new blades.


