Author:
Ellen Moore
Date Of Creation:
11 January 2021
Update Date:
1 July 2024

Content
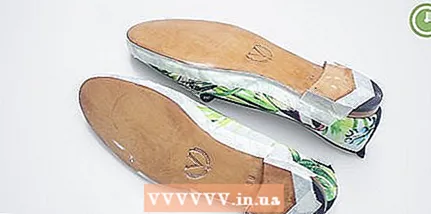
1 Clean your shoes with rubbing alcohol. Take a clean cotton ball and dip it in rubbing alcohol. Use this swab to wipe the surface of the sole and remove any dirt. Thanks to the clean surface, the paint will adhere better to the shoes.- Wait for the rubbing alcohol to dry after wiping; it only takes a few minutes.
 2 If desired, tape the edge of the shoe with tape. Use masking tape to protect other surfaces of the shoe from paint. Apply tape around edges and other surfaces you want to protect from paint.
 - Cut the masking tape into shorter or thinner strips to make it easier for you to attach them to your shoes.
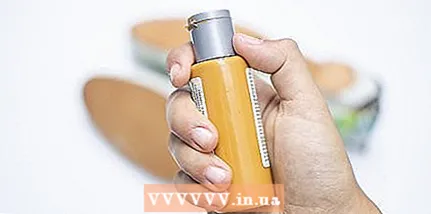
3 Apply primer to the sole as a precaution. This is not necessary, but the primer will give the paint better adhesion to the outsole. You need to use a primer that adheres well to the material of your shoes. For example, if the sole is made of rubber, then you must use a primer designed for rubber materials. You can find it at your local hardware store or online.With a clean brush, apply the primer evenly to each sole. - You can also use white acrylic paint as a primer if desired.
- If you are not sure what the sole material is, then look for the label on the inside or on the sole of the shoe. If it is not possible to find the label like this, then search the Internet for the material of a particular shoe model.
 4 Wait for the primer to dry completely. Read the instructions for the primer to determine the drying time. Start by waiting an hour for the product to dry. But if you are not sure, lightly touch the surface with your finger to check if the primer is dry or not.
 - The primer can be considered completely dry when, after touching it, it leaves no marks on the finger.
Part 2 of 3: Paint application
 1 Choose a paint that matches the material of the sole. Most often, acrylic paint is used for the sole - if at the end you cover it with a fixative varnish, it will last for a long time. There are also paints designed specifically for rubber or leather.
 - PlastiDip Liquid Rubber is the most popular rubber paint available in a variety of colors.
- Angelus paint is popular for working with leather.
- 2 Apply the first coat of paint in even strokes. Use a clean brush to apply paint in even strokes to the sides and bottom of the sole. Work slowly and double-check not to paint in areas where paint should not be, especially if you are not using masking tape.
- To protect surfaces, paint your shoes on a piece of newspaper.
- It's up to you to choose which brush size to use, but pick a small one to paint cleanly and neatly on all the curves of the sole.
 3 Wait at least an hour before painting with a second coat. Let the first coat dry. The drying time depends on the paint used, but the general rule is to wait at least an hour.
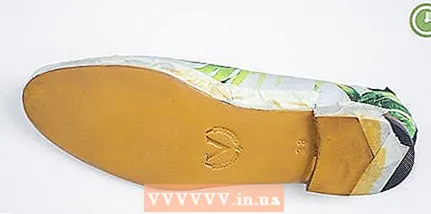
 - 4 Apply additional layers. The sole will need about 2-5 coats of paint, depending on the color and shade you want. Continue to paint evenly and gently and let each new coat dry before moving on to the next.
- If you paint the soles black, you probably only need 1-2 coats of paint.
- If you paint the sole with a lighter or brighter color, such as yellow, pink, or vivid blue, you will need more than two coats of paint.
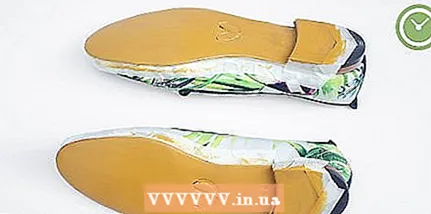 5 Leave the shoes overnight until dry. During this time, the shoes will be able to dry completely. Place the soles of your shoes on the newspaper to help dry them more effectively.
 - Shoes will dry faster if left in a cool place.
Part 3 of 3: Using a fixing varnish
 1 Use a clear fixer on the outsole for extra protection. The fixer varnish will keep the paint from peeling off during wear and will help protect the painted area in general. You can use Mod Podge Adhesive Varnish or any other paint hardener.
 - You can choose between glossy and matte finishes, depending on your preference.
- 2 Apply the first coat of fixer and let dry for 15 minutes. Apply the fixer in a thin, even layer with a clean brush. Since it is transparent and less visible, be sure to cover the entire outsole surface.
- 3 Apply a second coat of fixer if necessary. In this matter, act on your own, but know - two layers of fixer will provide more protection than one. Most importantly, let each new layer dry for 15-20 minutes.
- Feel the varnish with your finger to determine how dry it is. If there is a little bit of varnish on your finger, it means that the product is not dry yet.
- 4 Remove the masking tape when the shoes are dry. When the sole is dry and completely ready, you can remove the masking tape you used. Remove it carefully so as not to damage the paint.
- To ensure the sole is completely dry, leave the fixer to dry overnight.
What do you need
- Rubbing alcohol
- Cotton pads
- Dye
- Brush
- Cup or tray for paint
- Mod Podge Adhesive Varnish / Clear Coating
- Masking tape (optional)
- Primer (optional)
- Newspaper (optional)


