Author:
Virginia Floyd
Date Of Creation:
13 August 2021
Update Date:
1 July 2024
Content
If the rear lights of your car suddenly go out, then do not go to an electrician! If it's just a matter of replacing a light bulb or fuse, then you can do a great job yourself, spending only a fraction of the cost of repairing in the workshop. If you drive around with faulty flashlights, you can run into a fine, so do not postpone the matter indefinitely. Read on to find out how to fix this problem.
Steps
Part 1 of 2: Diagnosing the problem
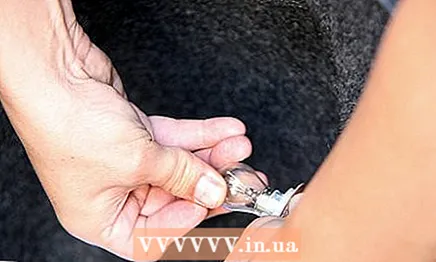
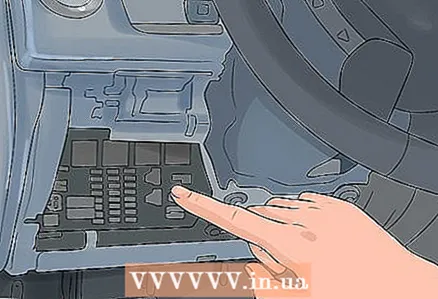 1 Check fuse. A burnt-out fuse is a common reason for both lights to go out. A fuse can fail for a variety of reasons, so you will not only have to check it, but it is worth starting with the fuse itself. Look in your vehicle manual for information on where the fuse box is located. Most often it can be found under the dashboard on the driver's side. The instructions will include a sketch of the box, which marks all the fuses and the purpose of each of them. Turn off the ignition, open the box and find the fuse responsible for the taillights. Shine a flashlight on the insert to see if it is out of order or not.
 - If the metal strip inside the fuse is intact, then it is quite working.
- If the metal strip is bent or broken, the fuse is defective and needs to be replaced. Use tweezers or fingers to pull the fuse out of the slot. Take it with you to the auto shop, pick up a replacement and plug the new fuse back into the empty slot.
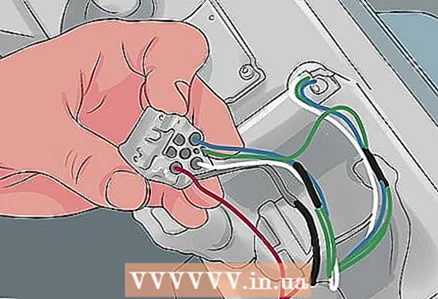 2 Check trailer wiring. This refers to the trailer tail light wires in the boot lid. Open it and inspect the cables. Trace them to the connector where the trailer wiring is connected. If any wire comes off the connector, put it back in place.
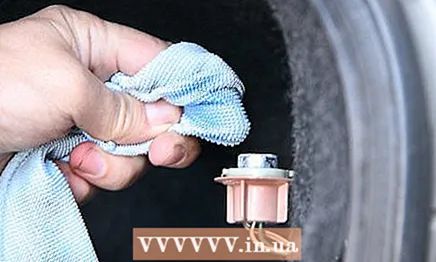
 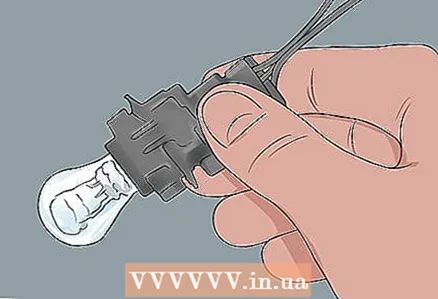 3 Check the rear light bulbs. If the fuses and wiring are in order, then the problem is most likely in the light bulbs. In order to check them, remove the lights by unscrewing the mounting screws from the outside with a screwdriver. Alternatively, the manufacturer sometimes provides access to the rear light bulbs from inside the luggage compartment to facilitate maintenance. Remove the problem bulbs and check them in the same way as any incandescent lamp is checked: inspect the transparent bulb in the light and determine if there is a break in the filament / filaments.
 - If the light bulb burns out, then you need to replace it. Go to a car dealership, show the light bulb to the seller and buy the exact same one, or find a replacement that is suitable for your car.
- If the light bulb is intact, then the problem is hidden somewhere deep in the electrical system of your car. If the fuse, wiring and light bulb are working properly, but there is still no light, then it's time to contact an auto electrician.
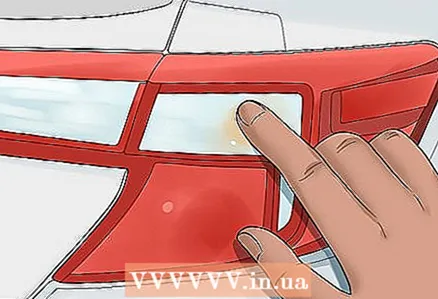 4 Check the rear light lenses. Let's say you've just finished testing a fuse, wiring, and light bulb. Regardless of whether you have managed to solve the problem of the non-working light or not, it still makes a lot of sense to check the lenses of the taillights to make sure that they are intact and free of cracks. If water gets inside the lanterns, the fuse may blow.Read on to find out how to fix cracked or broken rear lamp lenses.
Part 2 of 2: Using the Optical Restoration Kit
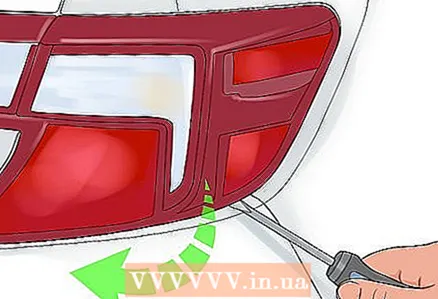 1 Remove the lens from the rear light.
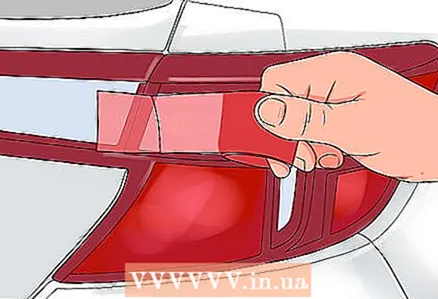 2 Seal the cracks in the lens housing using the special film from the optics restoration kit. This set usually includes red and transparent films; they simply stick to the crack, restoring the lantern to its former tightness.
 - Before applying the film, clean and dry the surface to be repaired to achieve better film adhesion.
- Expel air bubbles from under the pasted film so that the light of the lanterns is not distorted.
- Before applying the film, clean and dry the surface to be repaired to achieve better film adhesion.
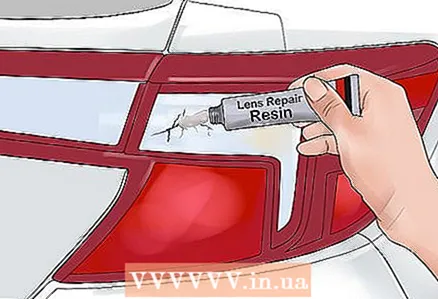 3 Seal holes and large fractures in the lens housing with rubber sealant. If you find notches or through holes on the surface of the lens, then try filling them with a special rubber sealant. When you buy a kit for the restoration of optics, then pay attention to the presence of sealant for the repair of holes in this kit.
 - Cover the hole on the outside of the lens with the film from the kit; this must be done so that the sealant does not come out.
- Prepare the sealant according to the instructions in the kit, mixing the required amount of rubber base, catalyst and colorant.
- Draw sealant into the syringe from the kit.
- Squeeze the required amount of rubber compound into the hole; make sure the sealant has filled all the required volume.
- Let the mixture harden; it will take at least two hours.
- Remove the film and sand the surface to make it smooth.
- If you do not have the opportunity to purchase a kit for the restoration of optics, then use any similar epoxy quick-drying sealant and add the appropriate dye taken from a permanent marker to it.
Tips
- You have learned, among other things, how damaged rear lamp lenses change. This is a very simple job; its course is fully described above. Now, when it becomes necessary to replace the lenses, you do not have to go to the workshop and pay for expensive repairs.
- Rear lights are one of the key elements of your road safety. They allow you to give signals to the drivers following you, because each press of the brake pedal and / or turning on the turn signals is accompanied by flashes of the rear lights.
- That is why police officers react so severely to faulty taillights. Having noticed a car with inoperative light signals, they, as a rule, immediately issue a fine to its owner, because it poses a serious threat to the safety of all road users.
- When your lights are finally working properly, be sure to report it to the appropriate police unit. If you do not, then the case may go to court.
- If there were no taillights, then the situation on the roads would become simply terrifying. By the way, some of the multiple accidents, when a "heap-small" occurs, happen due to the fact that someone's brake light did not work. The rear lights are especially relevant in conditions of poor visibility, when the view is seriously hampered by bad weather.
- So, once again faced with a malfunction of the rear light, you can now easily fix it yourself. Working lights will give you confidence while driving on the highway and reduce the likelihood of accidental accidents.
- If you want to avoid unnecessary fines, then you need to make sure that your taillights are in perfect condition. The lifespan of light bulbs can be up to several years. However, it makes sense to check their performance annually or every two years. In this case, you will not encounter unexpected failure of the rear lights.
- It is also worth having an emergency kit of spare bulbs and taillight lenses. If you break the turn signal, then you will not have to run around the car dealerships. In addition, some bulbs are very scarce, so on occasion, buy several copies at once and carry them with you, along with spare rear lamp lenses.


